


Rough Parts is a swiss suupplier with quality products, expensive and you should take care o paying taxes when importing in EU
Portuguese local Supplier with good parts
https://d6-4×4.com/categoria-produto/land-rover/?v=35357b9c8fe4
Local German manufacturer has interesting parts
One of several excellente landy suppliers from Germany
https://www.baltic-offroaders.de/shop/
UK based supplier known for quality and tough parts
French special supplier for landy parts nice concepts
One of several excellente landy suppliers from Germany
https://www.tour-tec.de/index.php
Guys from UK with nice parts
https://www.fcx.co.uk/the-fcx-store-
One of several excellente landy suppliers from Germany
Spanish based supplier very good, huge variety and fast delivery
https://www.sahara4x4.com/b2c/productos/1/1/1644/defender-1984-2015-/1
South Africa supplier with some interesting parts
One of several excellente landy suppliers from Germany
https://www.oryxsolutions.de/fahrzeugtechnik/?p=1
One of several excellente landy suppliers from Germany– already bought from them
French Supplier for Landy hardtops
http://ijffleuret.free.fr/site2008/produit_DEF90.html
Big time distribuitor of parts in Germany
Guys from Nederland
Home
UK based nice expedition equipment
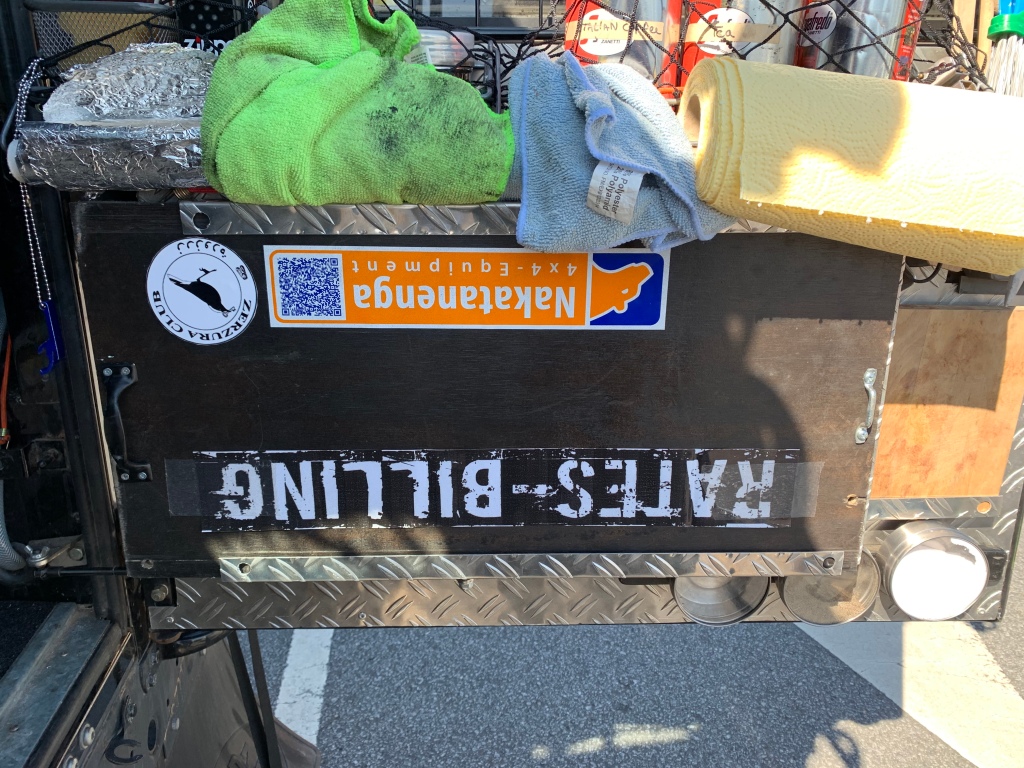
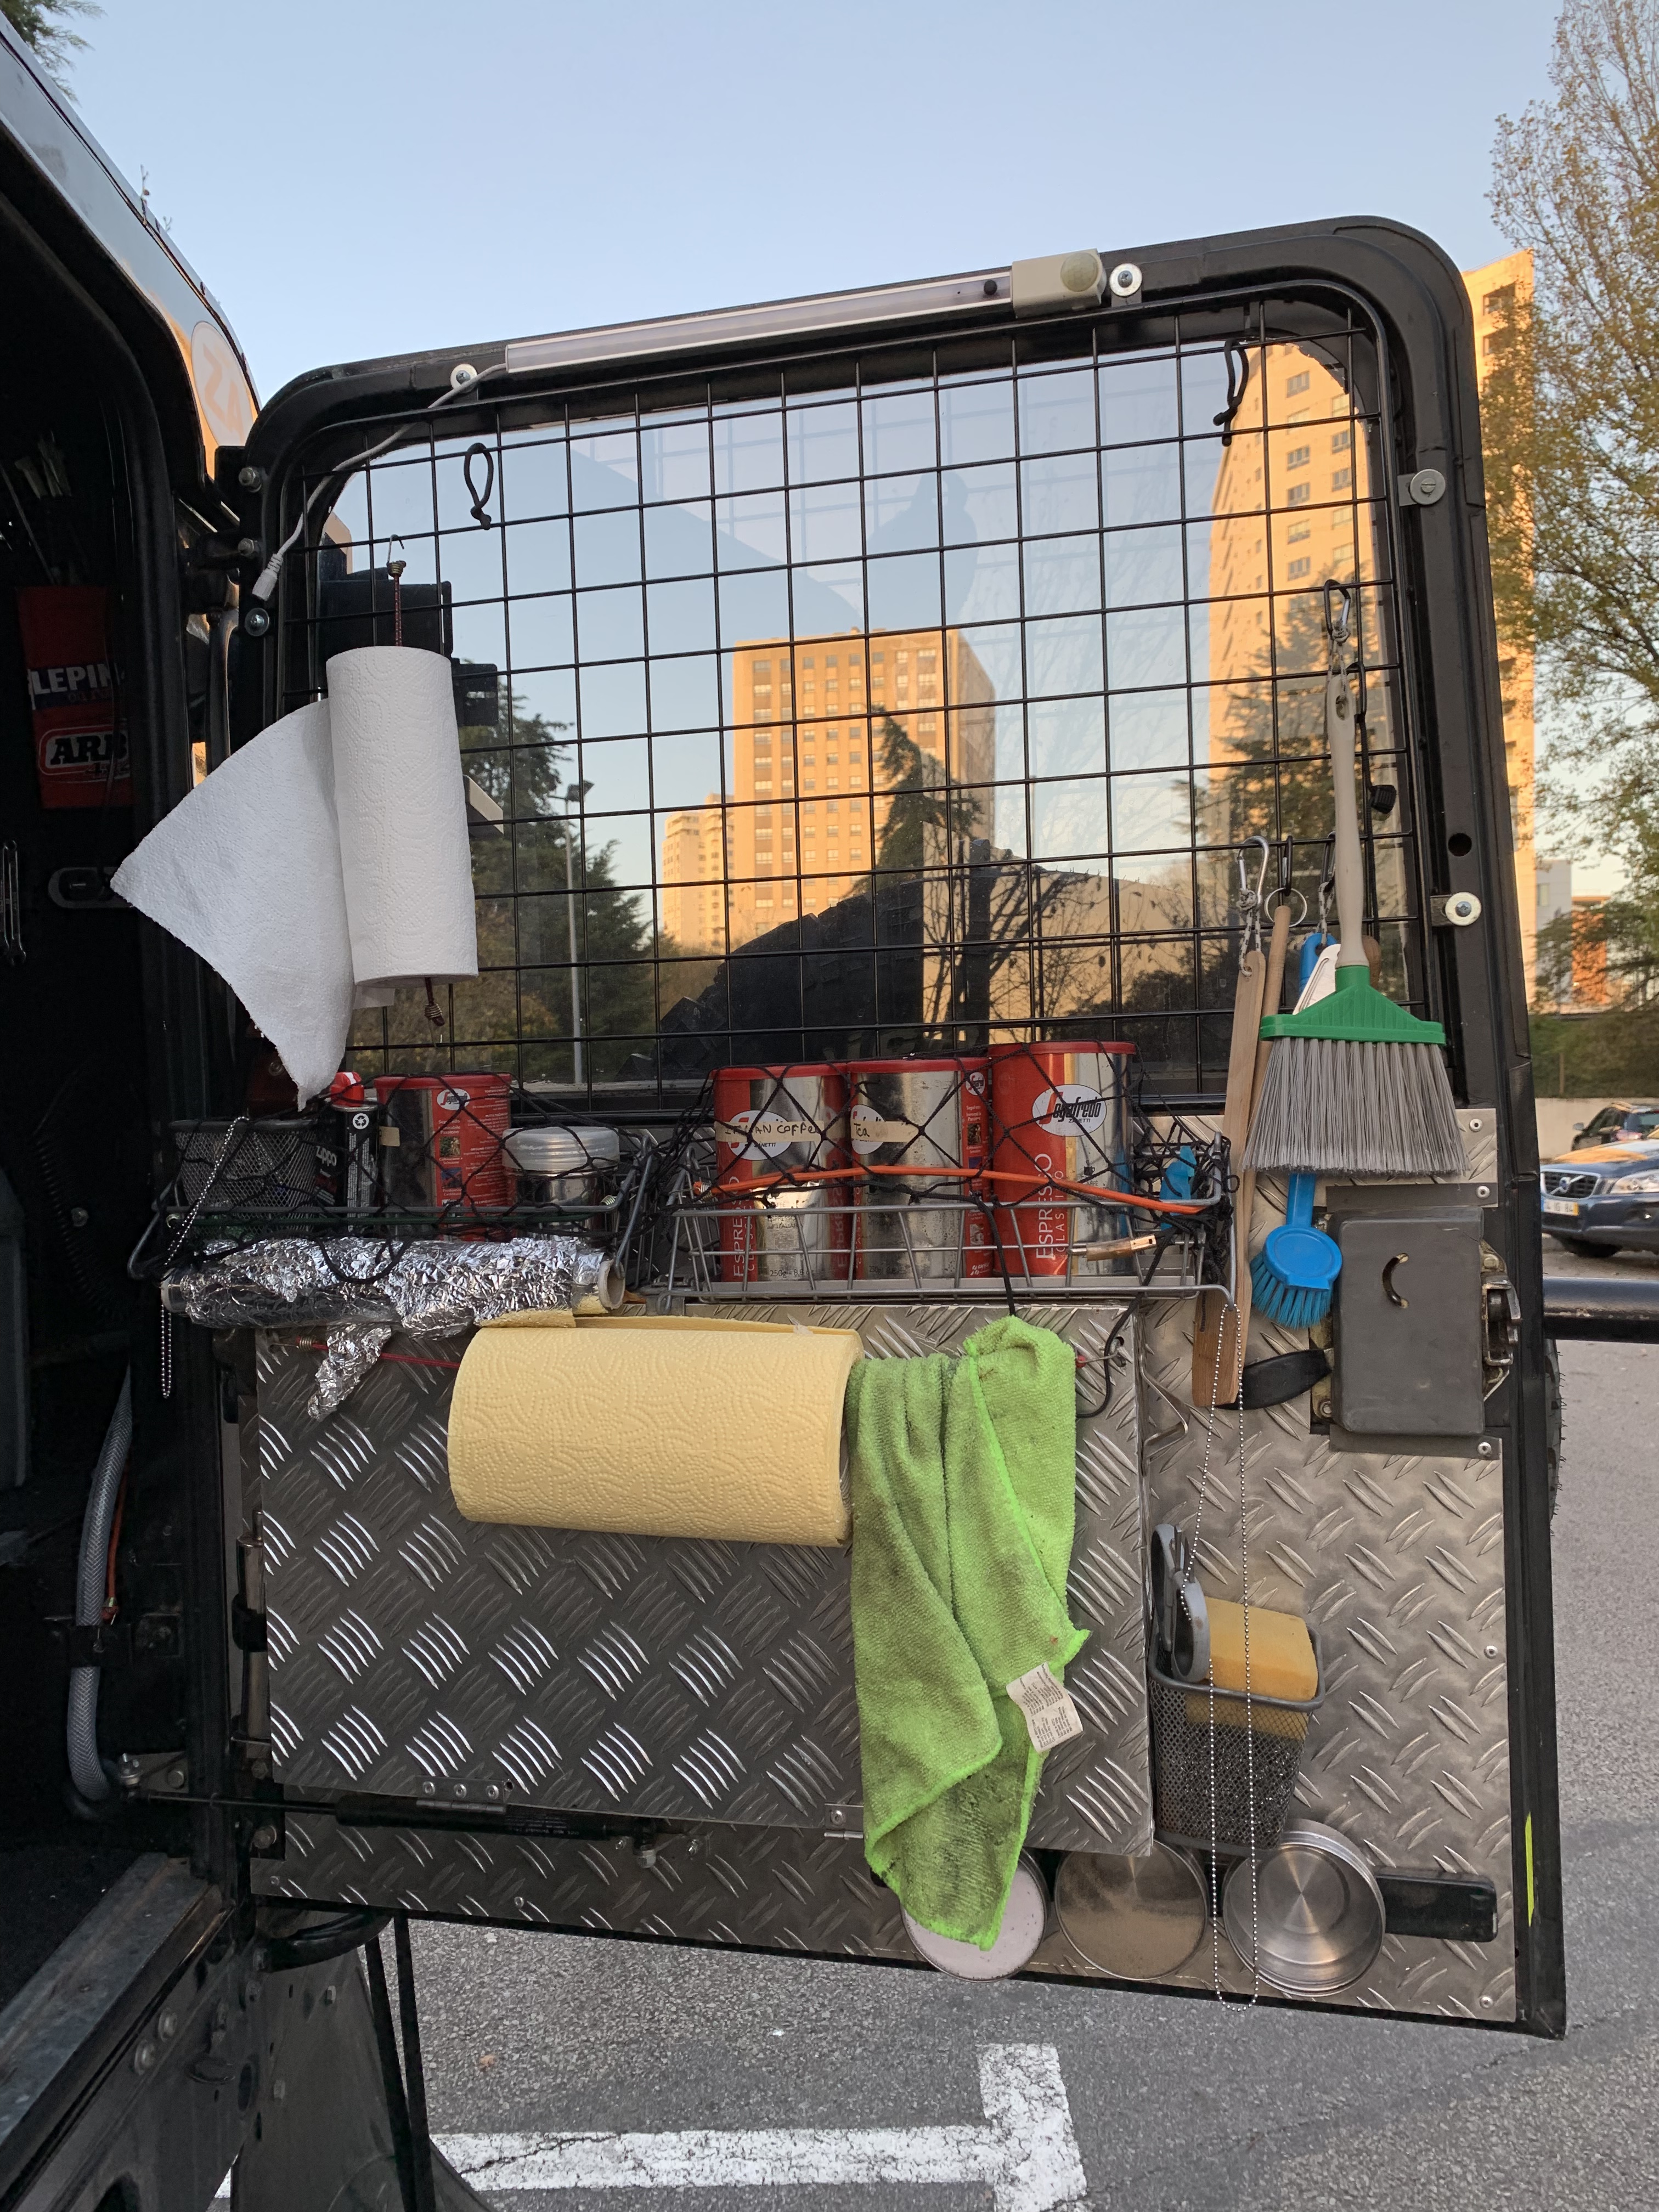
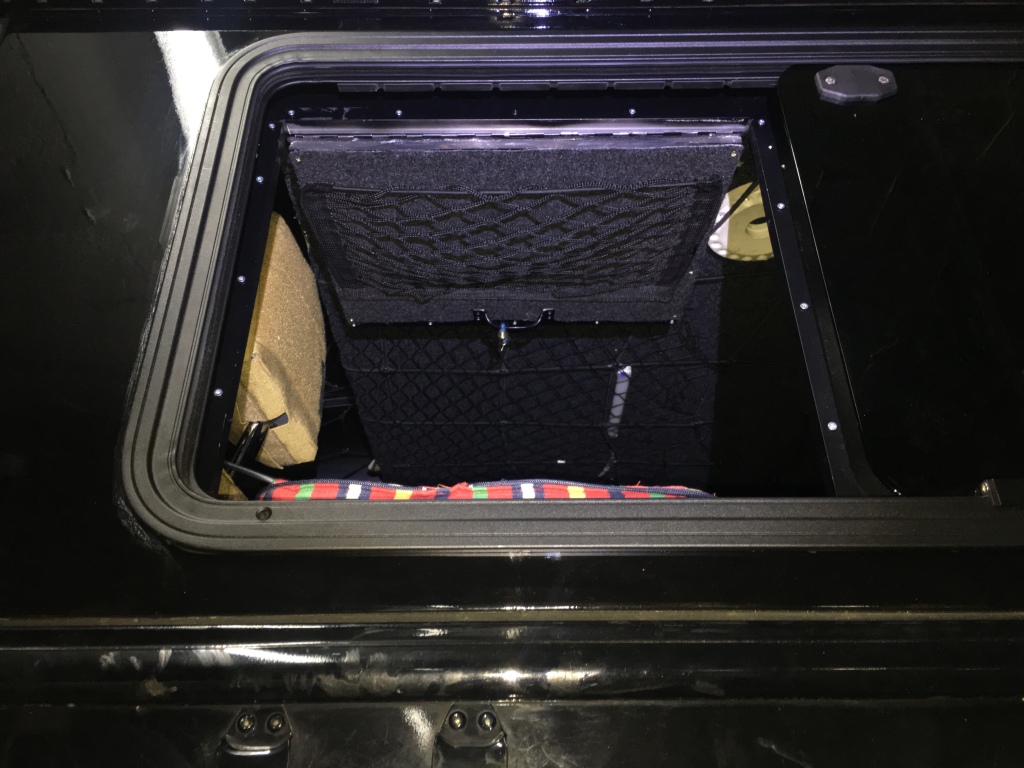
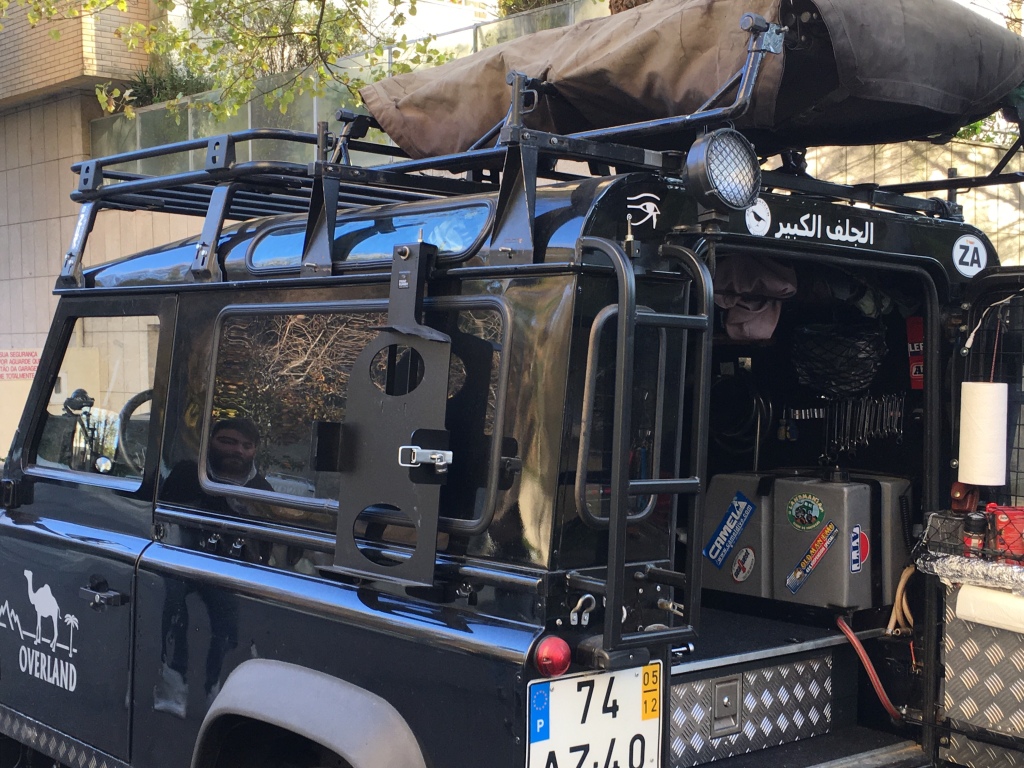
Next Project…. on the other side window where i already have the sand matts , that is a perfect access for me to the interior from the top of the sand matts…… i can still store something and hang easy access stuff
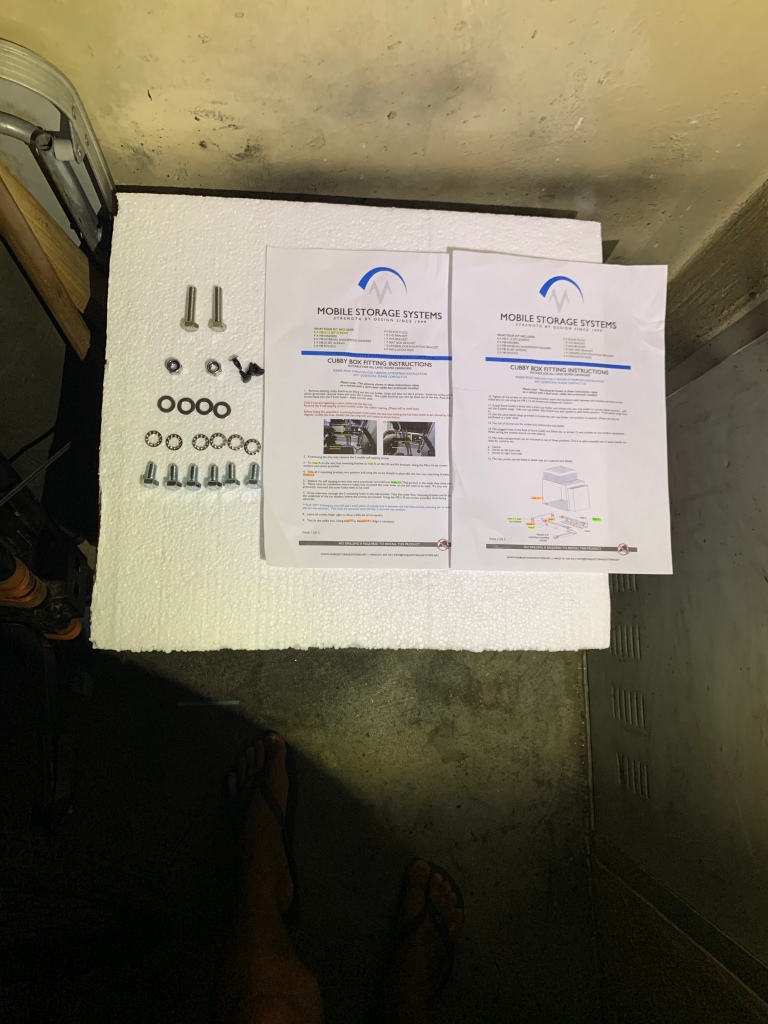
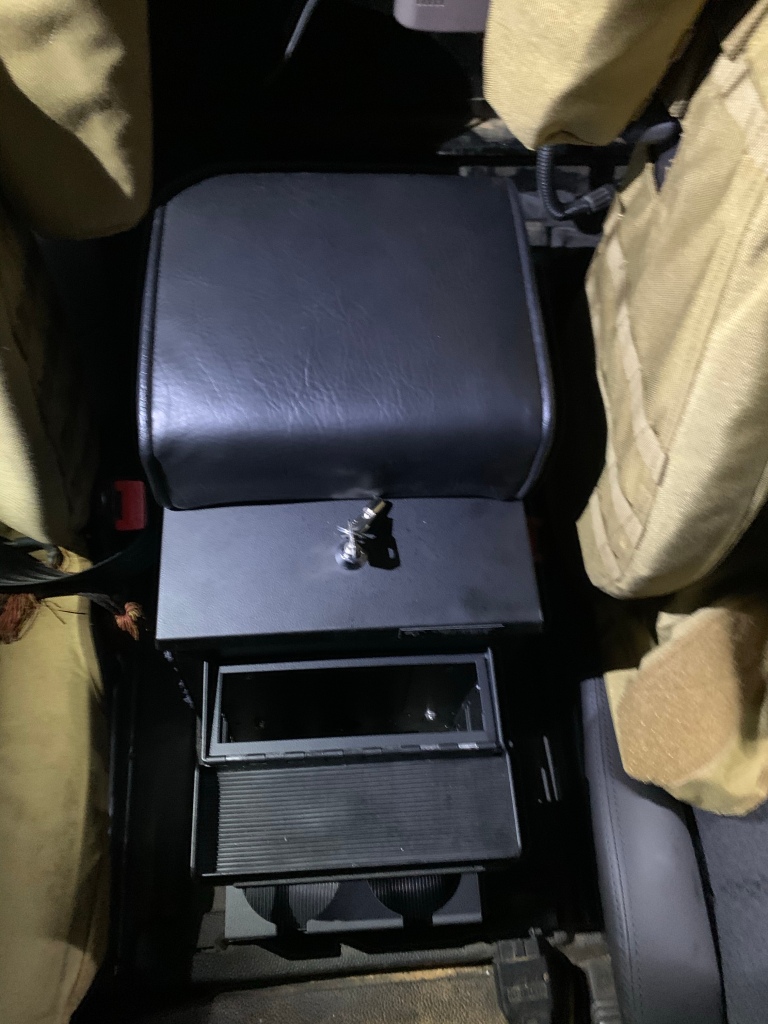
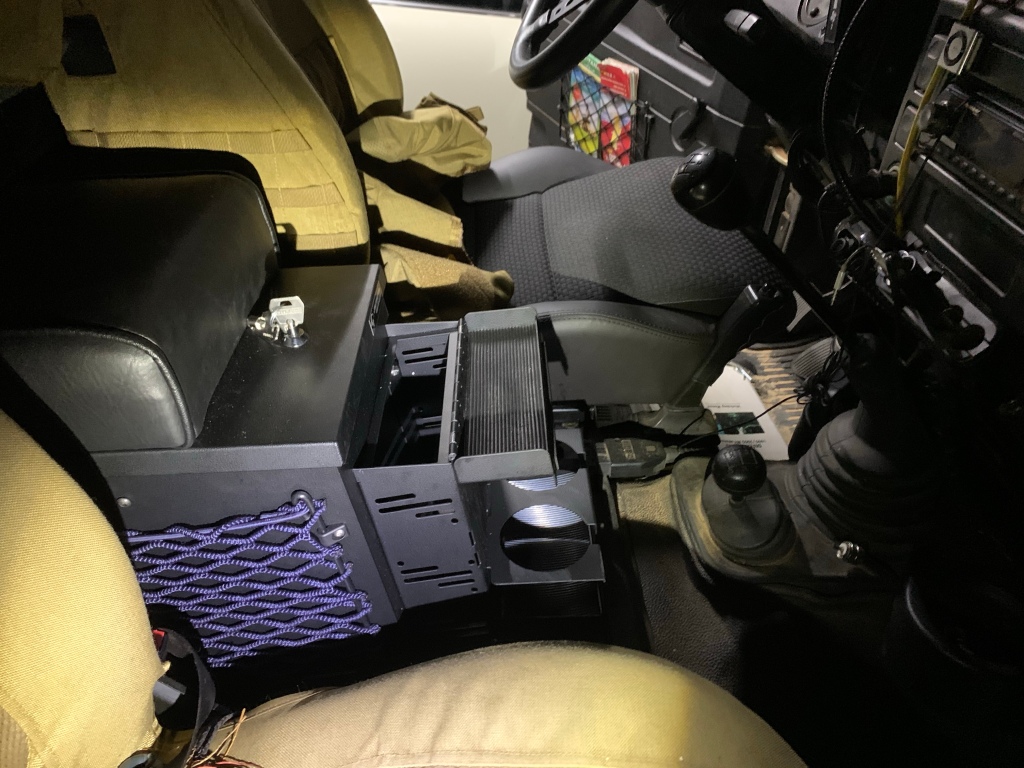
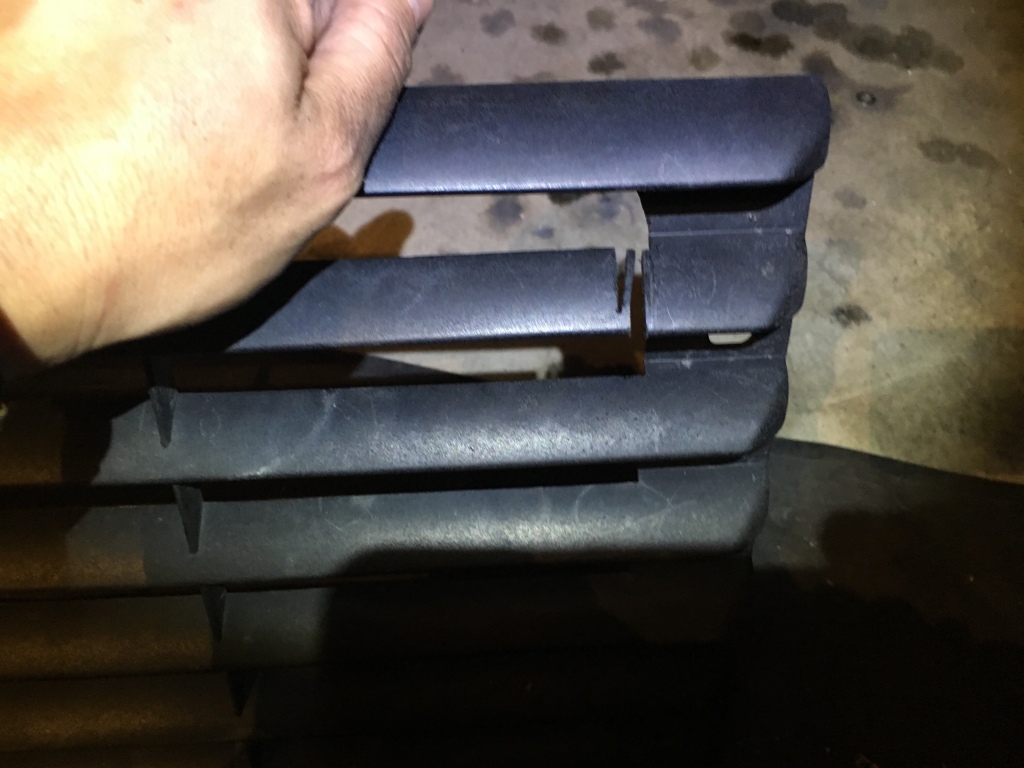
I have decided to buy this cubby box for future trip due to the quality product i am use to from MSS
Main box:
Height: 250mm
Width: 250mm
Depth: 420mm at the bottom, 310mm at the top (sloping front)
Stereo: 75mm x 200mm
Cup holder: 80mm x 200mm
Cushion: 70mm x 250mm x 250mm
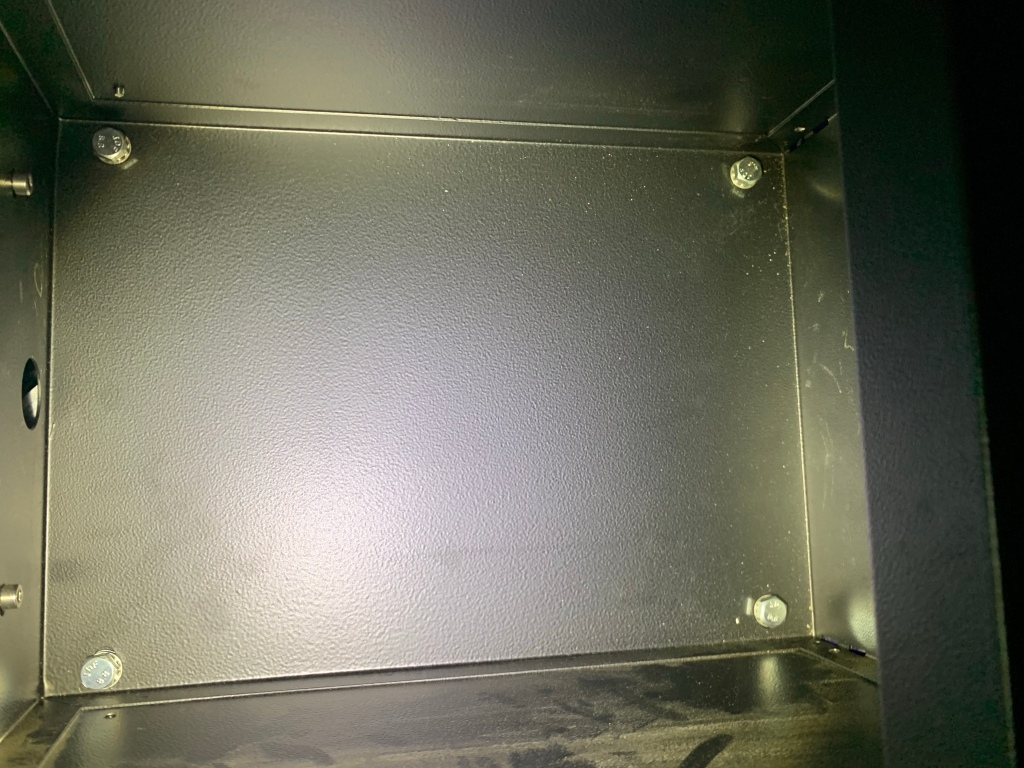
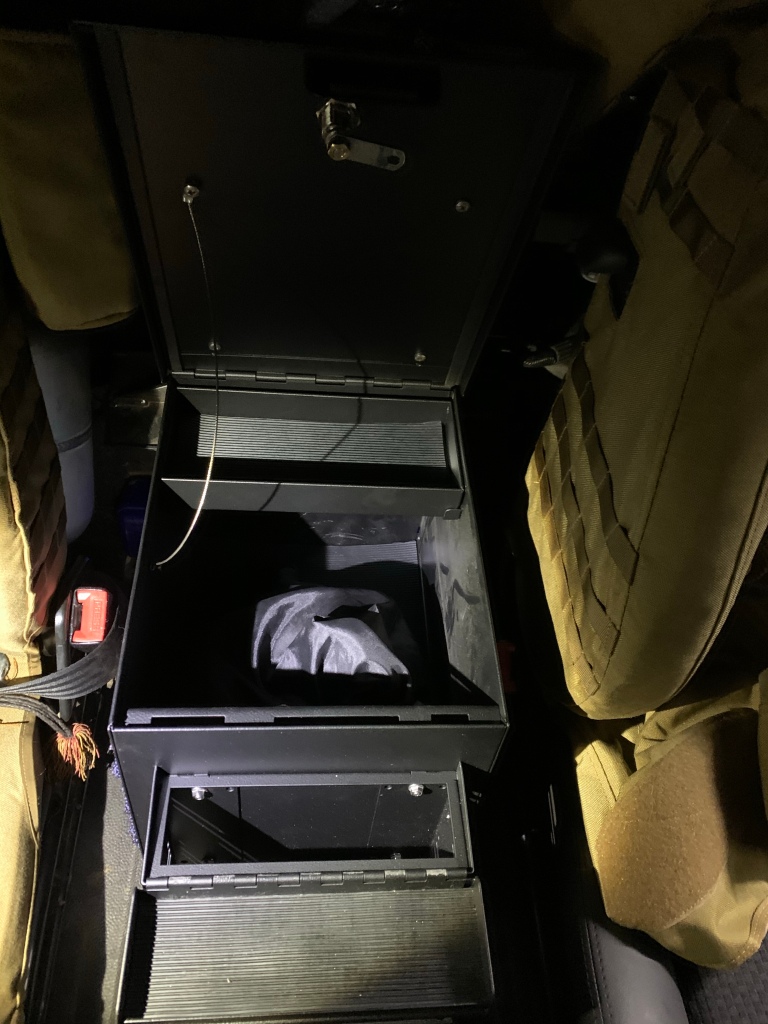
The whole thing bolts to the centre access panel made of 4 seperate spacers bolt together and the floor, there 4 bolts that then will fix the cubby via 4 openings to the threaded spacers.
nut thread underneath on the spacers and bolts openings from within the cubby box. The height of the spacers allows the cup holder to just clear the lip at the front of the seat box. The lid is slightly oversized to overlap the front and sides of the box.
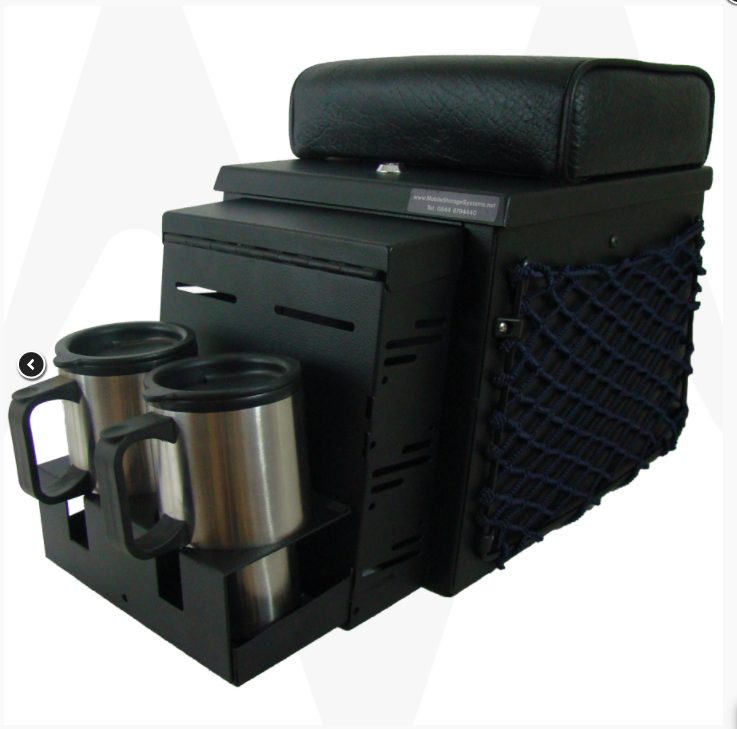
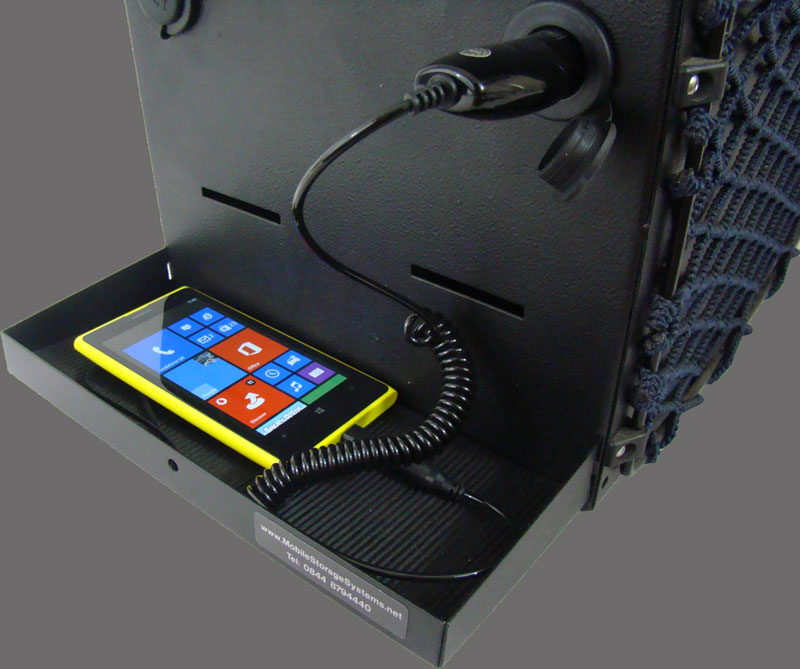
The rear has 2 circle openings that you can use for 2 USB /12V sockets ( the holes are only covered in a plastic cover.

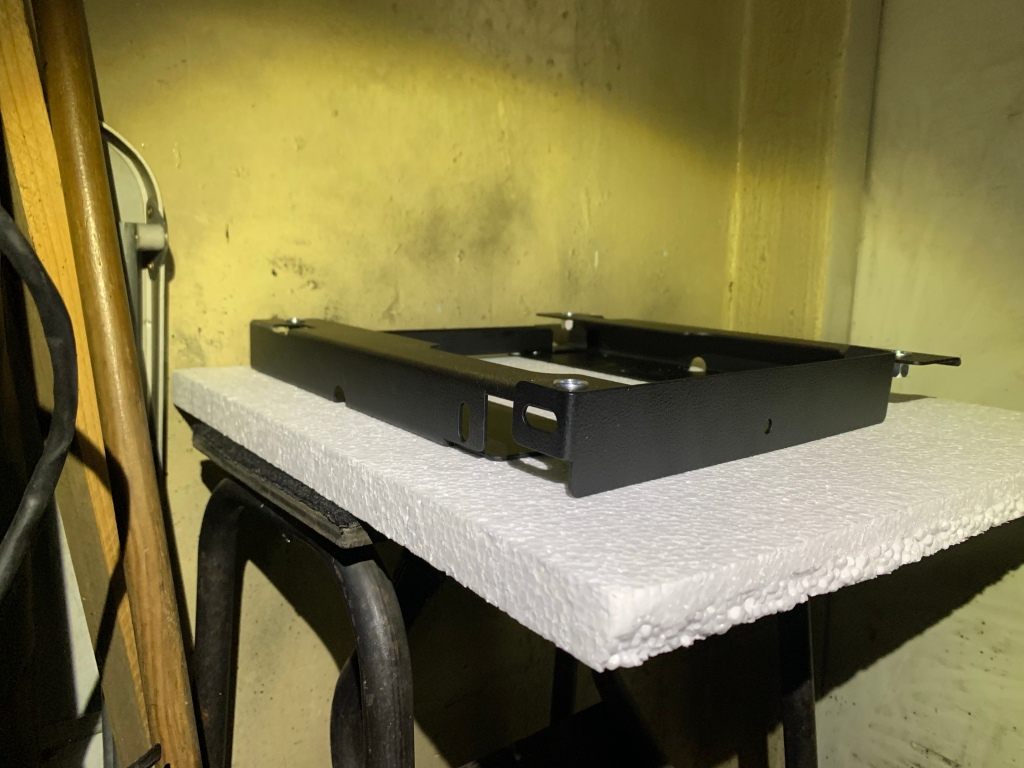
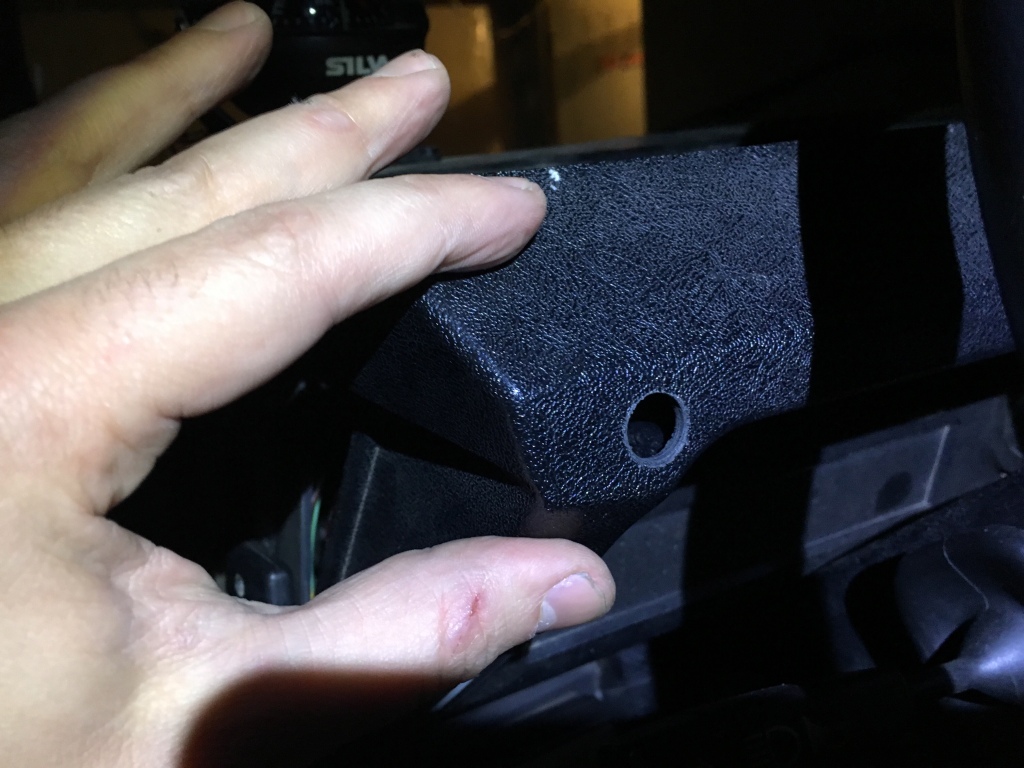
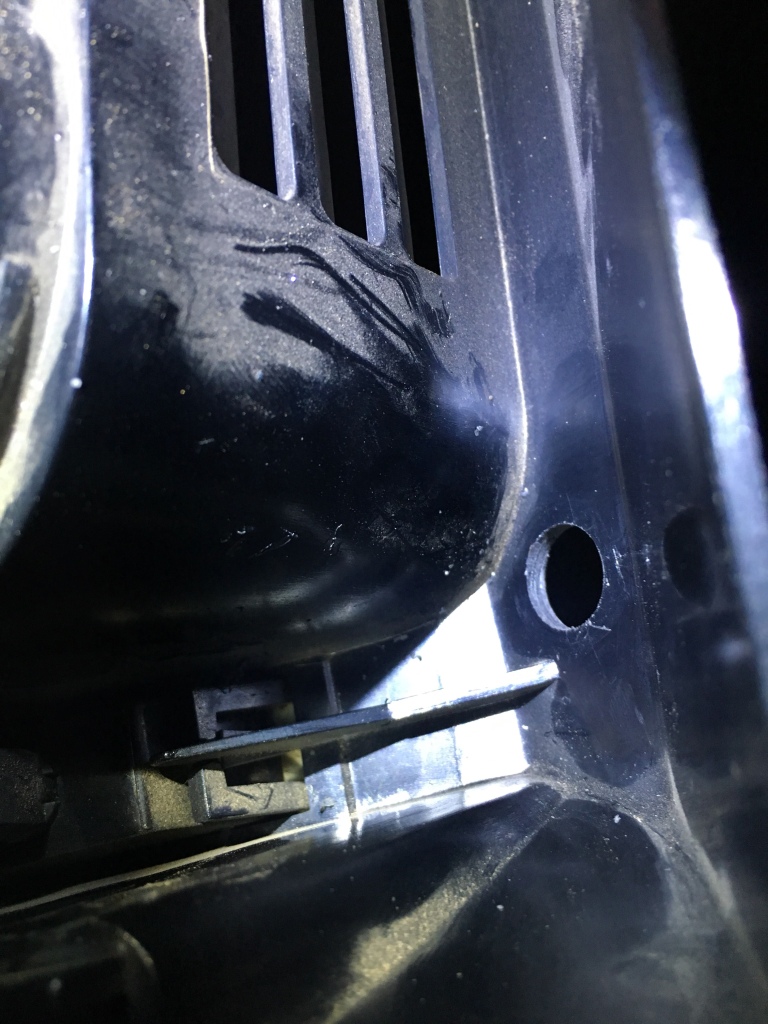
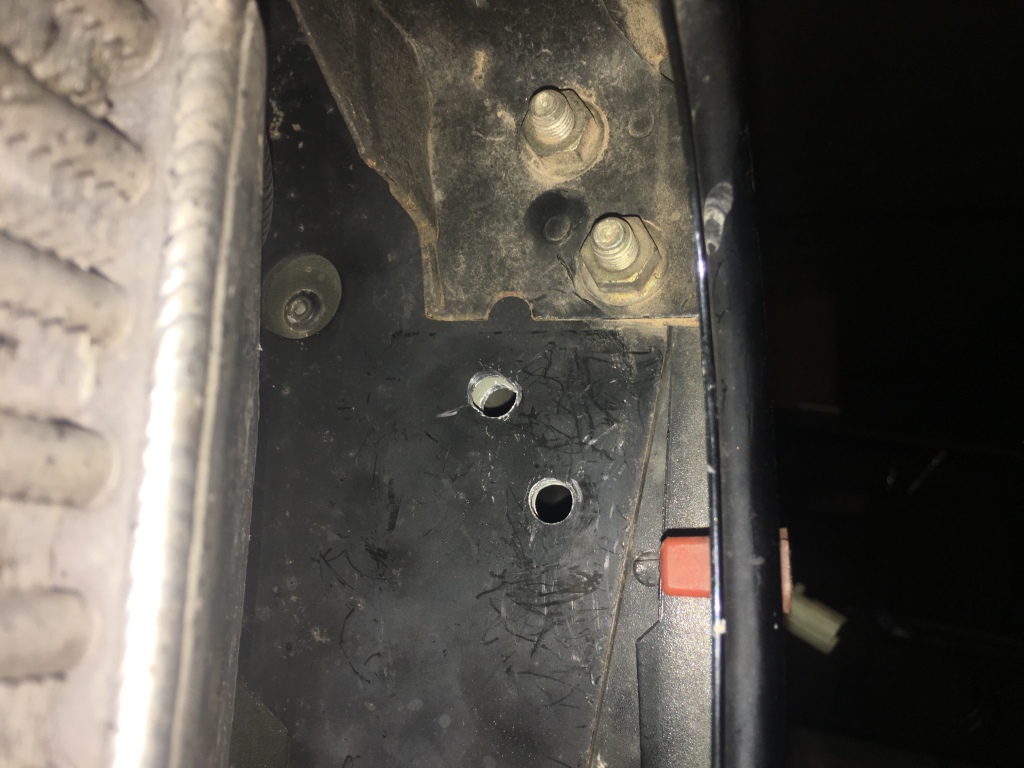
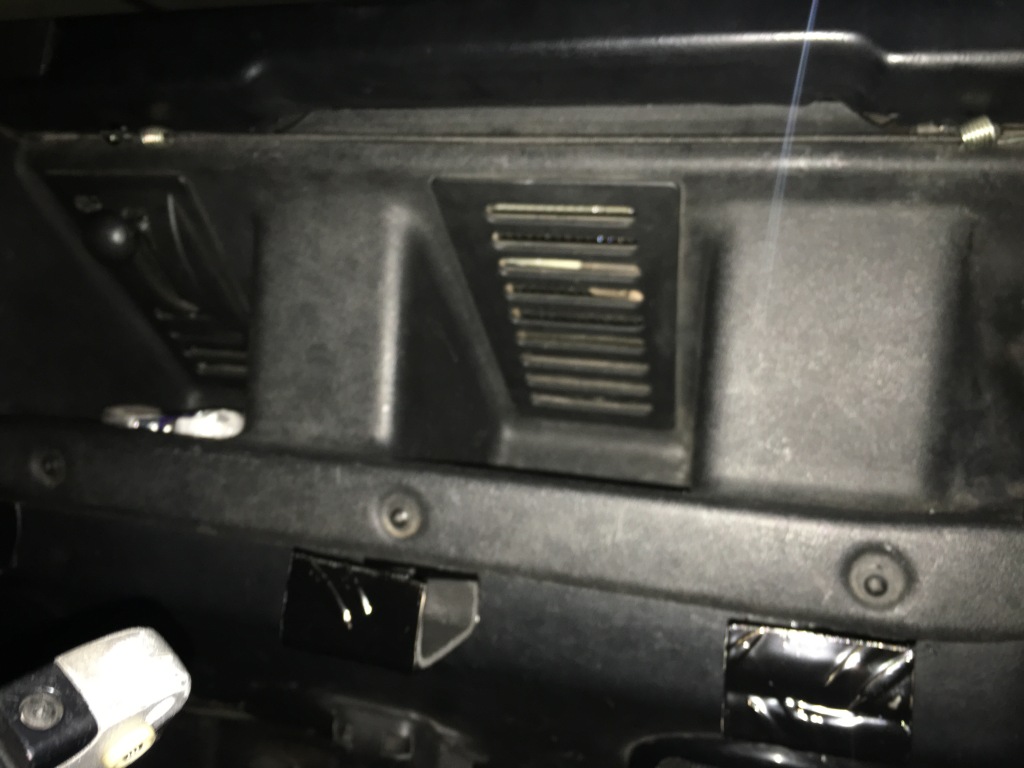
View of the middle section, you can see here hole C and hole D, on a defender Td5 model 2005 could not find a purpose for hole E and F that you can see on the bracket itself on the right.
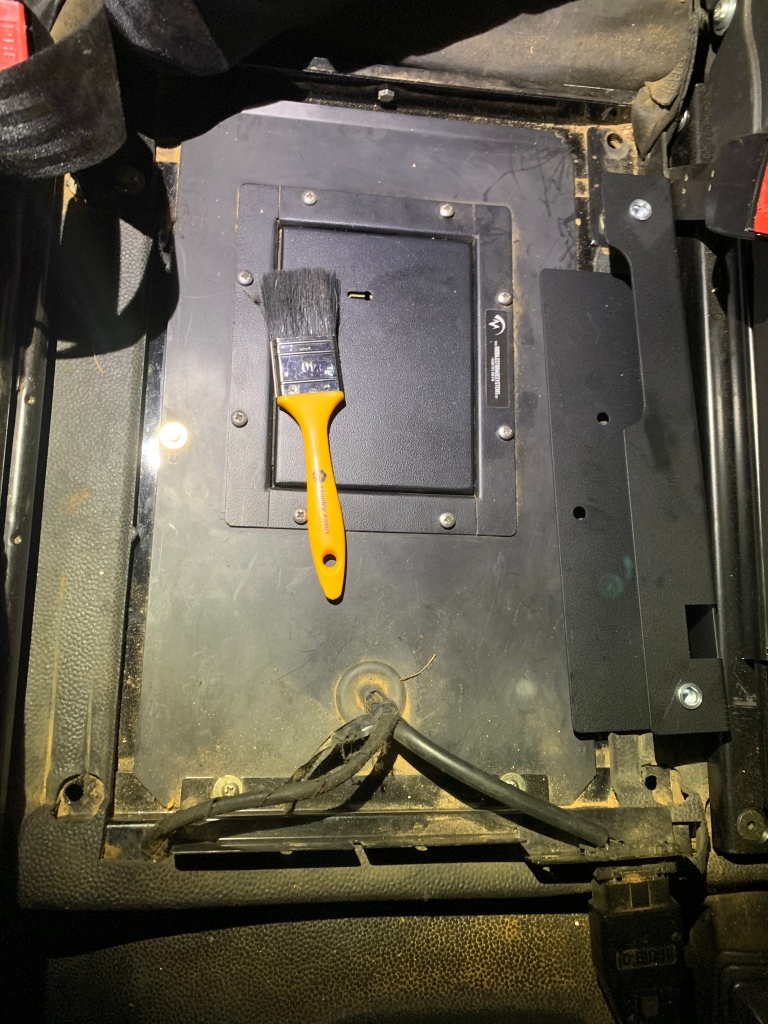
Hole C below front view
Hole C back view where the panel will be bolted using the same bolt and opening
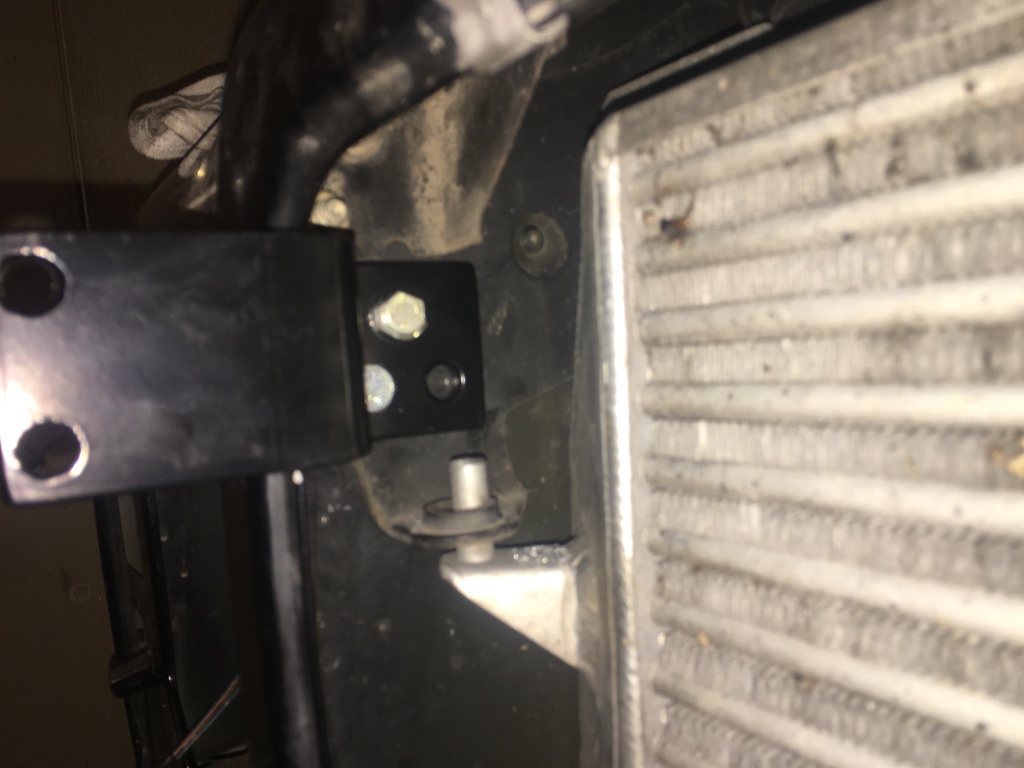
Hole A + Hole B side opening for which we will use 2 bolts washers + nyloc to mount the frame together
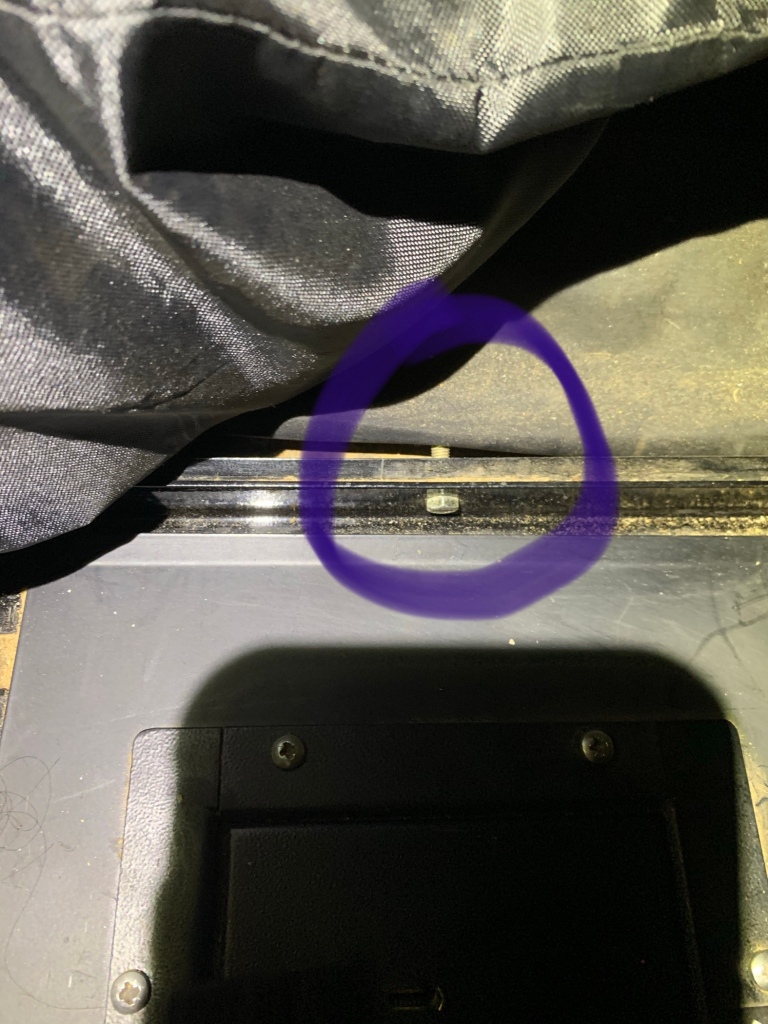
The Blue highlight is Nusert G is the underfloor mounting bracket which i did not fit because i was happy with the 3 point fix that i already have. i beleive this part implies drilling as the position of this bracket will be in the middle without any support from any existing bolts.
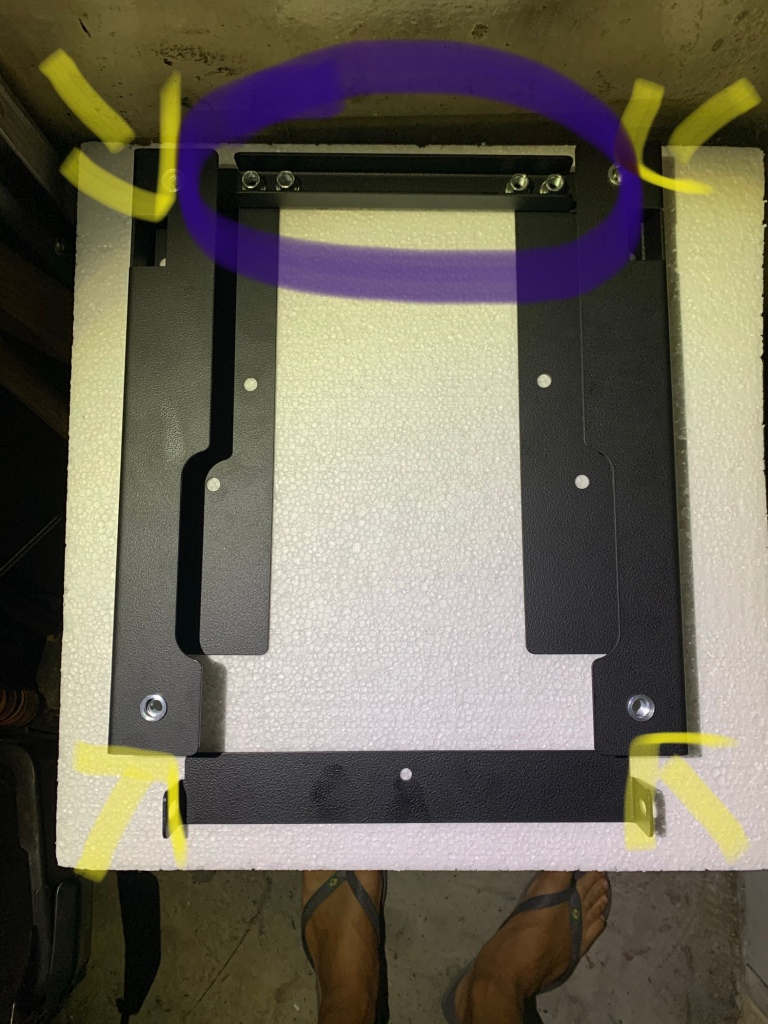
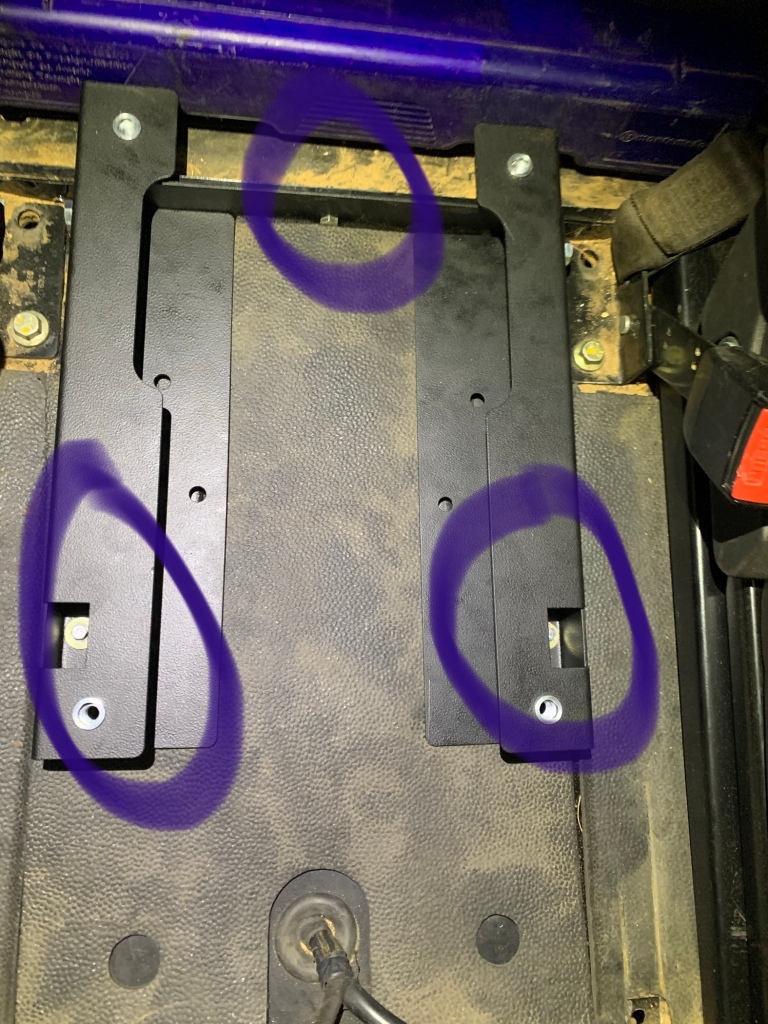
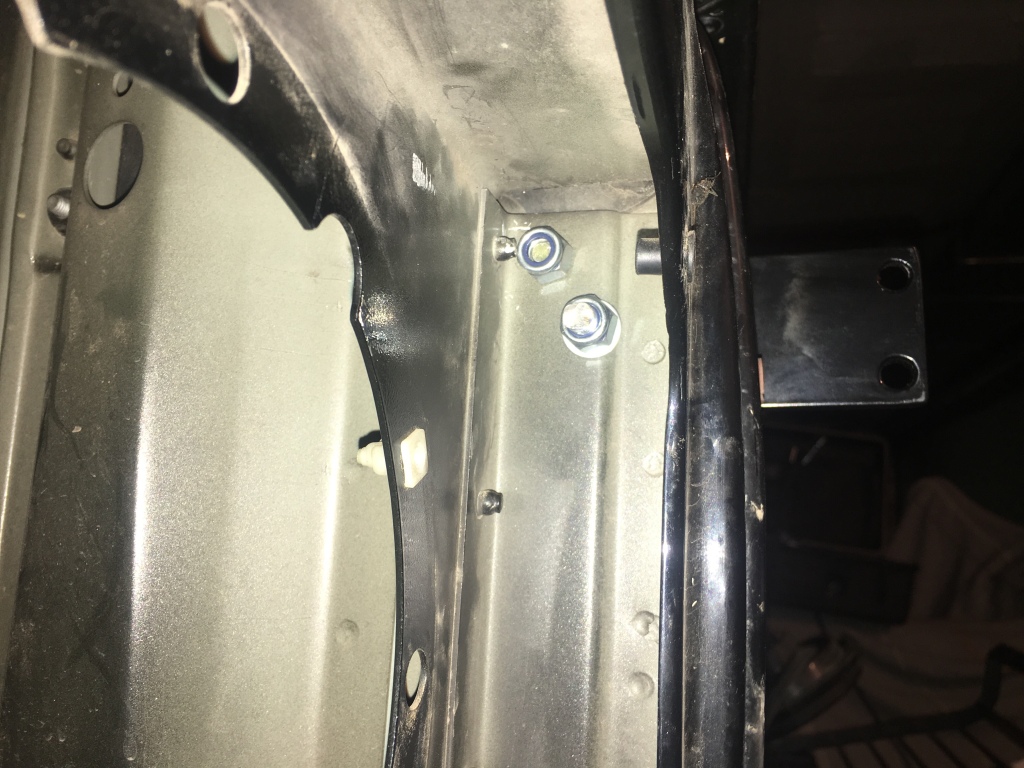
Yellow hightlight are the Nusert F 4 positions on which the cubby will be fixed.
Yellow hightlight again are the Nusert F
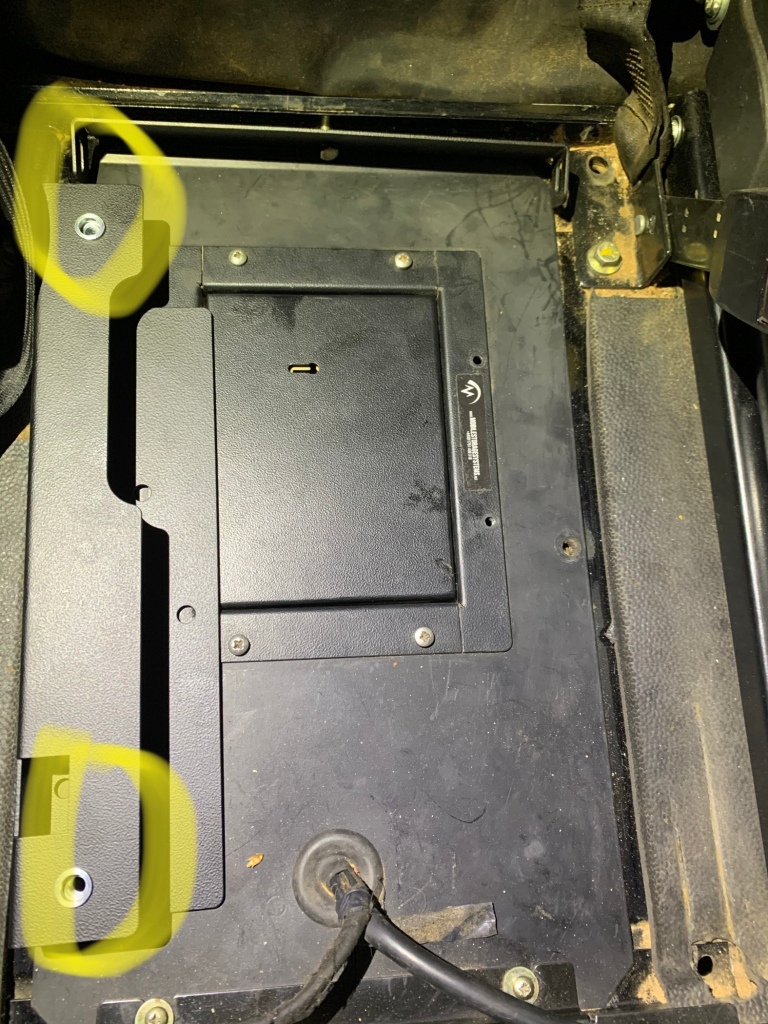
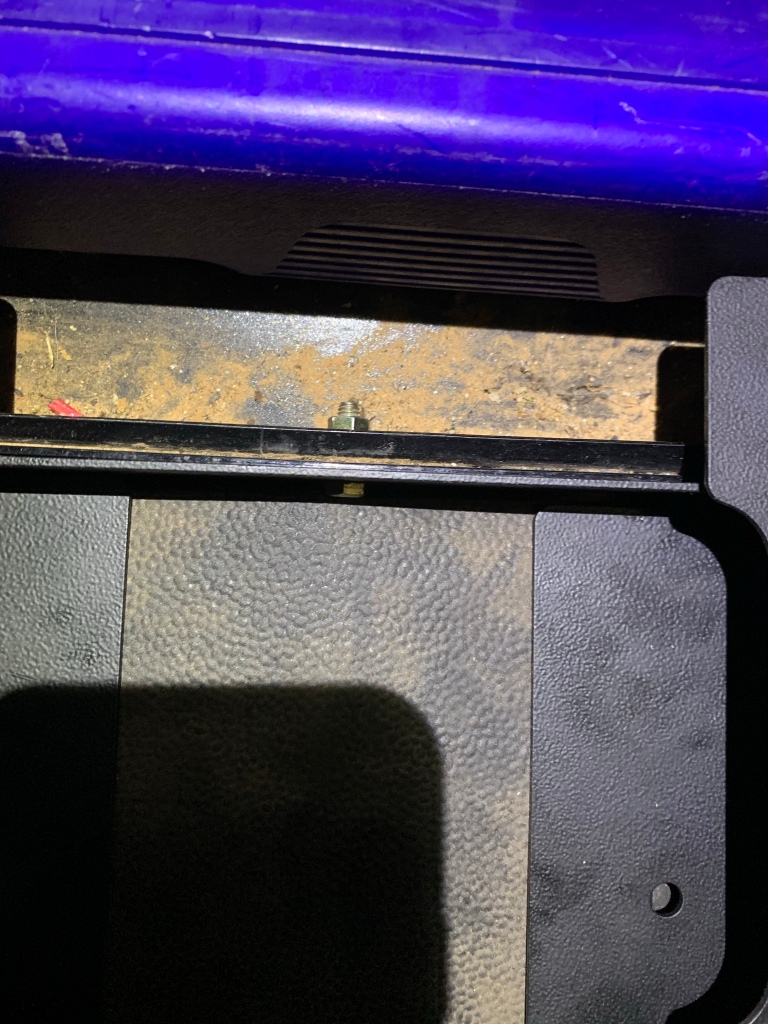
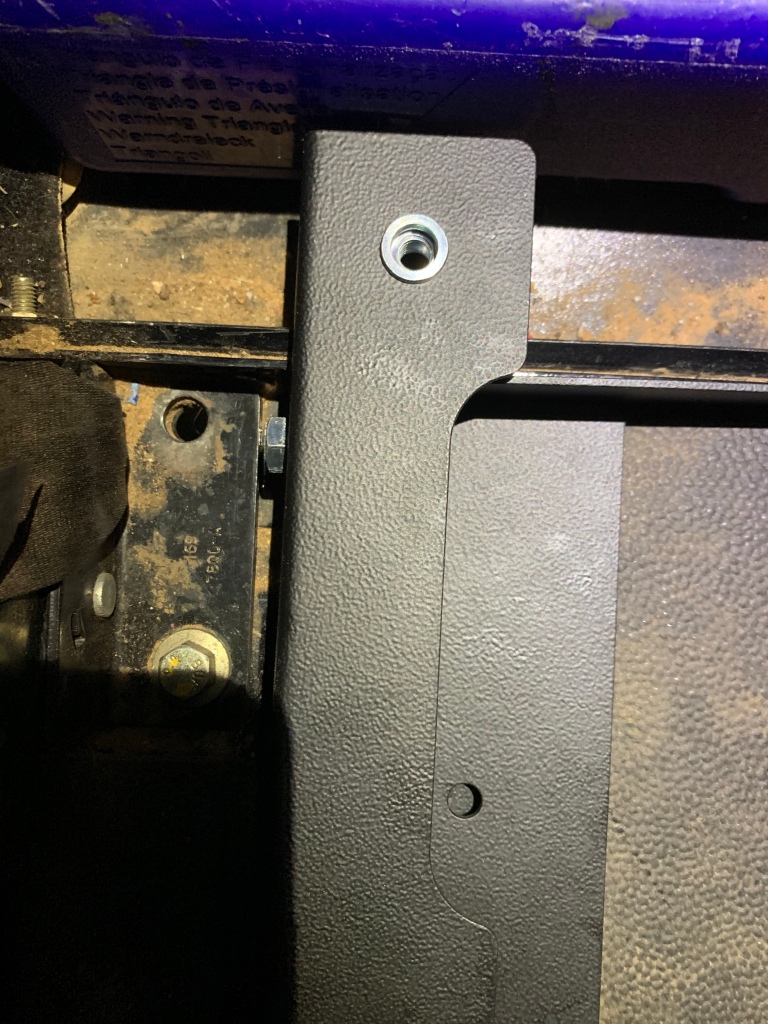
Nusert F final position over the lip and closer to the bulkhead
Hole D which is already existing in the landy , the panel opening is excatly located on top of it
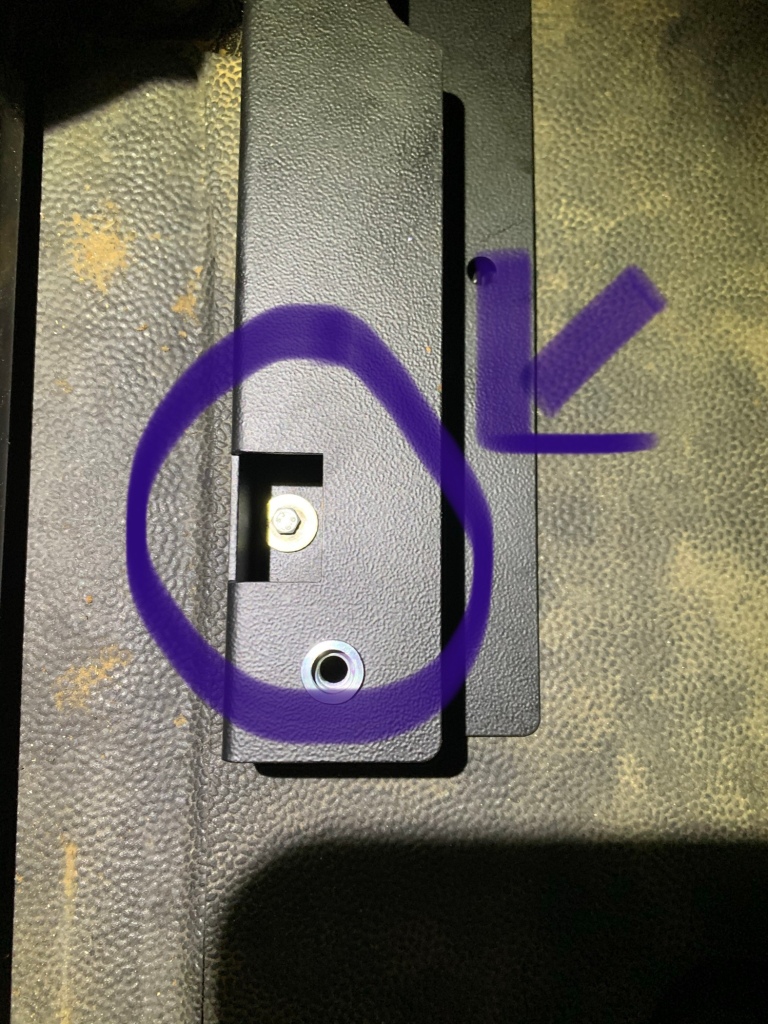
You can see clearly that the frame is fixed with the bolt in the back and the 2 bolts in the front
Hole C – 4 bolts in the bottom to holdit to the spacers frame below
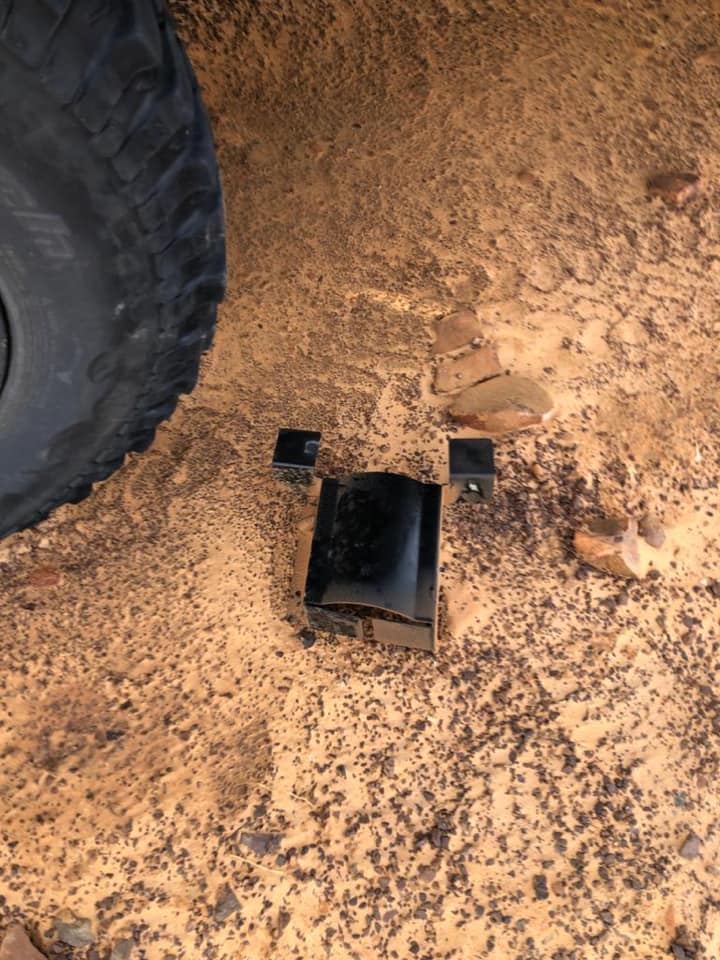
After doing 9000 kms the only thing I report that broke on the Defender td5 in Mauri is the diesel filter lower plastic drain plug ( no idea why – probably age) of course it was the spare part I didn’t have 🙂 but we had to find an M 10 bolt to screw in the filter instead of the plastic plug ( took it out from a spot light bolt) and close the fuel circuit which worked and on to our route….
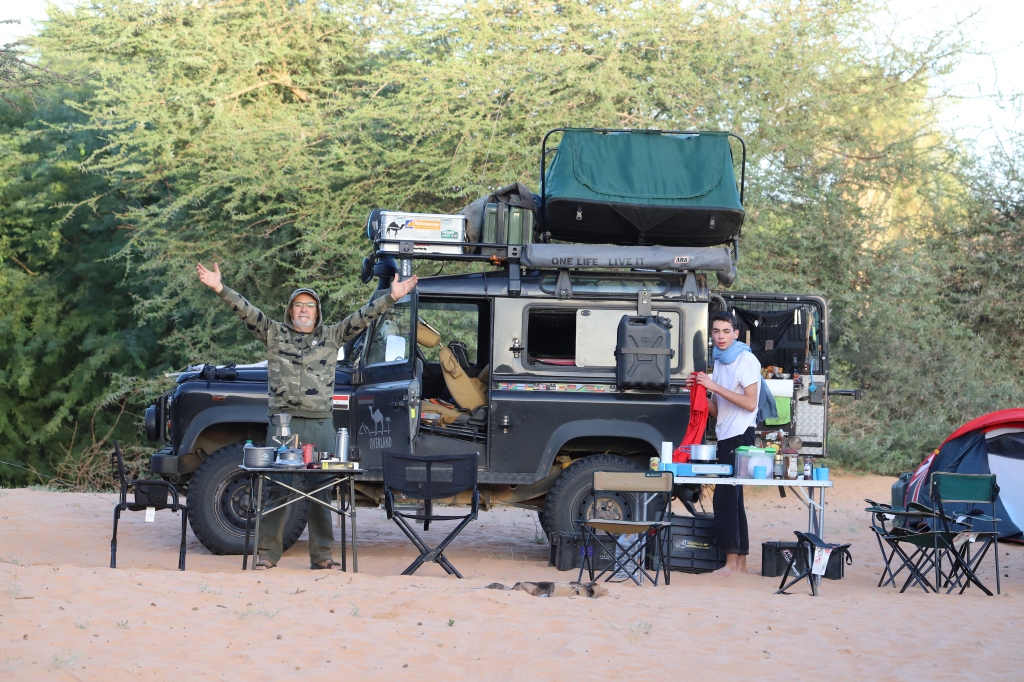
A dream coming true….WE DID IT !!!
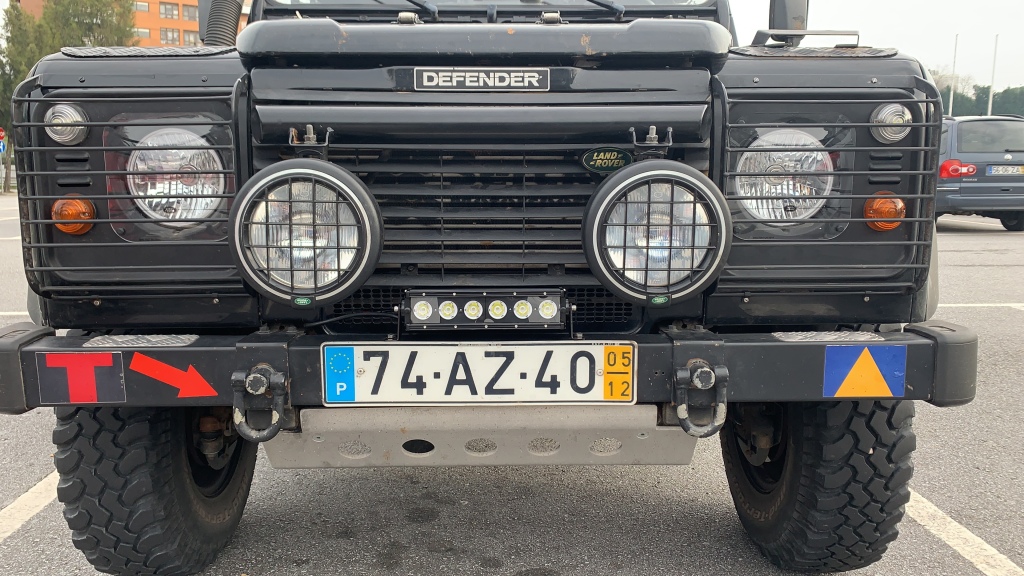
I have chose a led light bar to be placed on the front bumper in between my original land rove spot light due to the reason of effectively completing a 9000km round trip to Mauritania and back driving if different configuration of road condition ( highways, single roads, roads with holes and pools and weather condition (rain , fog, sand storms…ect), lighting is important and i needed to improve it
There are other sizes but this one was for me
The led light bars on the roof rack in my case would not work so much in a fog situation as the fog dispersed the light and the vision was worse by using my standard roofrack 55W beams (therefore roofrcak is an extra for other uses not this one – besides i was stopped during the night by police in Morocco who informed me to turn it off as it was not legal to be premantely on)
It is better to have a focus light close the ground that would illuminate the road just infront with a strong white light.
Flatdog Predator Led light bar 11 inch (27,50cm)
I bought as well the led light bar wiring kit

I have changed both standard side mirrors with the MudStuff blind spot Mirror right & left and it has improved enormously the field of vision, it is now showing me clearly the blind spot i had to look for. Excellent upgrade..
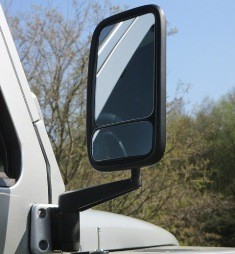
https://www.mudstuff.co.uk/products/mud-stuff/mud-blind-spot-mirror.html
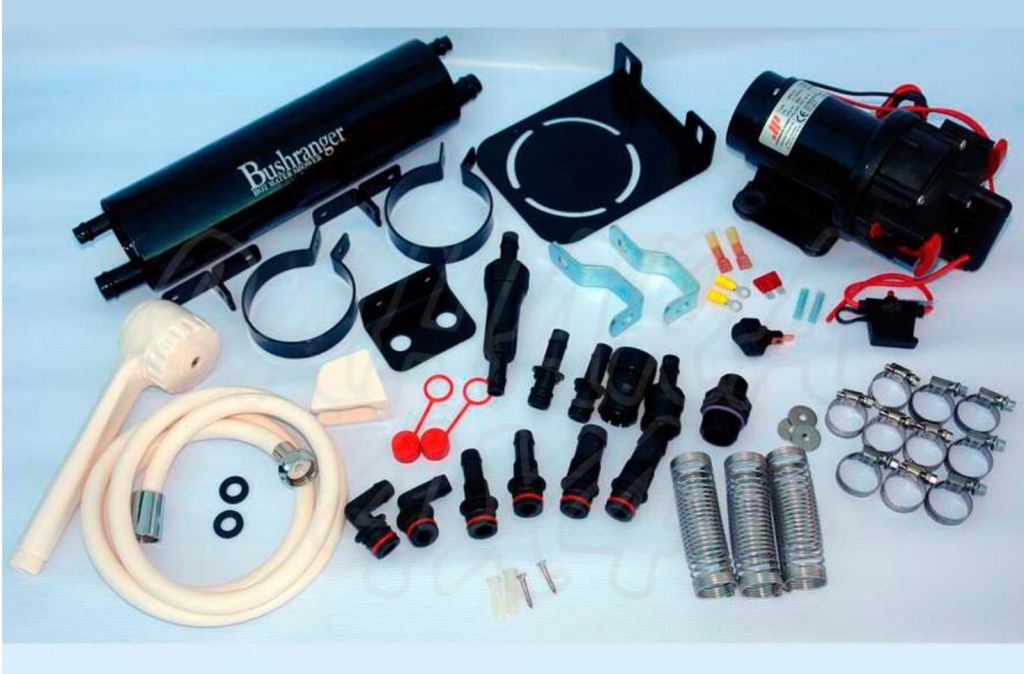
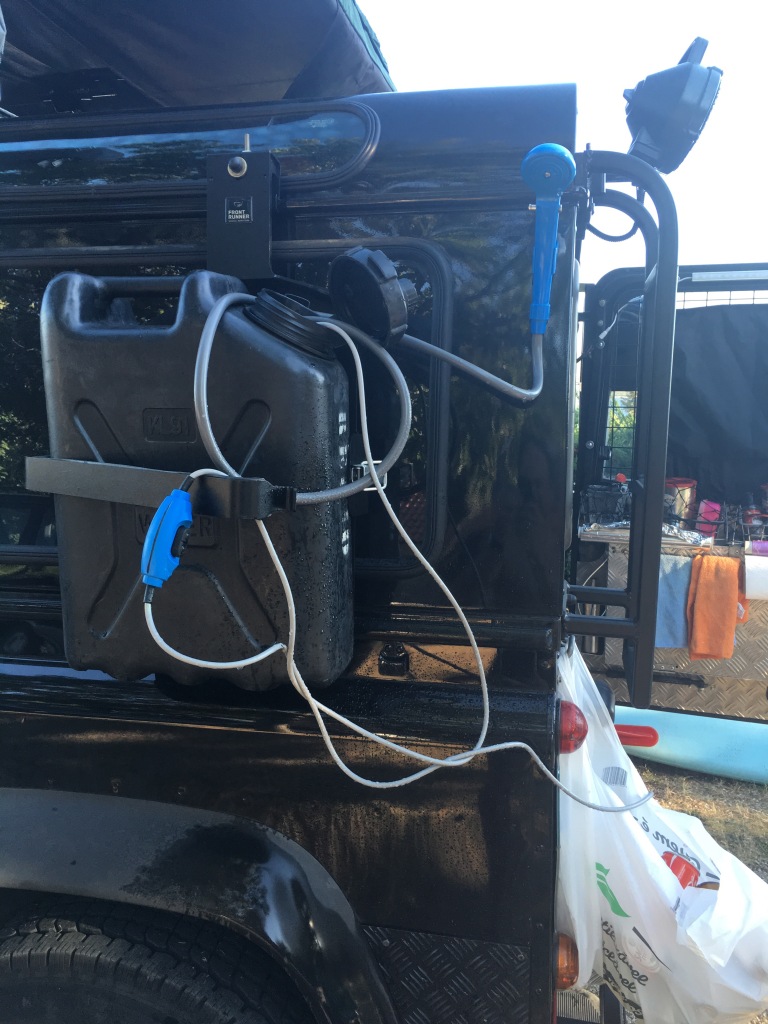
https://www.sahara4x4.com/b2c/producto/v5900/1/kit-de-ducha-agua-caliente-12-v
https://www.sahara4x4.com/b2c/producto/v5900/1/kit-de-ducha-agua-caliente-12-v
Good quality kit that you place on rear or front mudflaps
https://www.sahara4x4.com/b2c/producto/ACBA112/1/kit-de-tirante-para-faldilla-regulable-por-pareja-

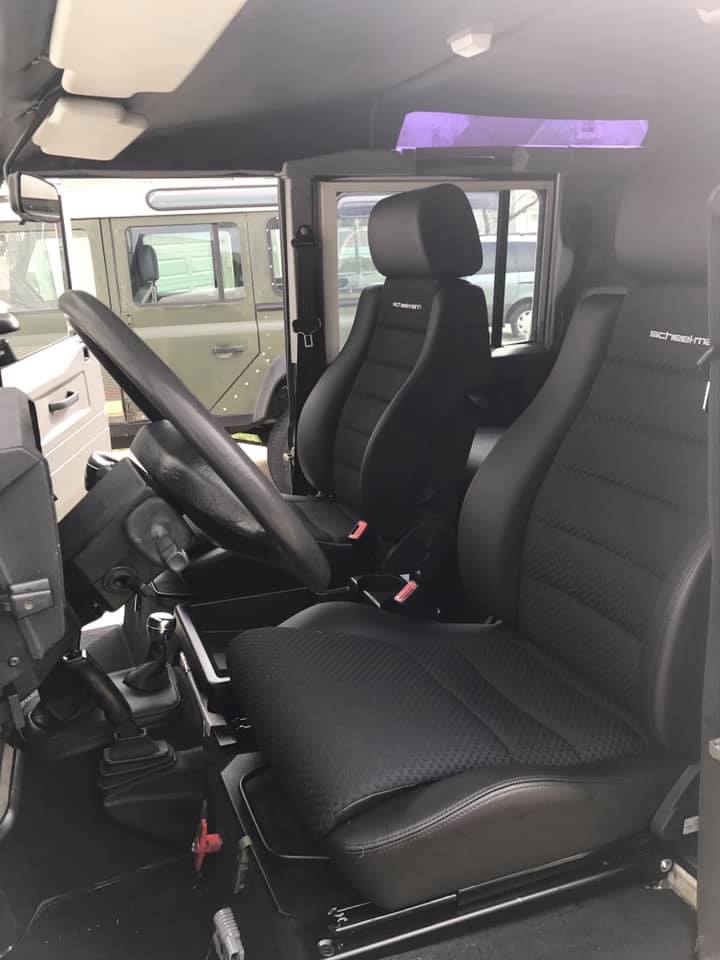
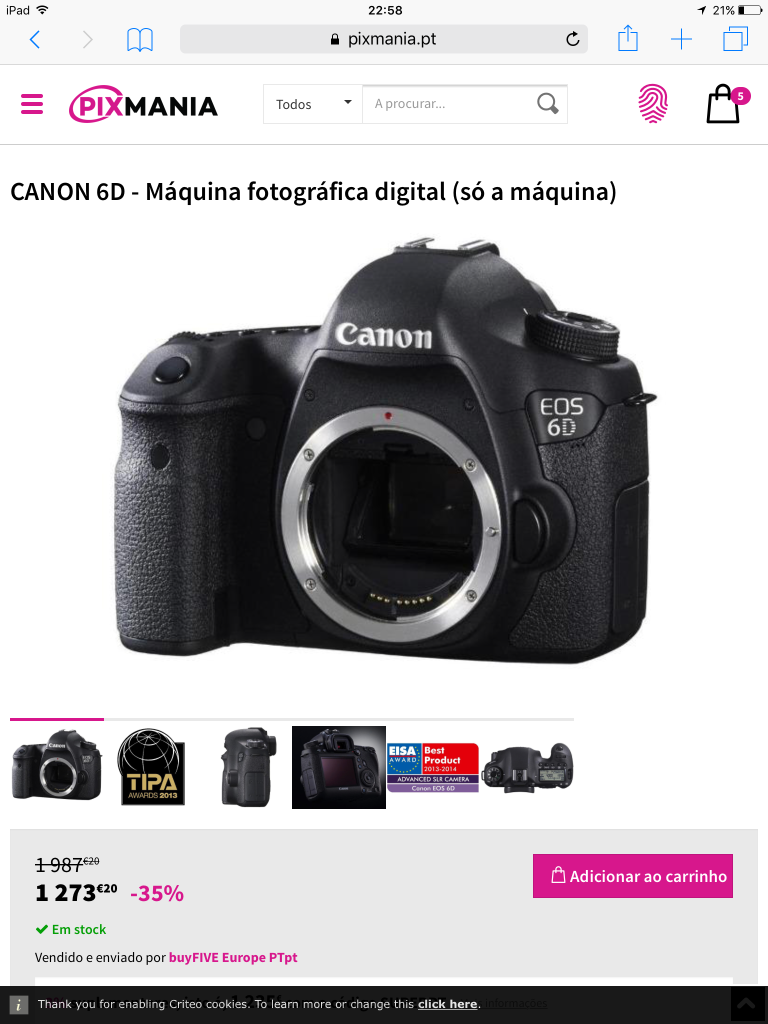
My standard Defender seats are ok. But after long drives one feels his leg and behind num . I was always fixed on the proven seats from Scheelmann.
Finally, I decided for the Scheelmann Sportline LR edition comes with many options like with heated seats, he accessibility of the box under the seat (will be ordered from Nakatamenga )
you will need as well the rail
Protection for the seat
https://delta-bags.de/art/O-5064-16

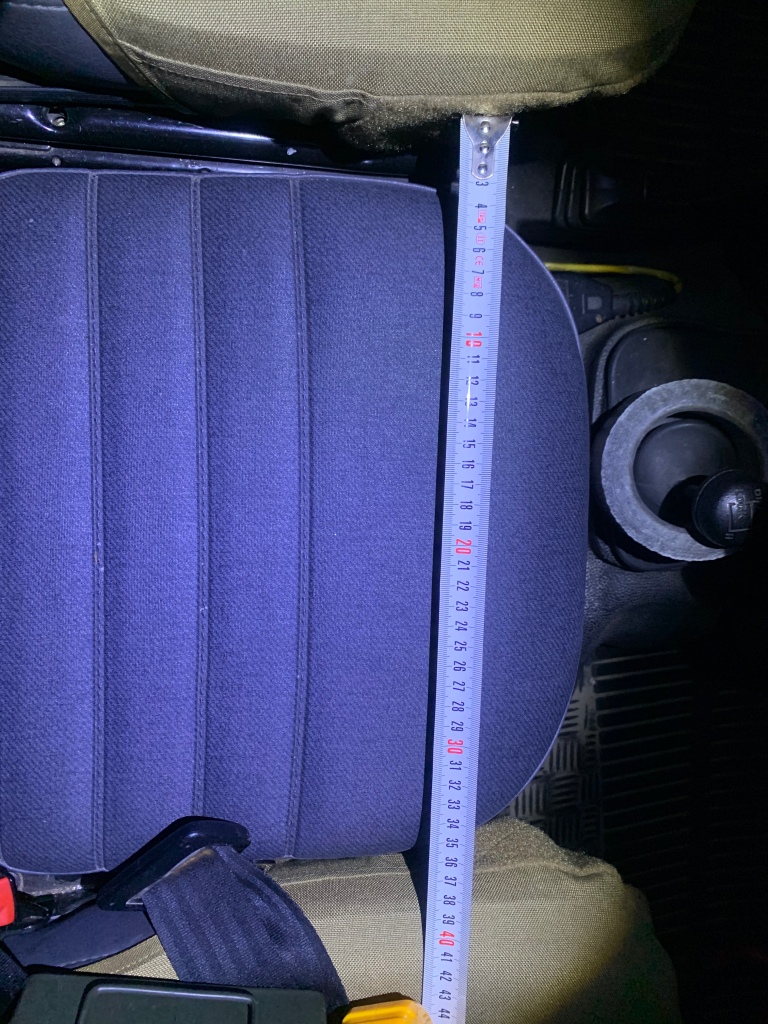
Width between both seats 400mm

I will be using 2 types
I will use this one regularly
1- Silub
Additif gazole multifonctions composé de détergents de dernière génération, d’un biocide, d’un désémulsifiant et d’un agent antimousse.
Le flacon doseur de 500 ML (1/2 litre) traite 1 500 litres de carburant.
Le flacon doseur de 1000 ML (1 litre) traite 3 000 litres de carburant.
Traitement préventif : 1 bouchon de 25 ML pour 75 litres de gazole
Traitement curatif : 2 bouchons de 25 ML pour 75 litres de gazole pendant 3 à 4 pleins, puis dosage normal.
Traitement curatif avant contrôle technique : 100 ML pendant 1 ou 2 pleins, puis dosage normal en entretien.
I will use this for the trip itself to clean the fuel I doubt
2- chameau diesel 1 L Bardahl
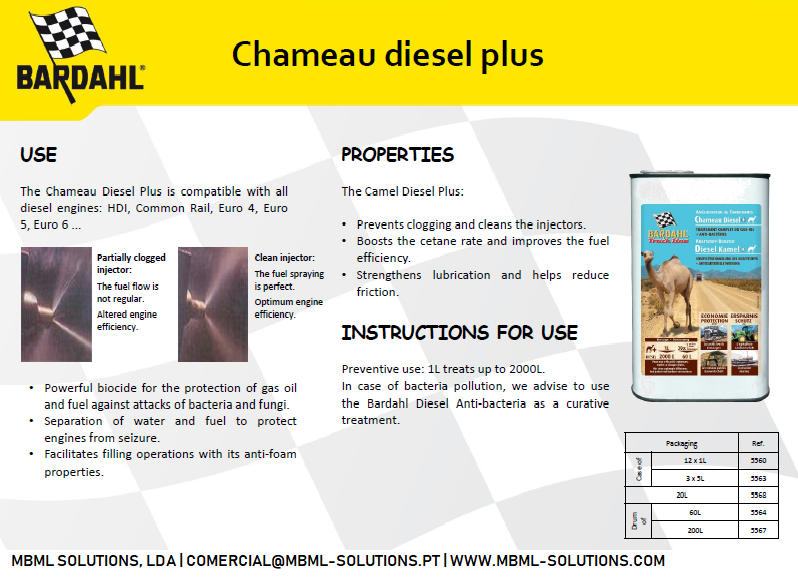
In Portugal you can buy here
Confirmo o valor final de 72,91 €
IBAN: PT50 0010 0000 5044 6360 0010 3
No caso de confirmação, enviar p.f. os elementos para faturação e envio.
Cumprimentos
Augusto Costa
José Augusto Costa, Unip. Lda
– JACOPEÇAS –
Tel: +351 253 617 504 / +351 933 984 614
augusto.costa@jacopecas.com
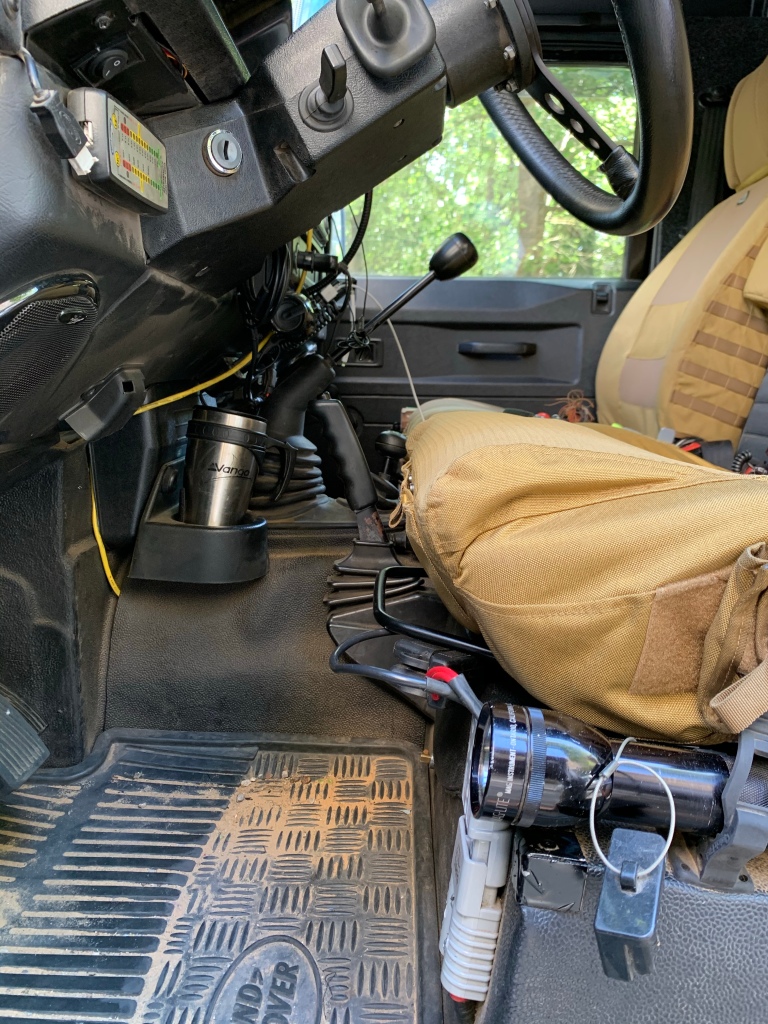
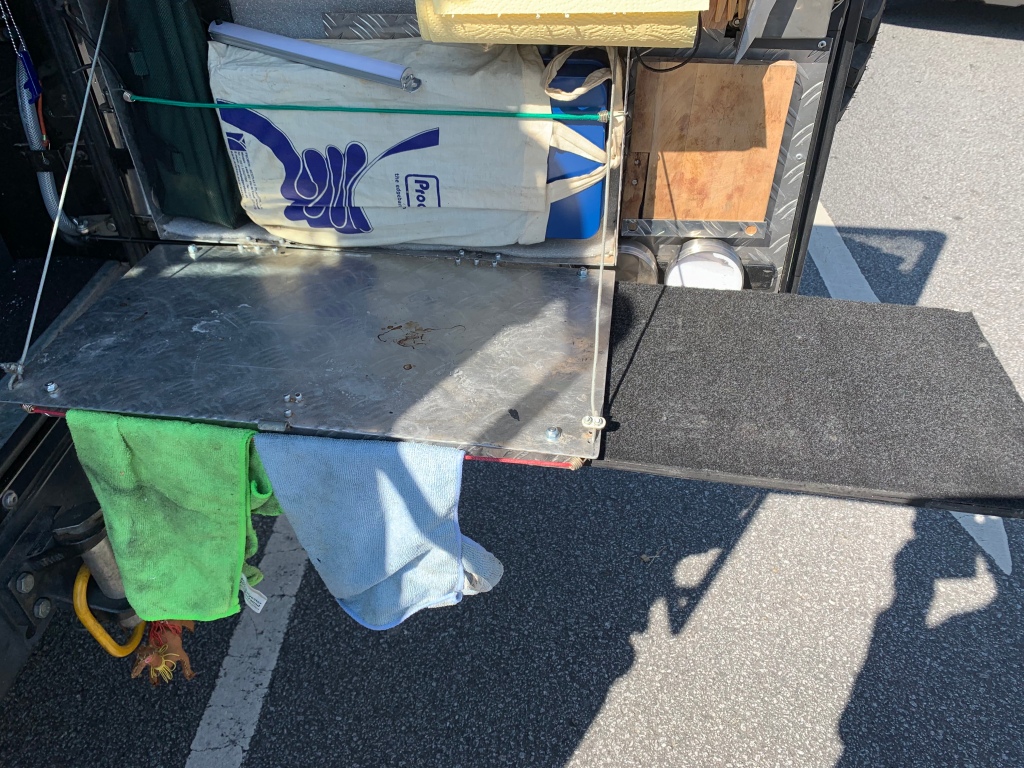
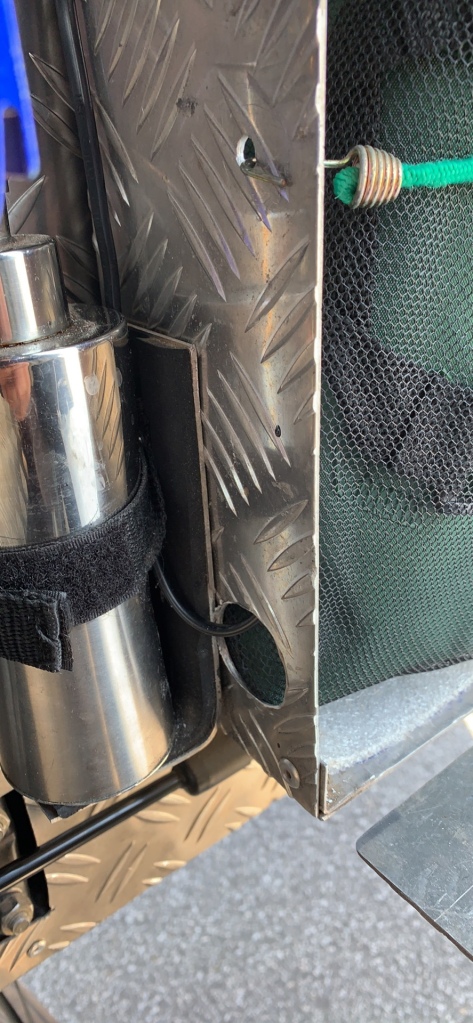
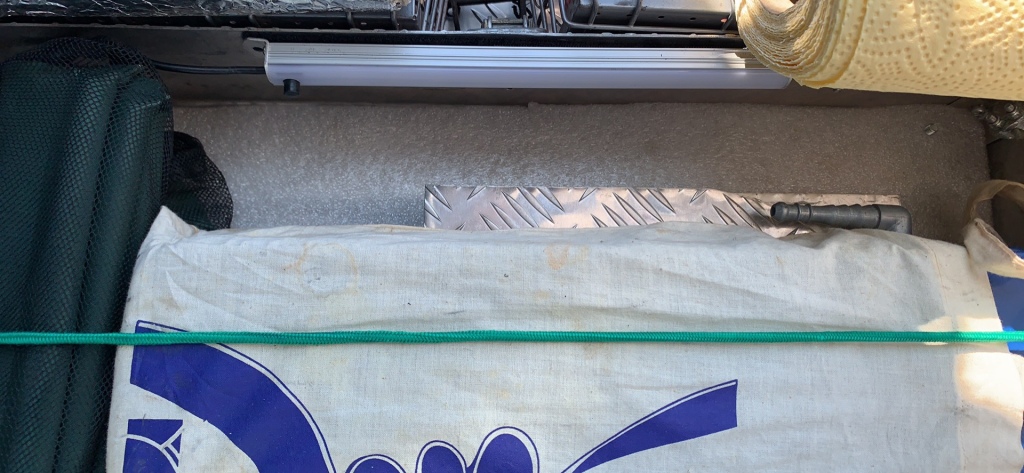
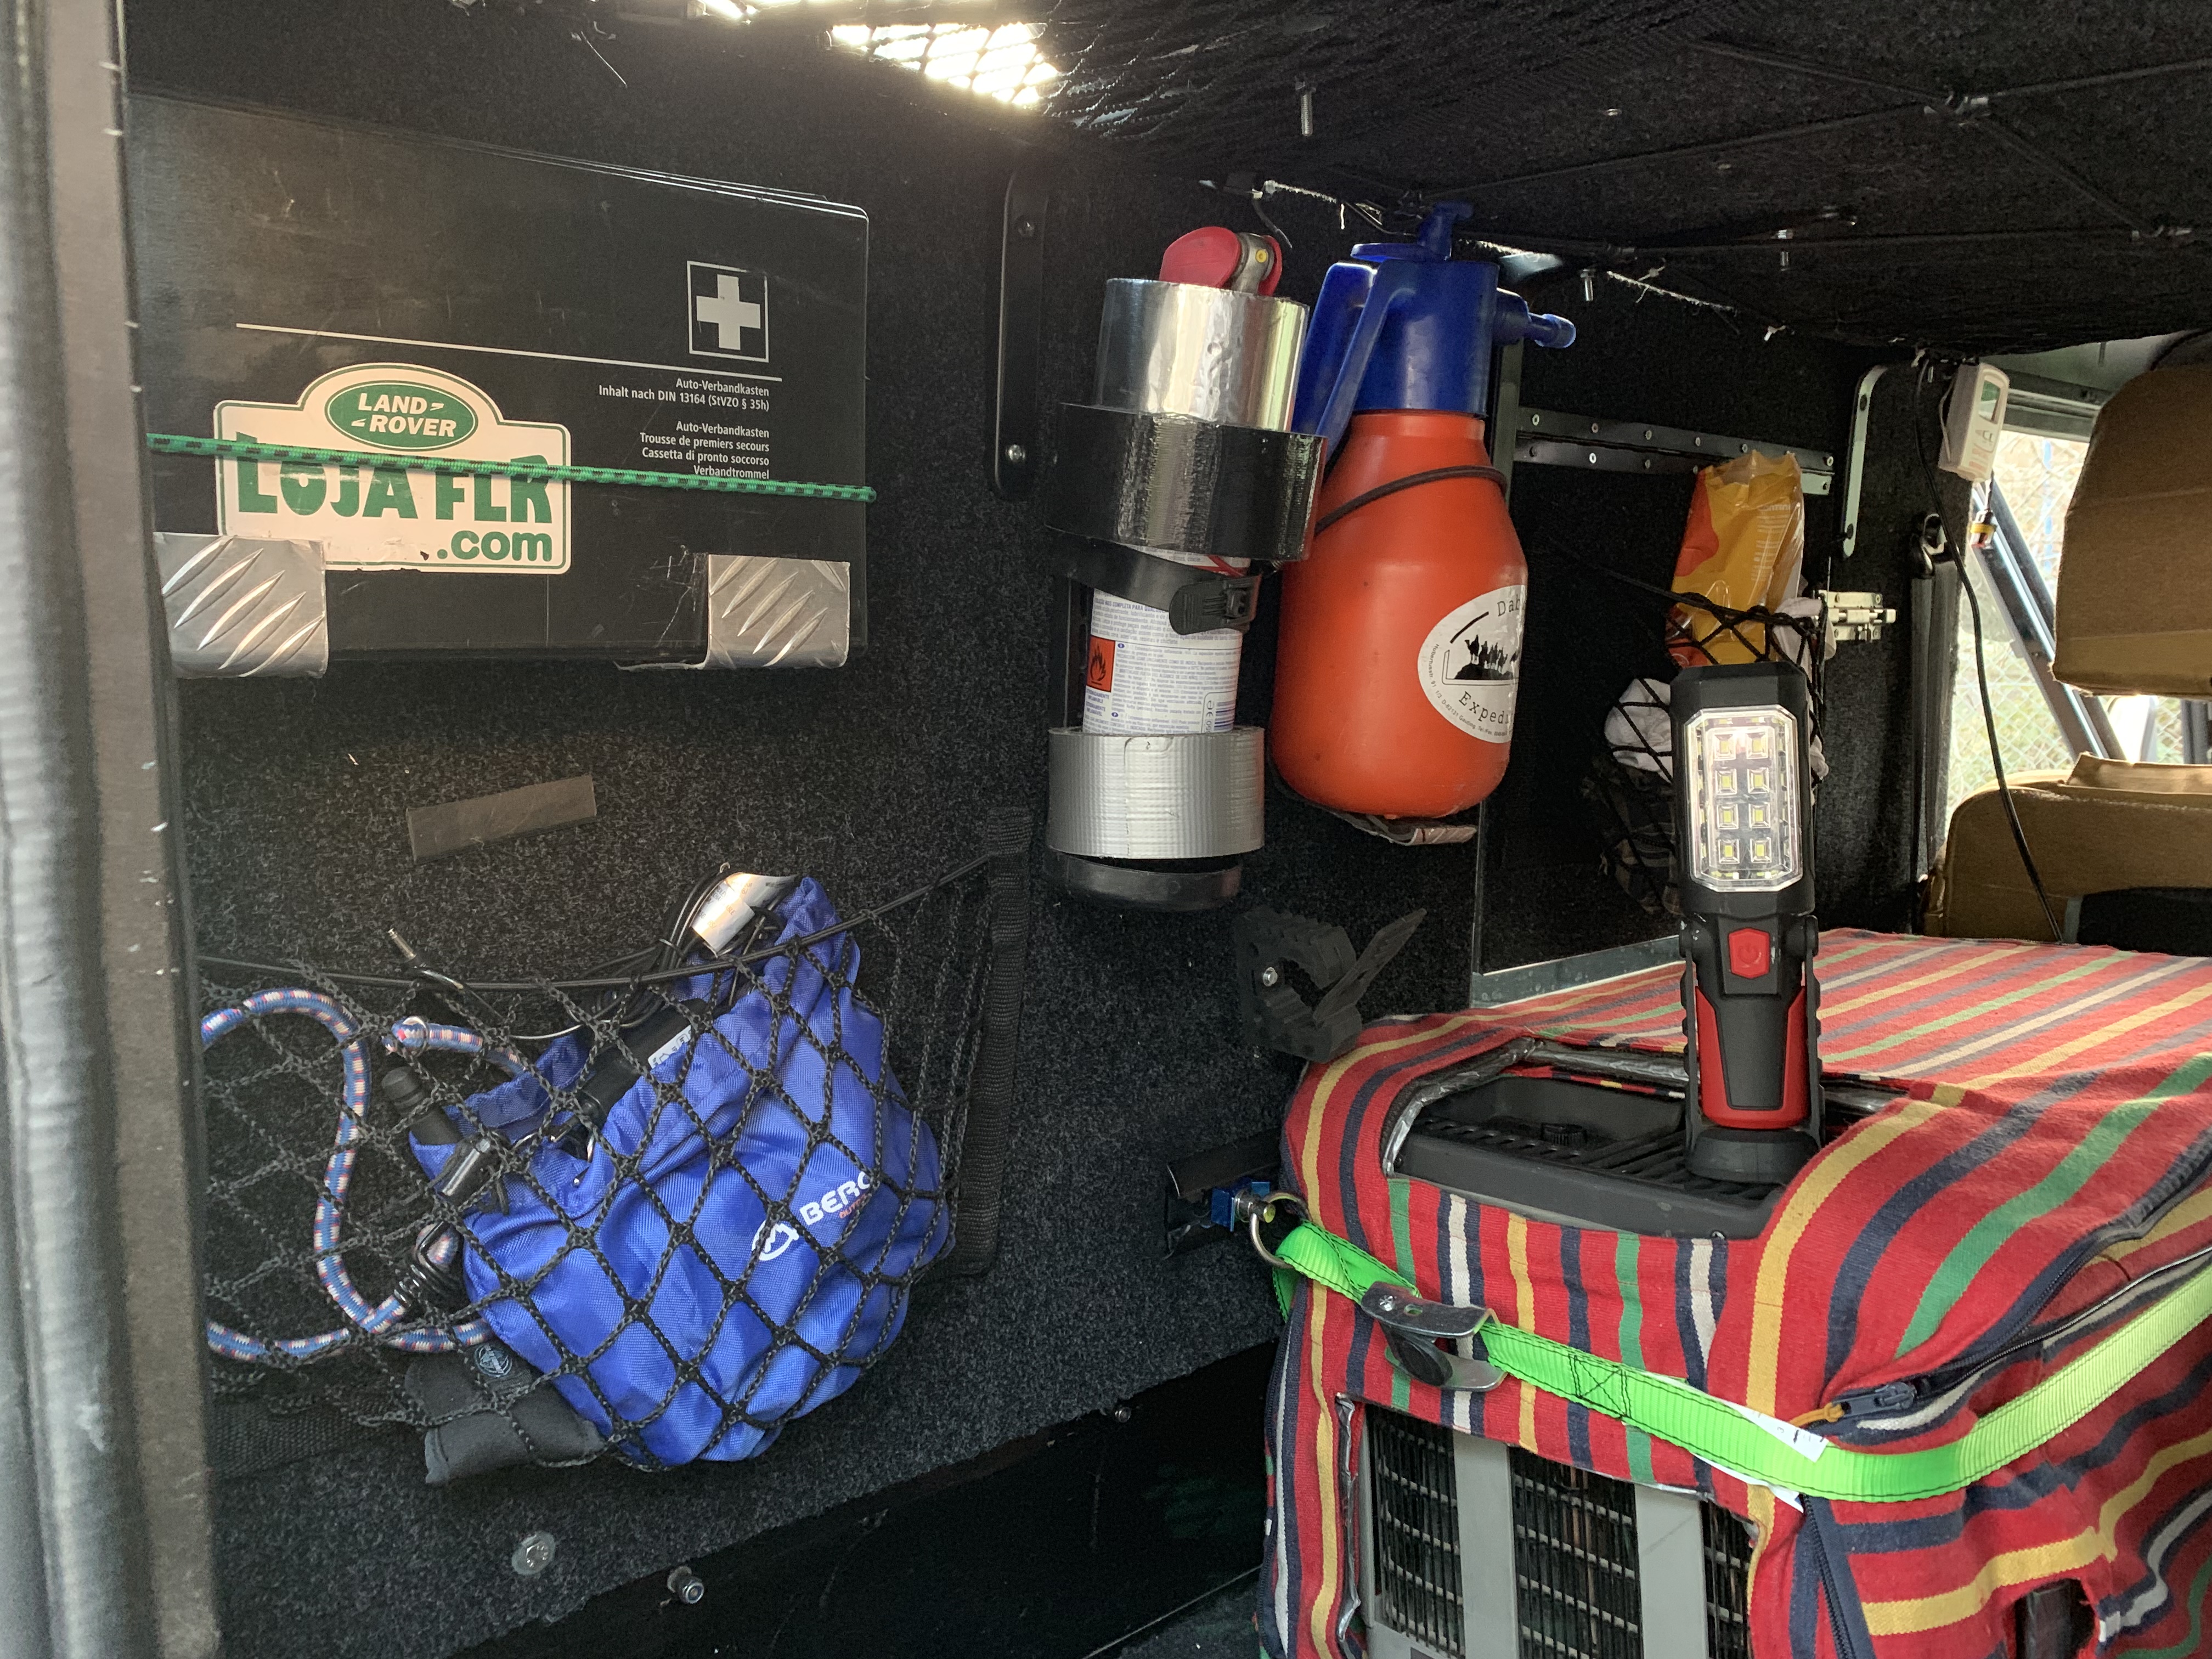
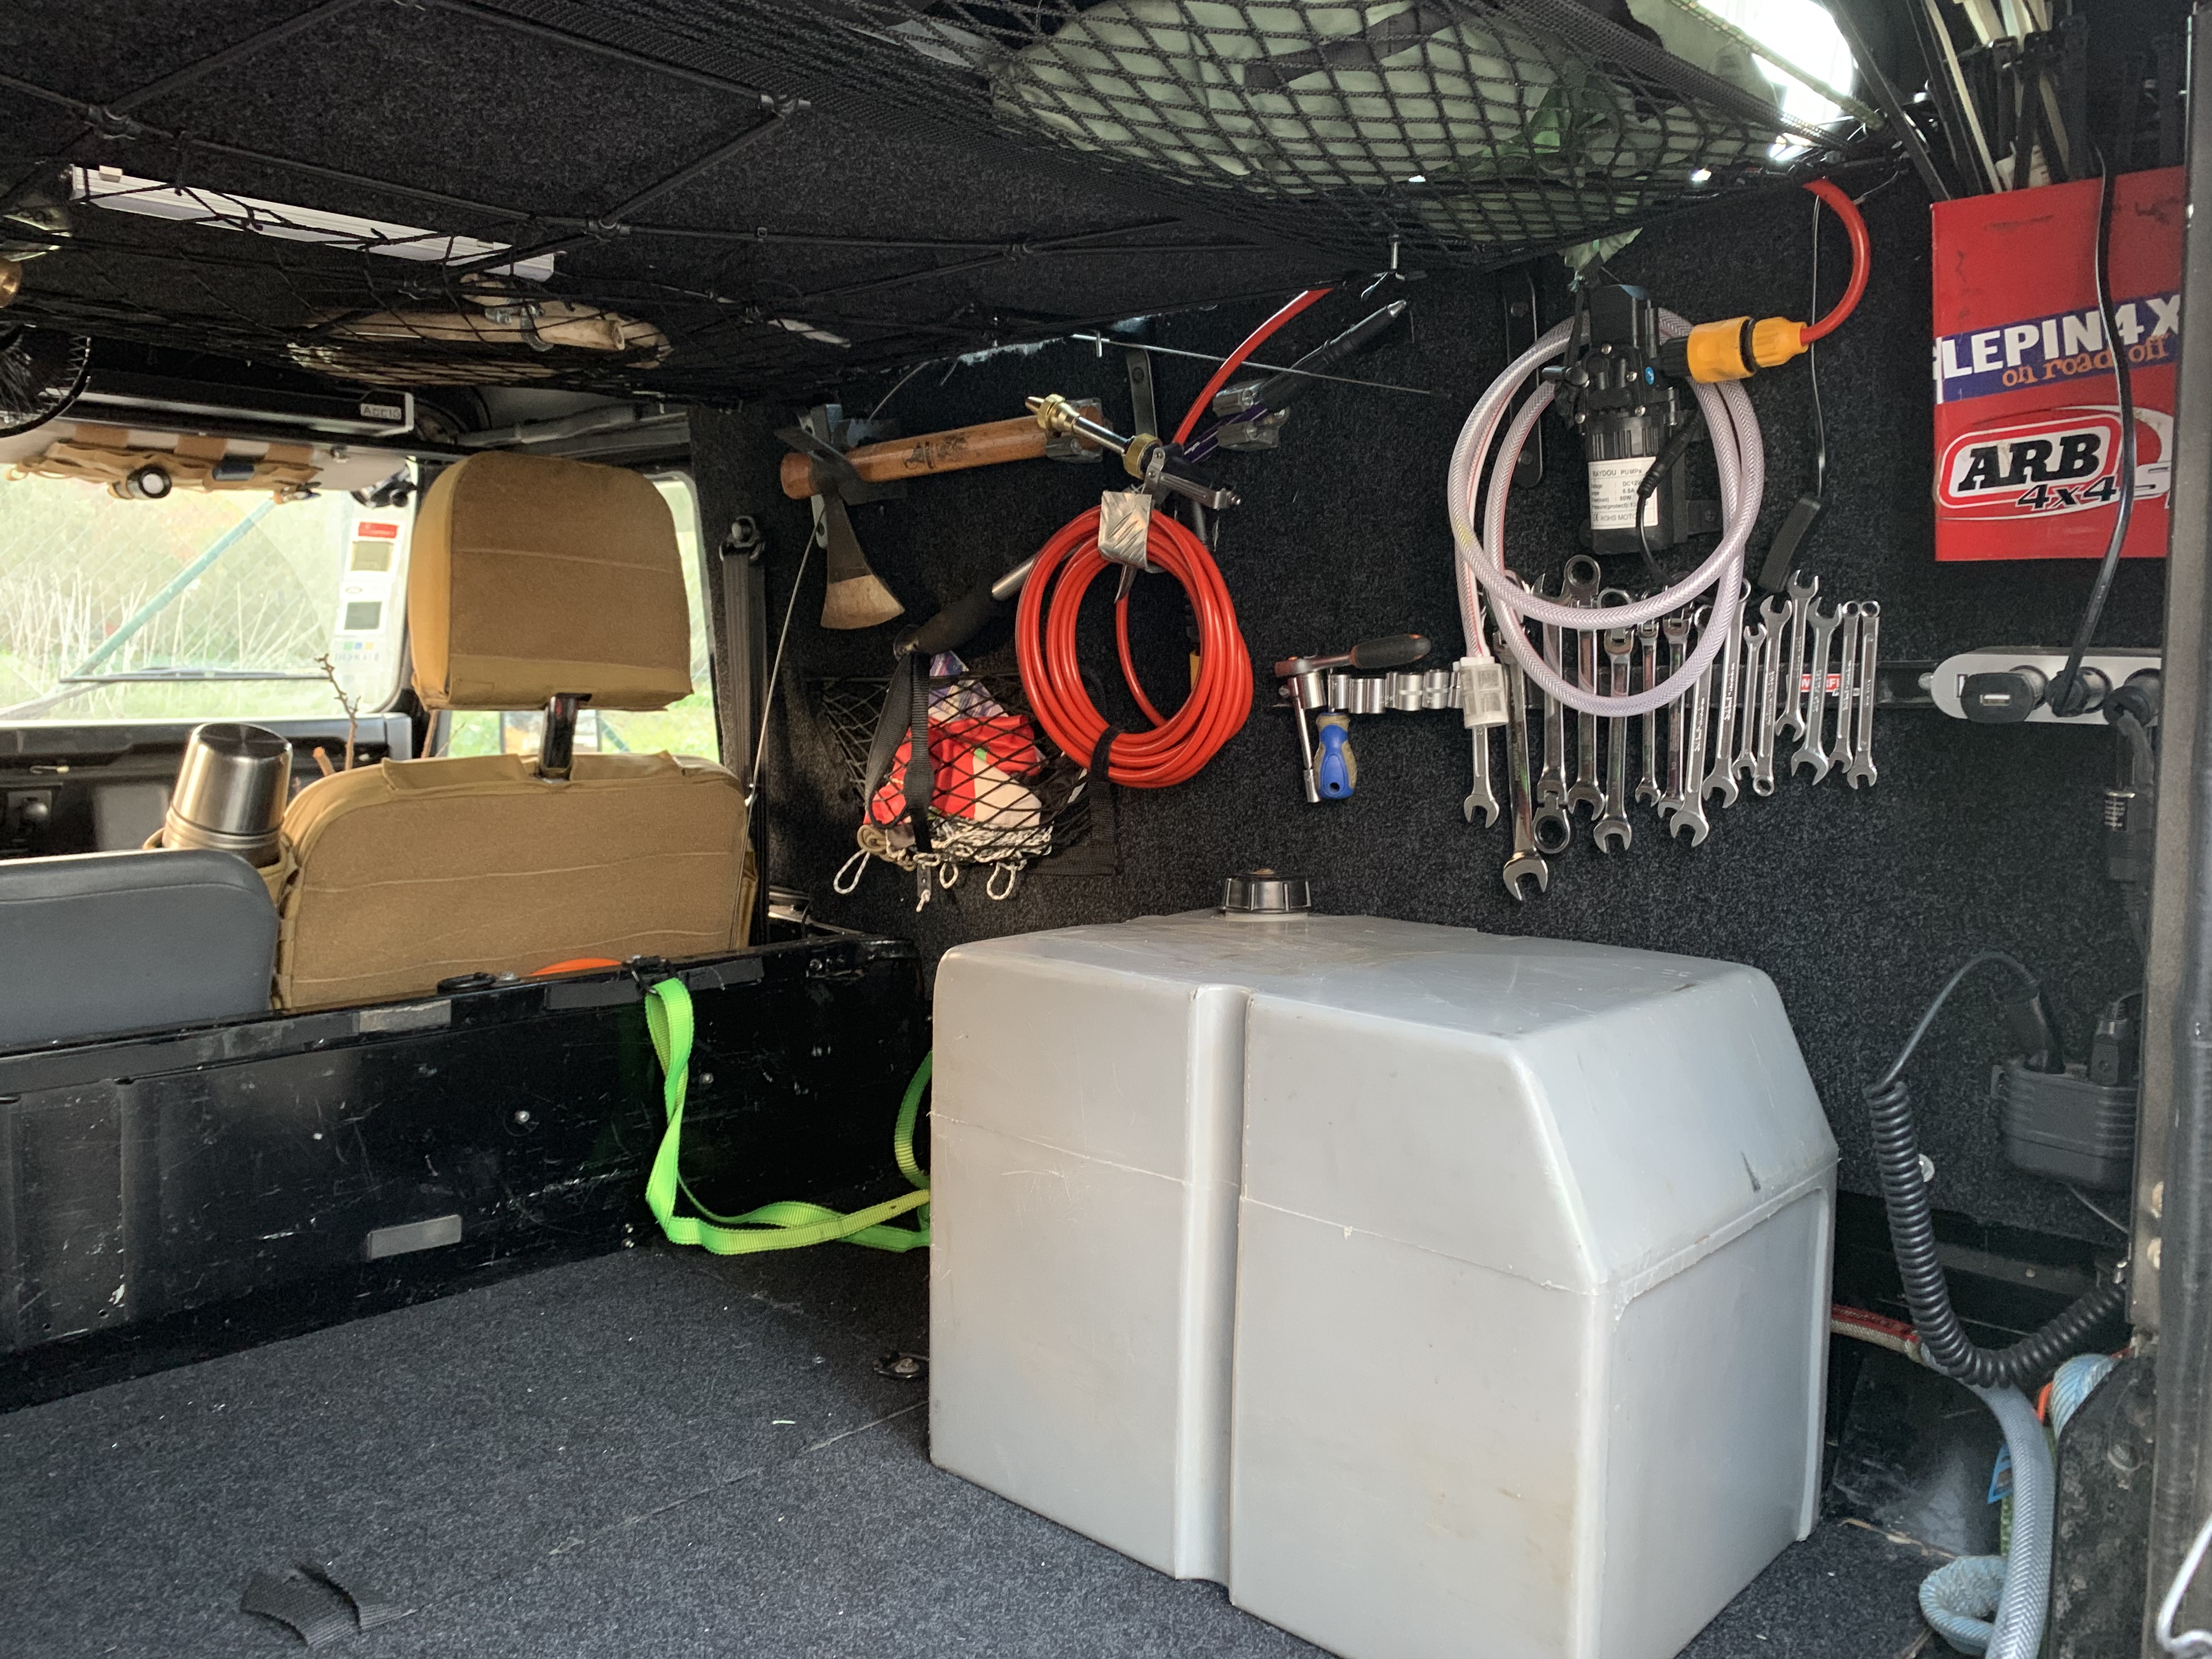
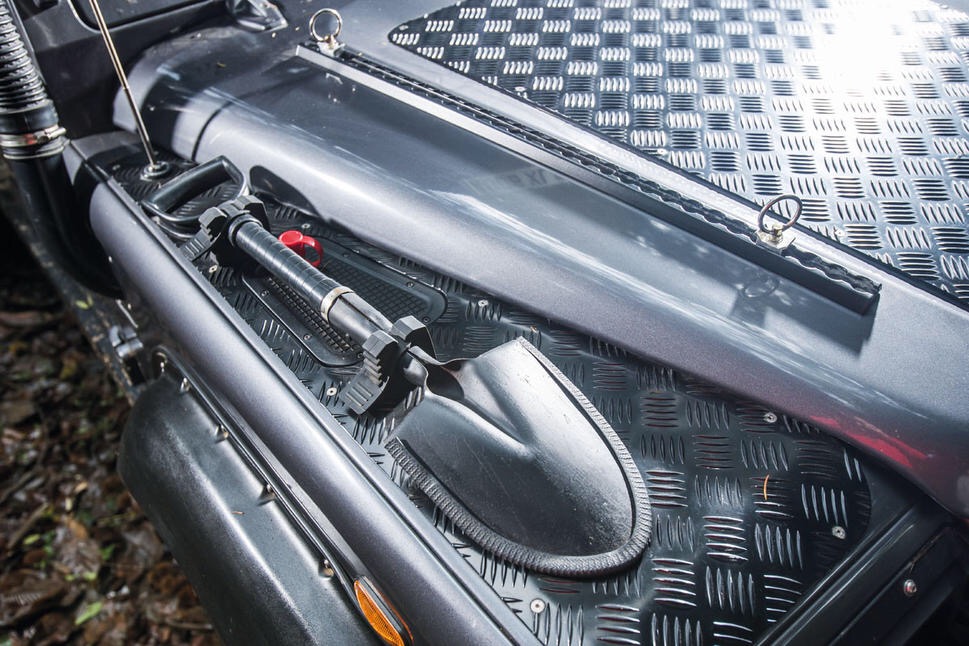
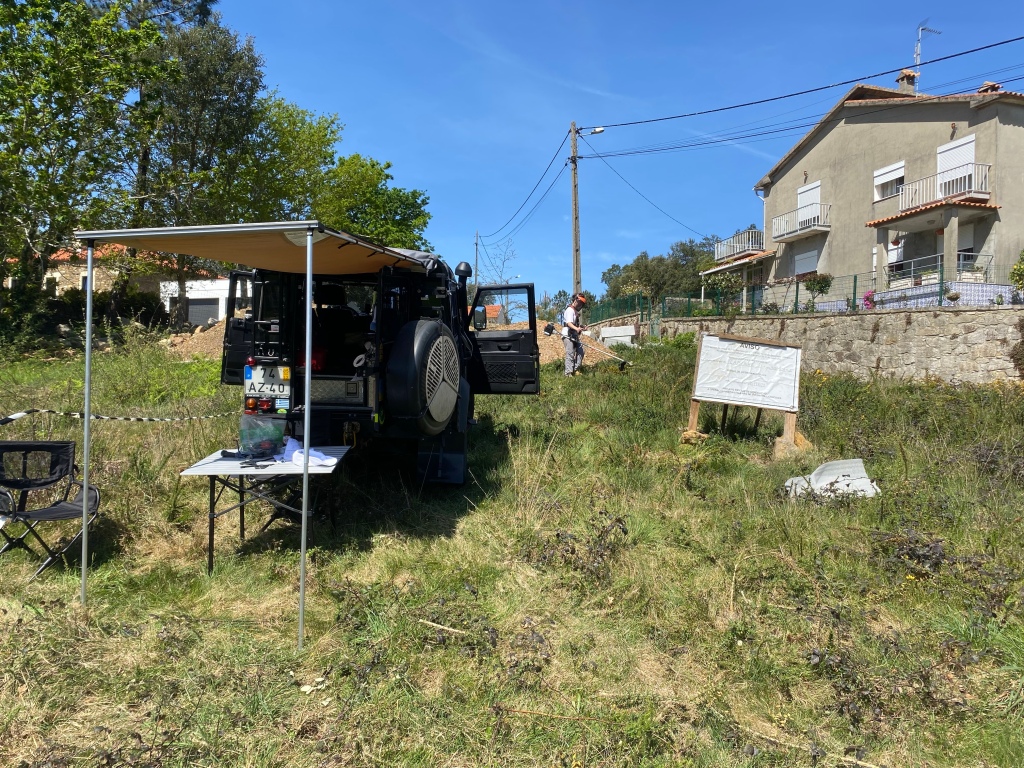
Some improvement for a side table , gaz tube let through hole , lighting upgrade
I Bought this funnel due to necessity to use diesel fuel that will be bought from Biddon of 200 litres and it is a safer way to be sure the mix is ok as the funnel separates the water
You can find it here
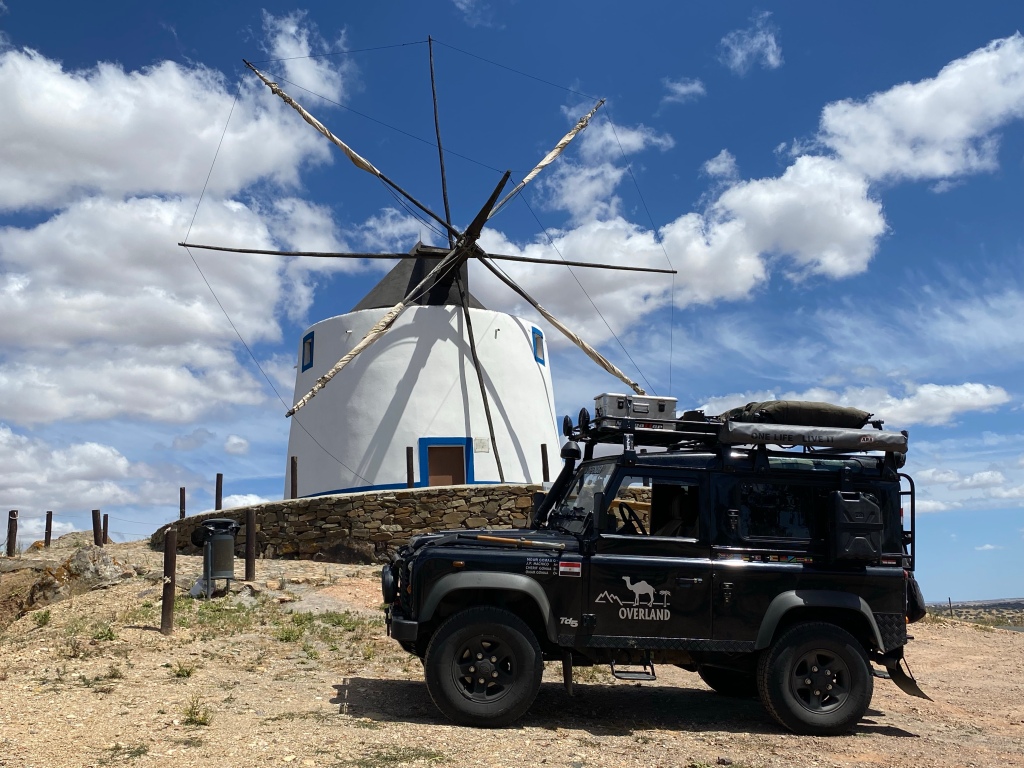
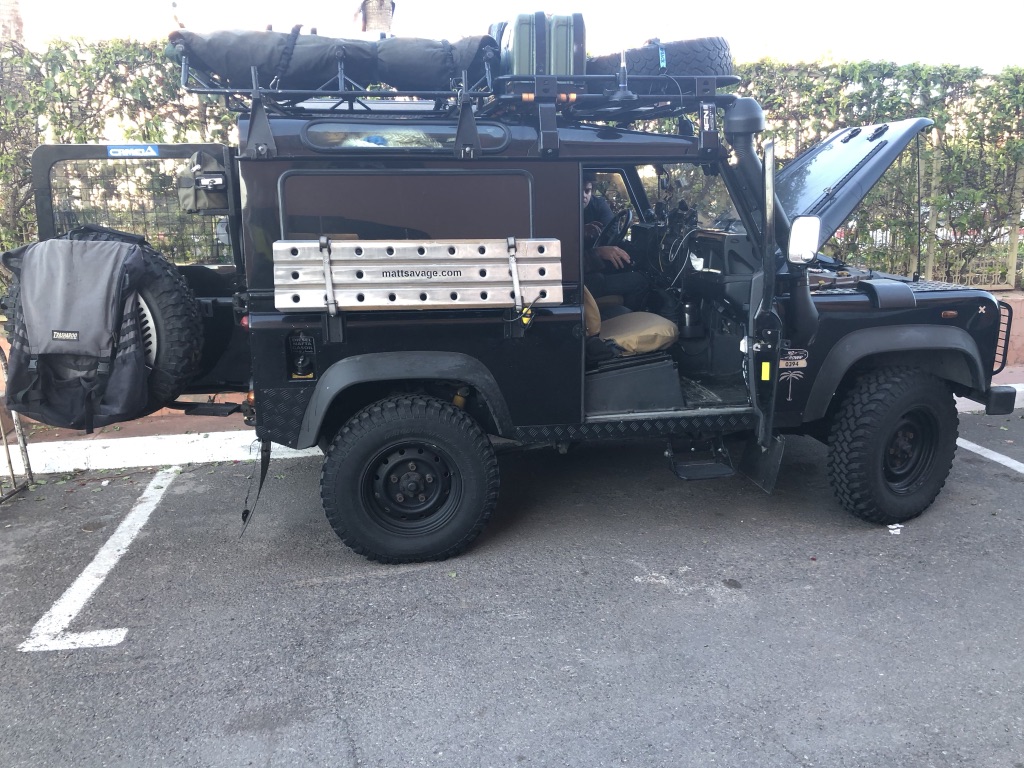
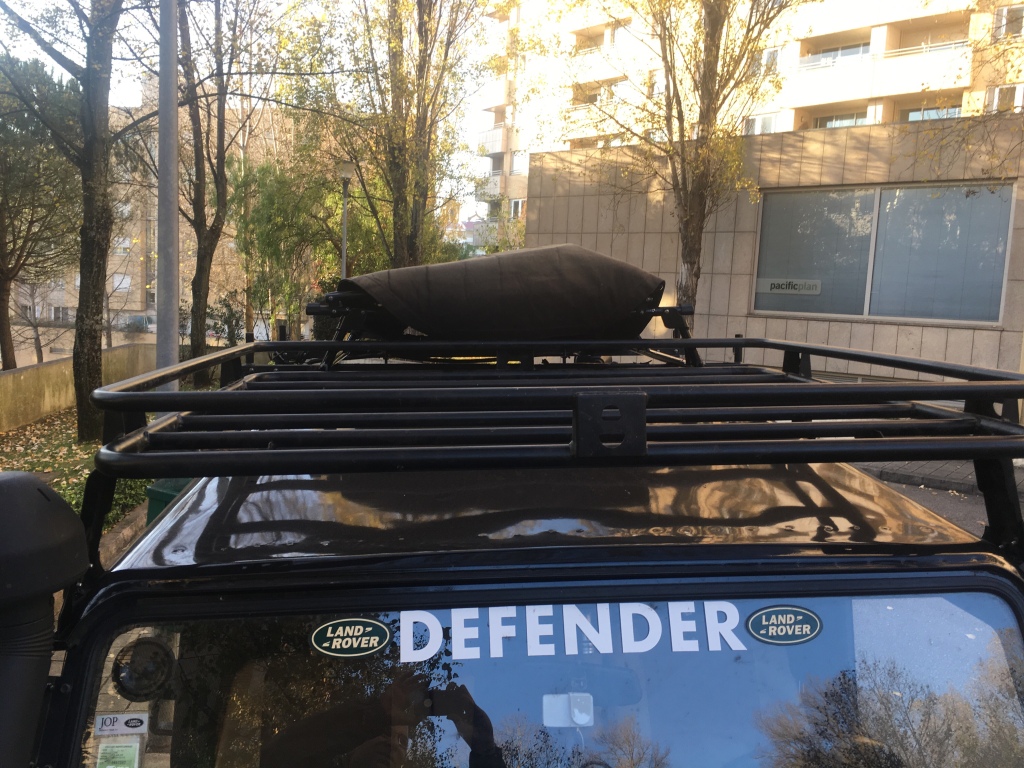
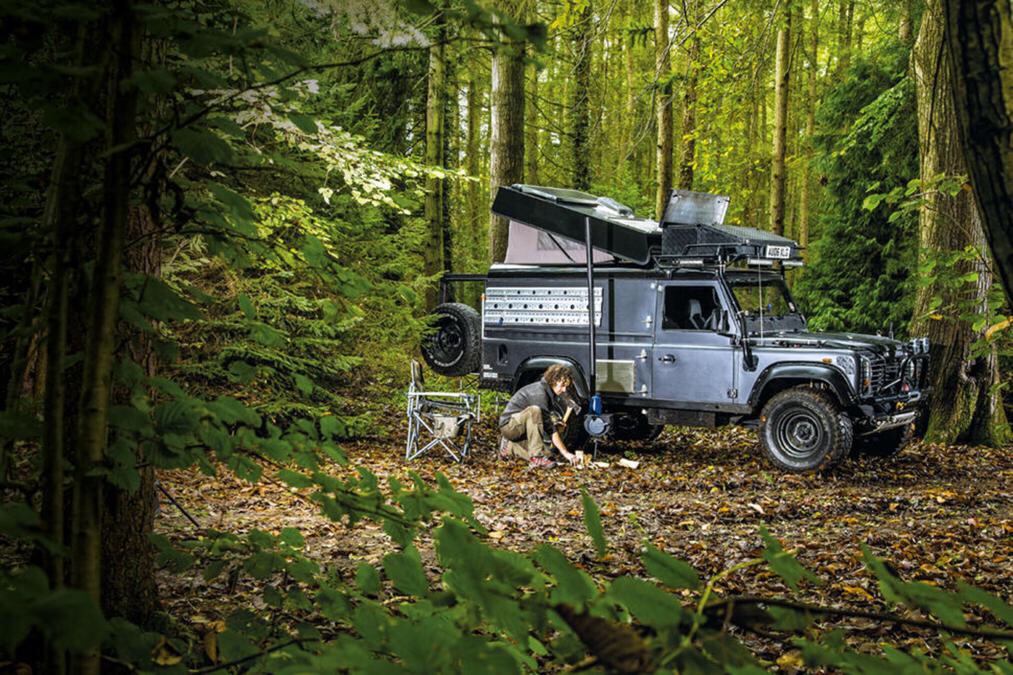
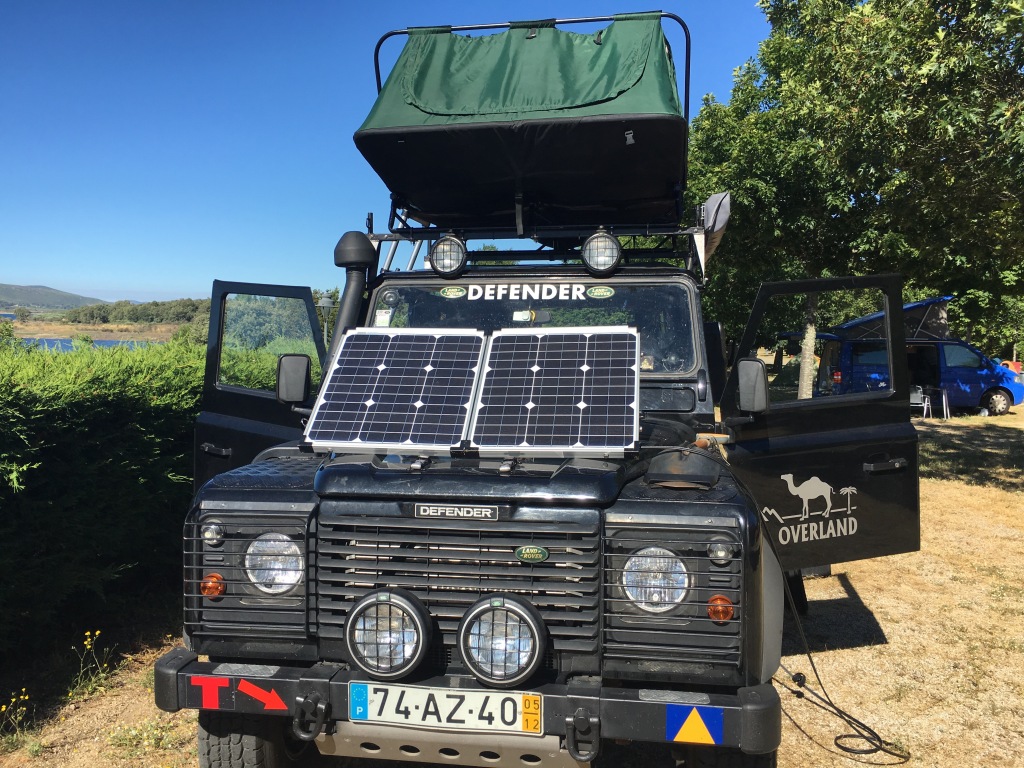
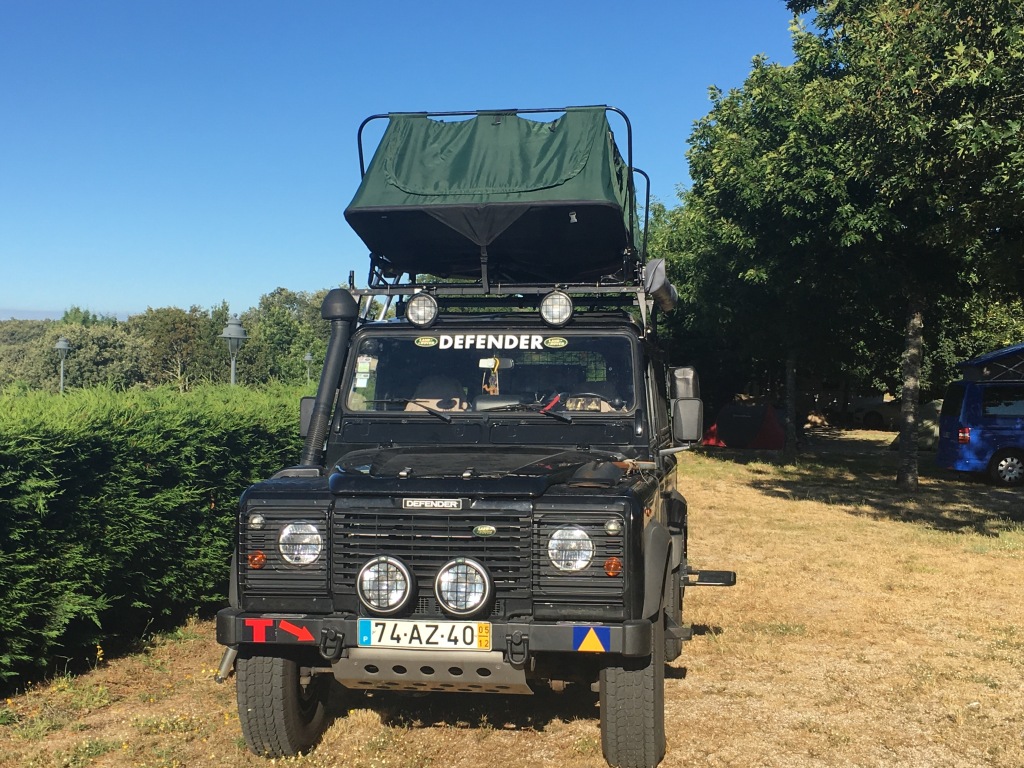
Defender 90 overland expedition setup
Defender 90 overland expedition setup
Defender 90 overland expedition setup
Defender 90 overland expedition setup
Defender 90 overland expedition setup
Defender 90 overland expedition setup
Next job…….
That is the kit i used, you can find it in ebay here
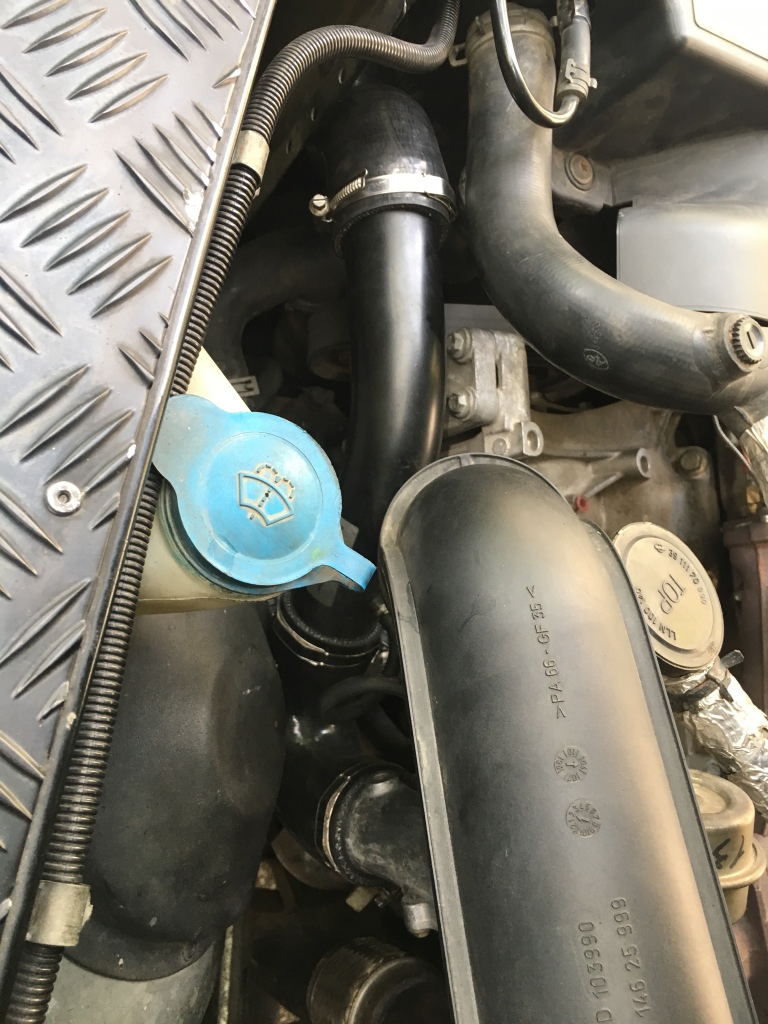
The video is excellent but i find it needless to take somany bolts off to change the O ring while 90% of the problem reside only in the side valve that needs to be replaced, all the rest of the bolts can stay bolted on the pressure regulator without needing to undo them because they simply dont drip anything from there.
First of all i inspected well the area and understood that the problem 90% comes from the blown valve (which is what happens most of the time and it this was my case)
this was my 2nd time for the valve all the rest of the tubing as far as i know is ok
What i did is clean very well the area around the fuel regulator and honestly speaking i was able to manuever o the 3 bolts with no extra drama, obviously the one in the bottom was only able to use this tool …….to be able undo the bottom bolt.
This is after fitting but still without starting the engine
Just a quick look after i put my keys in the ignition and turned the key…..so far working

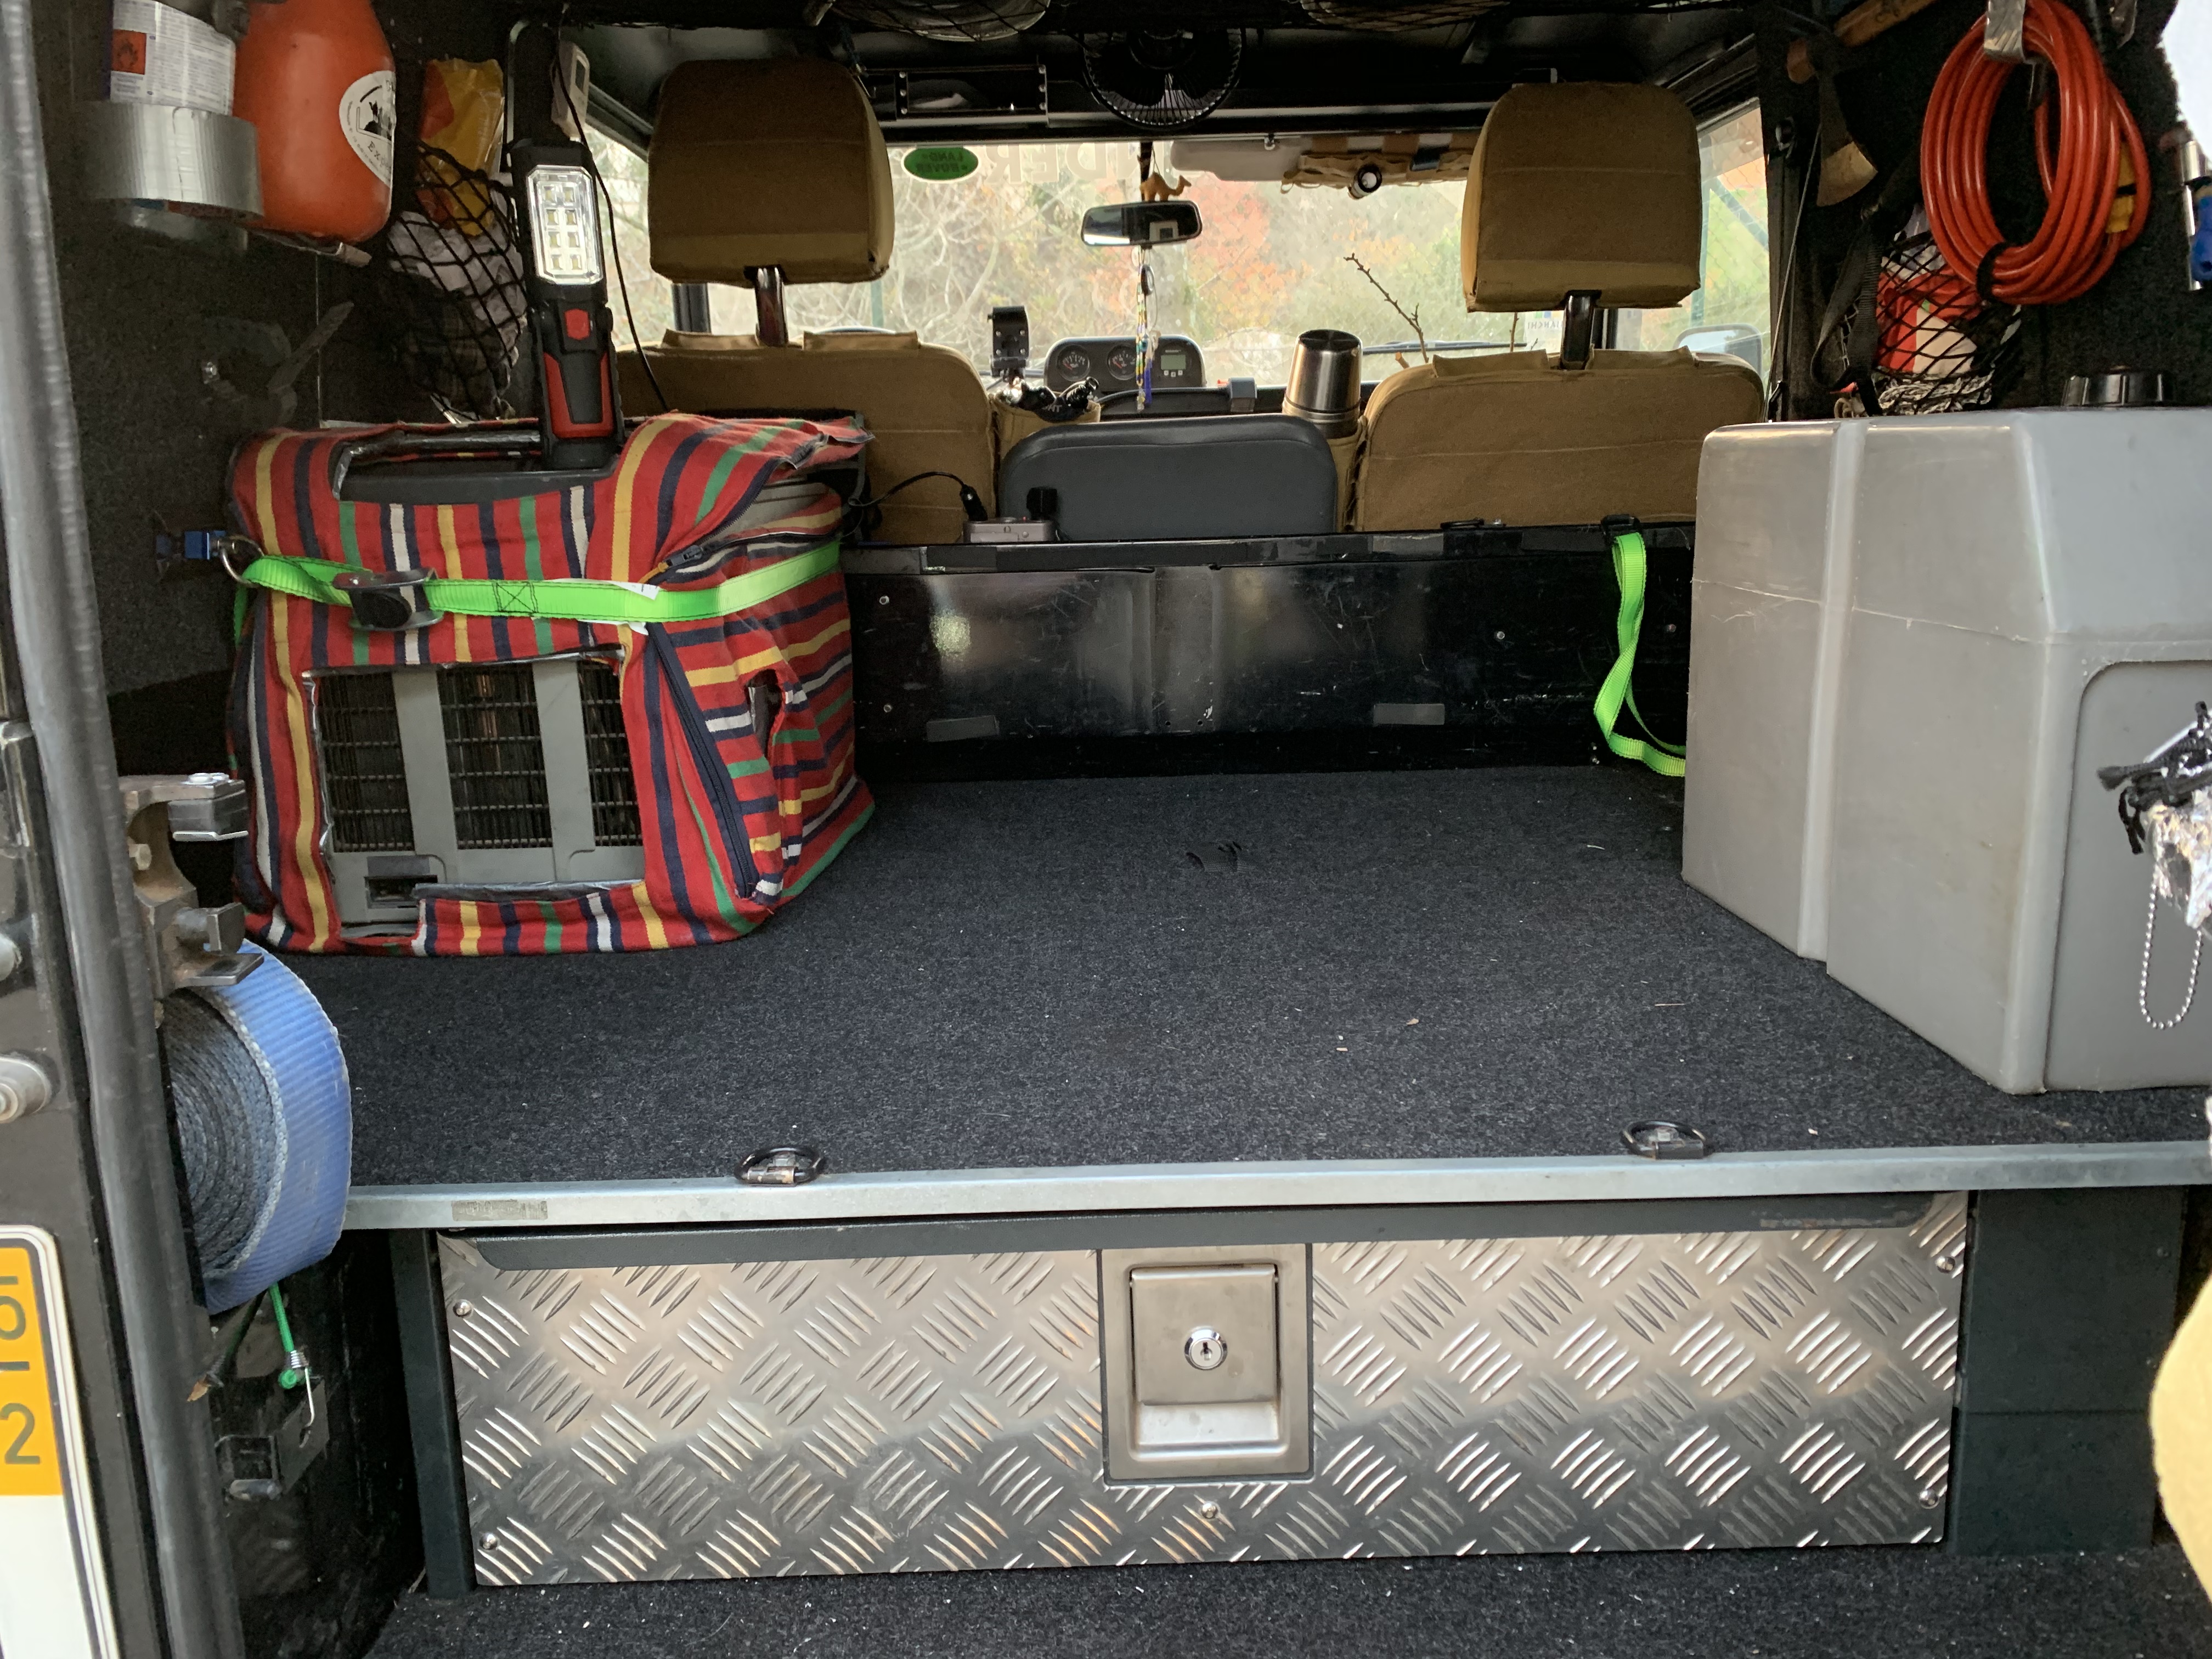
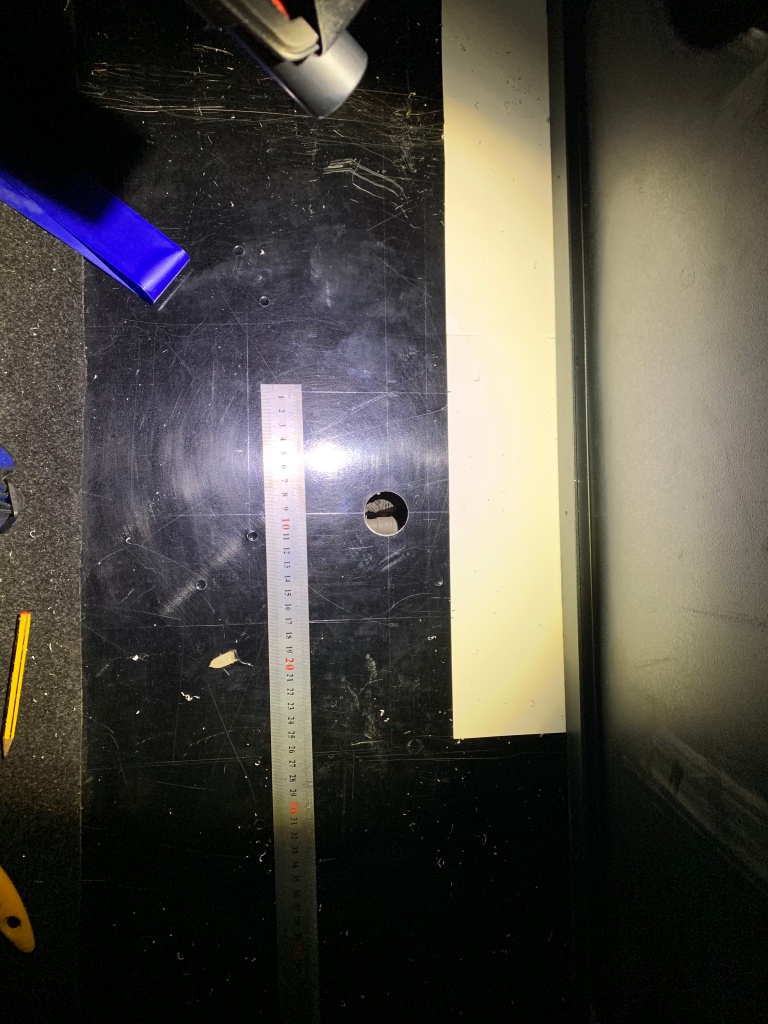
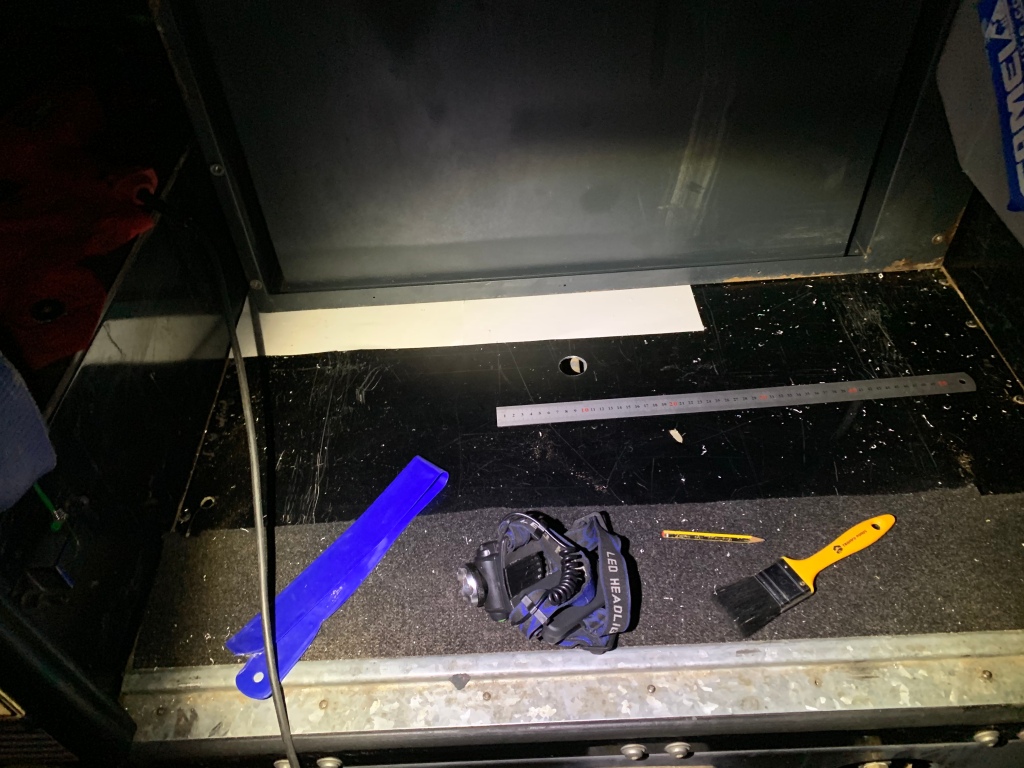
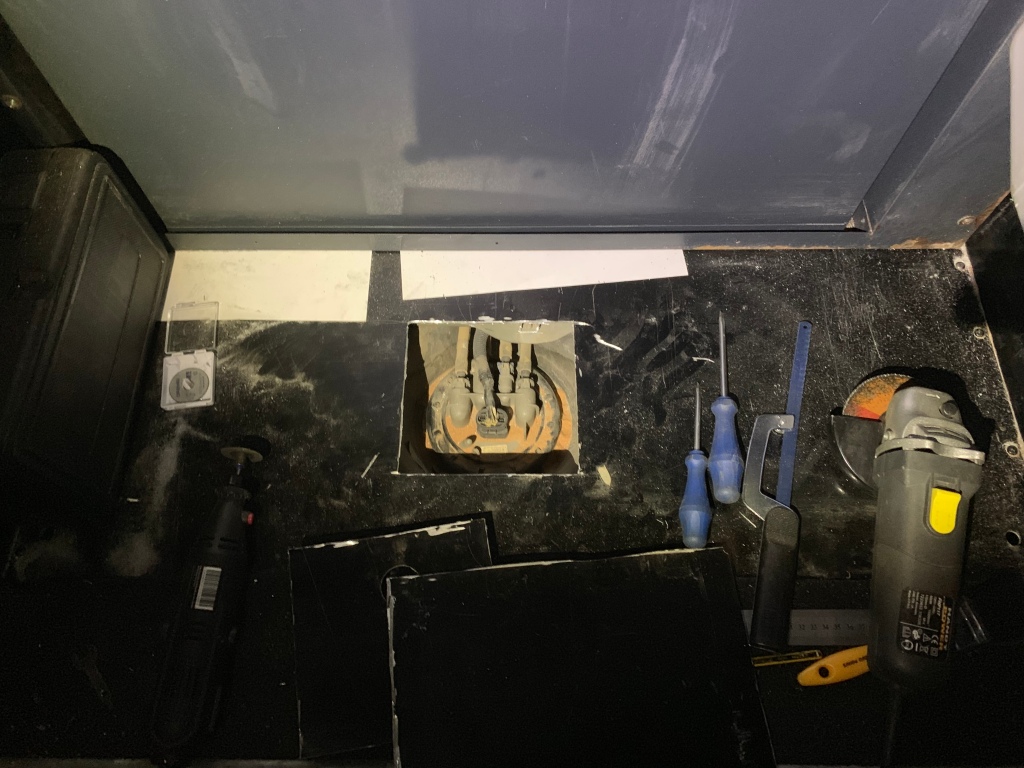
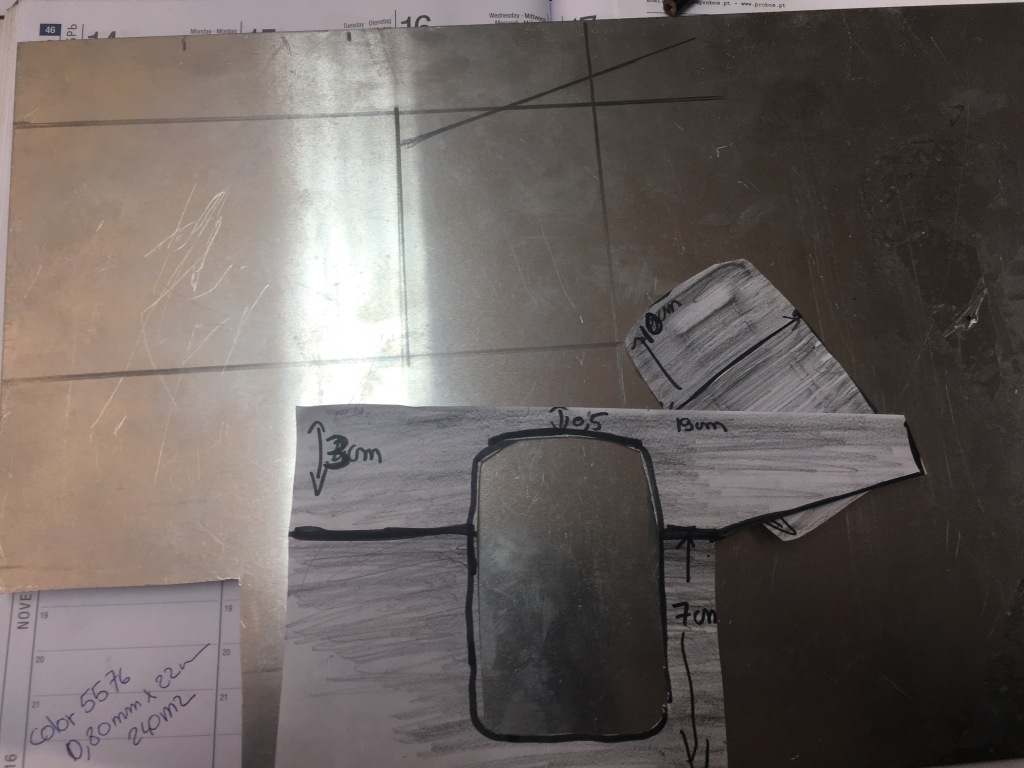
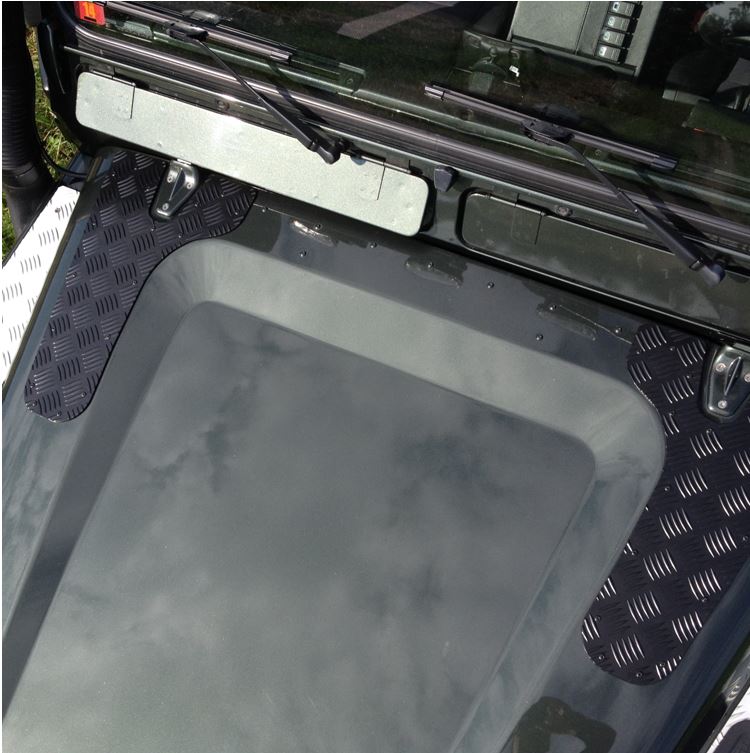
Will need to work out a project for this….just gathering as much measures as i can
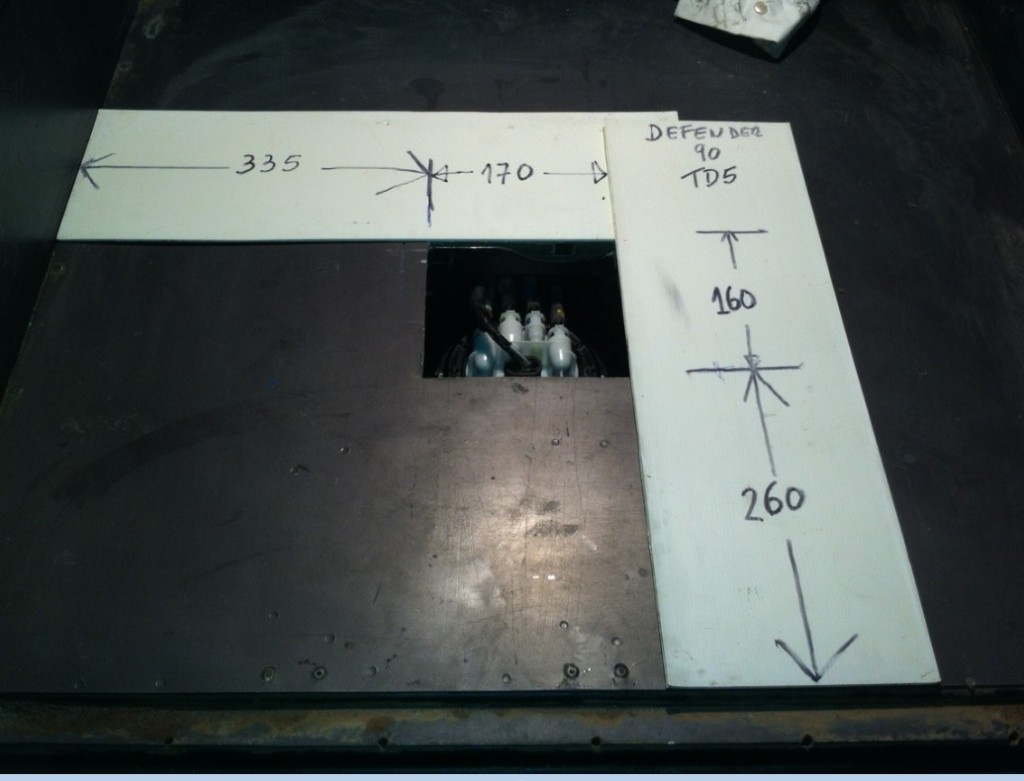
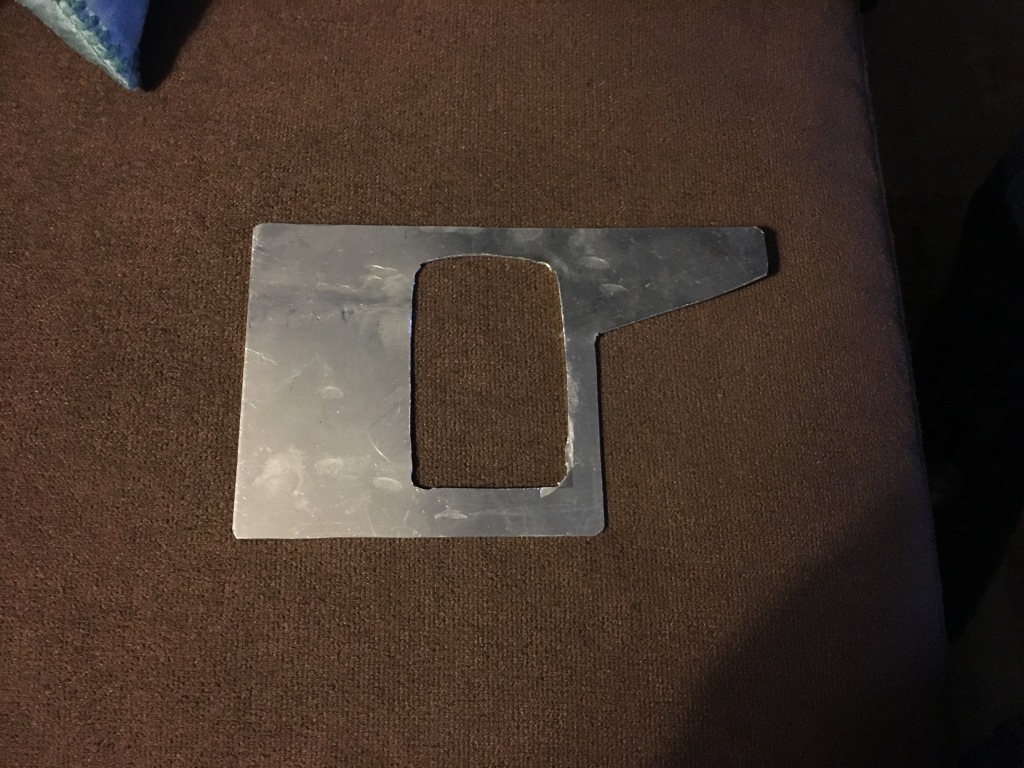
The measures for the access hatch are the below, i believe a square cut is better form me due to MMS storage that i have on top of the cross member in the interior off the landy.
If i used the marine hatch that many are using i would have had a problem with opening and closing the drawer (as the marine hatch has some 2mm clearance and the drawer has 1mm.
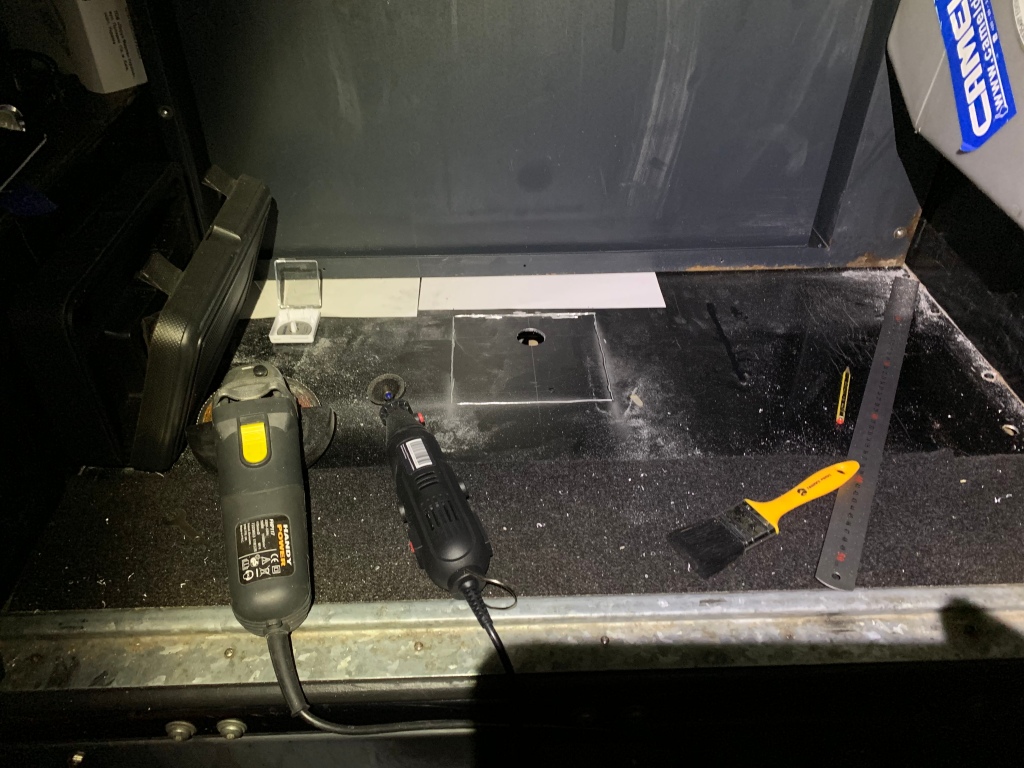
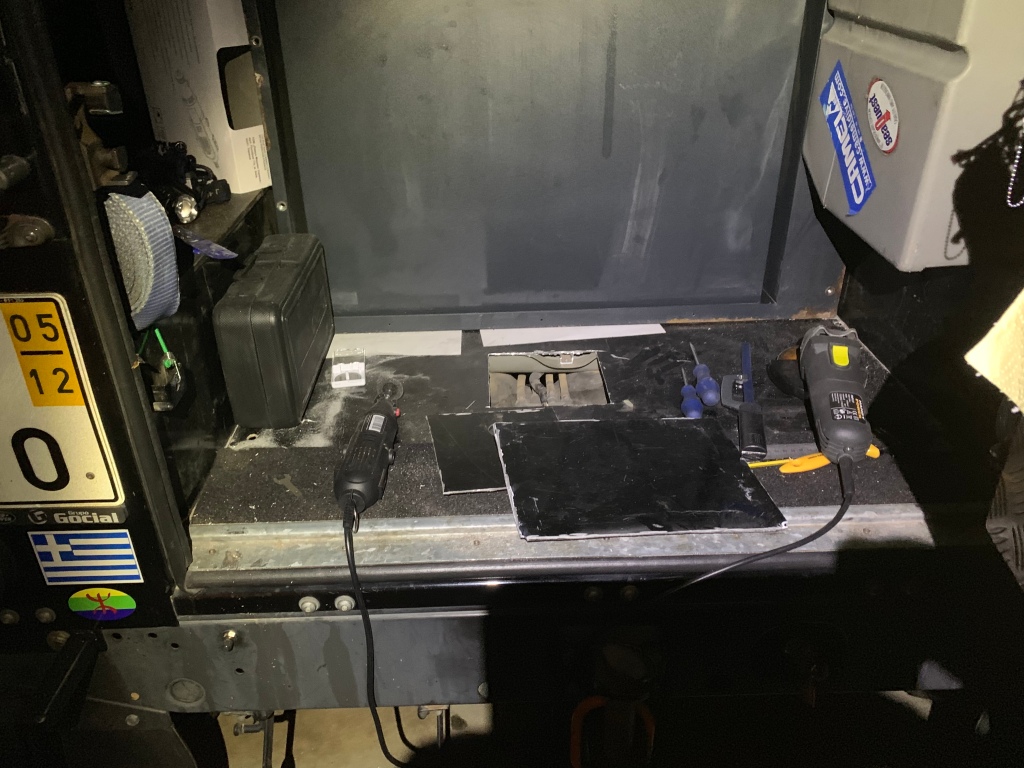
Therefore i used the same opening square cut and i used another plate bigger square, rivited the smaller square in the bigger and on the bigger square i opend 4 holes and use a rivet nut on the crossmenber, finally with 4 flat bolt i boltted everything
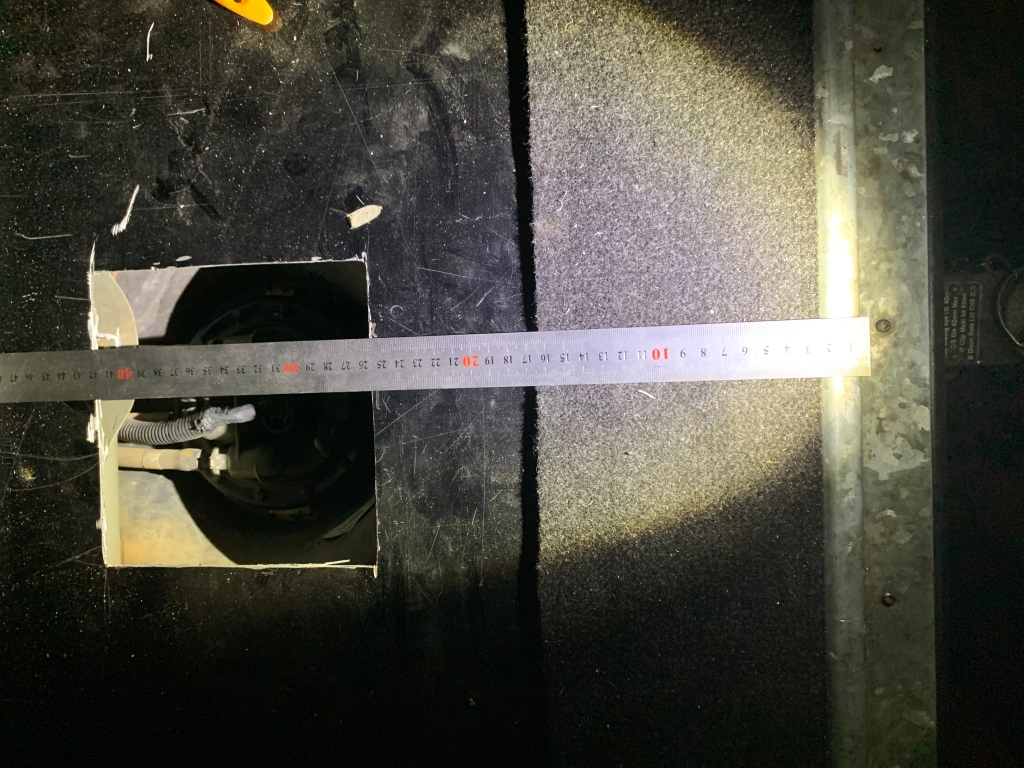
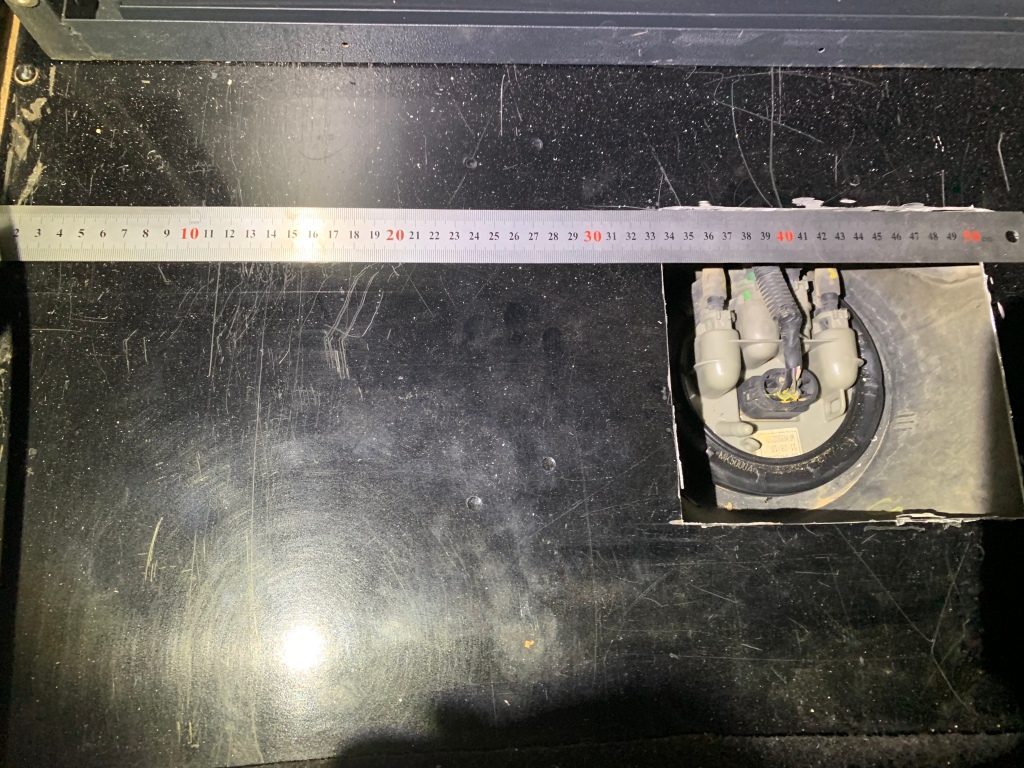
Well this basically the first thing i did measure 410mm from the outside edge of the rear door just on top of the 2 bolts you can see at the edge and the other measure from the left side is 330mm for the start of the square and if you make the line longer it will cross the 410mm at a cross point and i made a hole which was right on top of fuel pump
https://m.youtube.com/watch?v=8m1BitUpjDs&t=701s


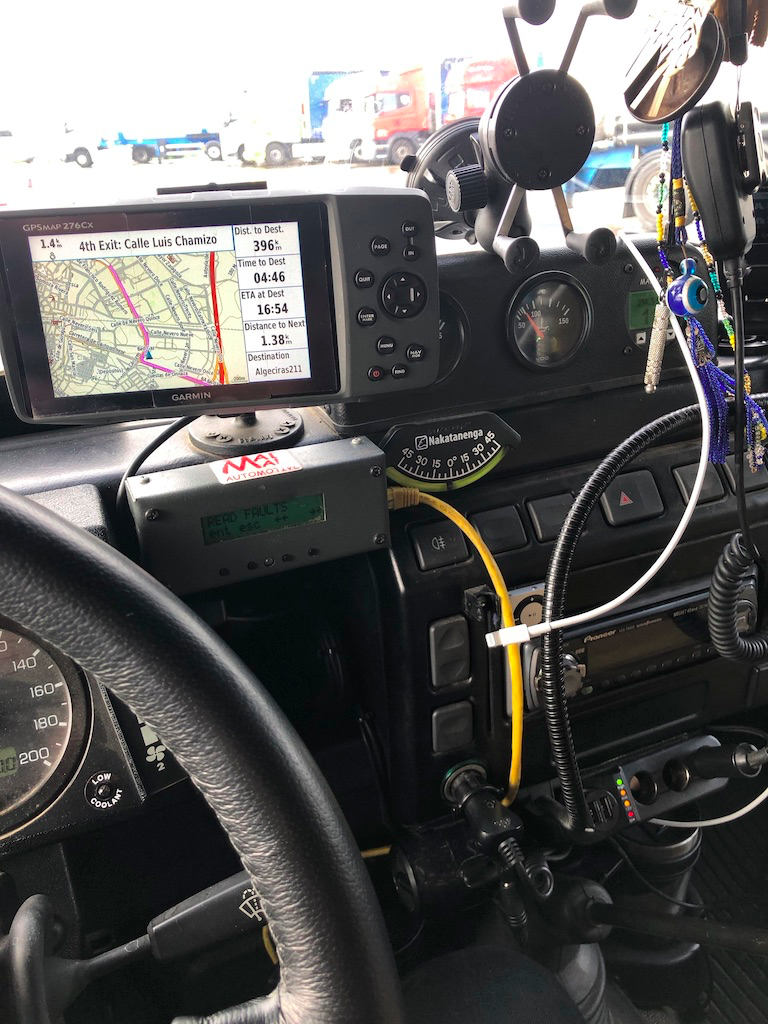
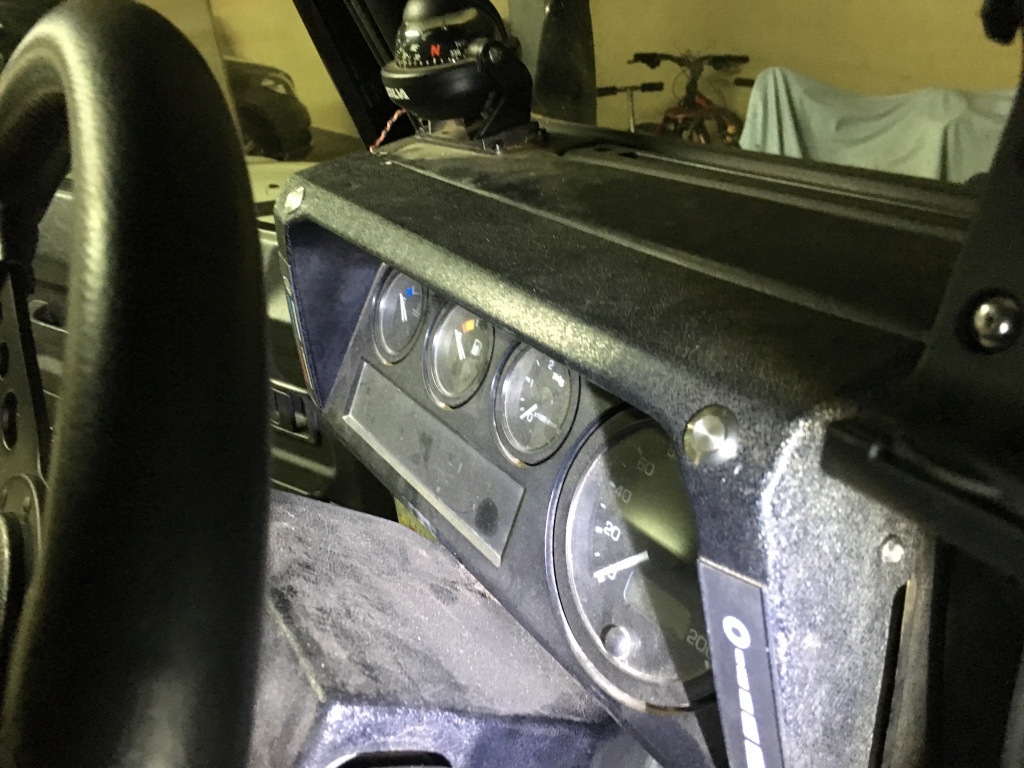
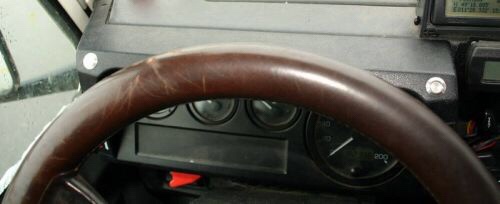
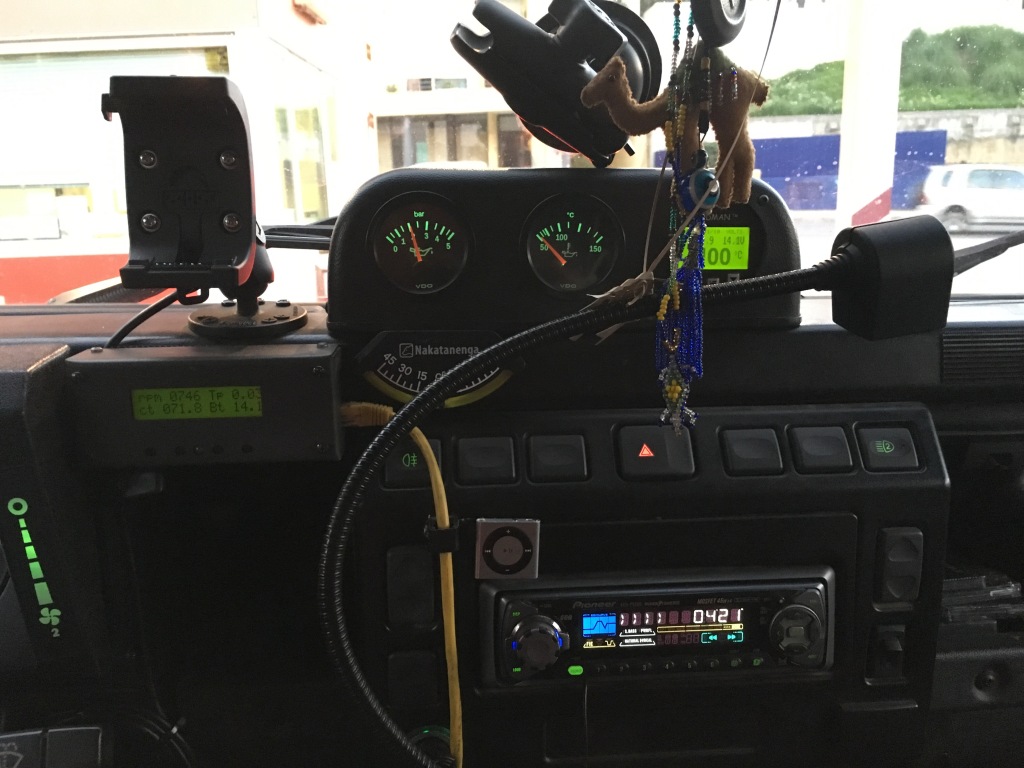
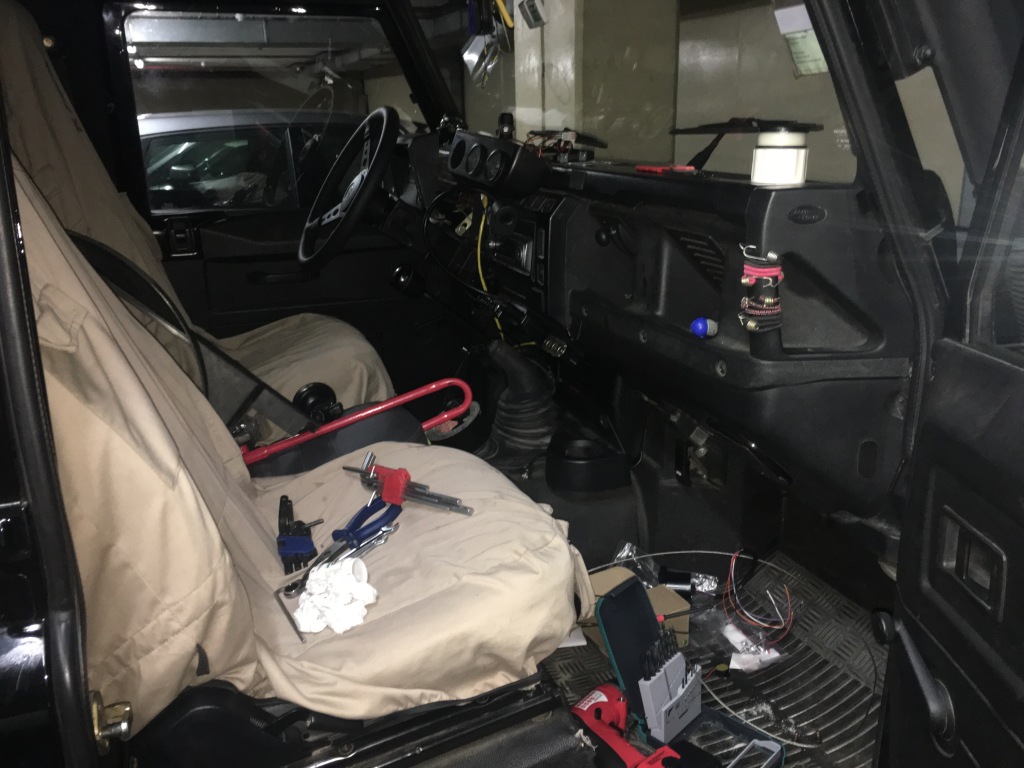
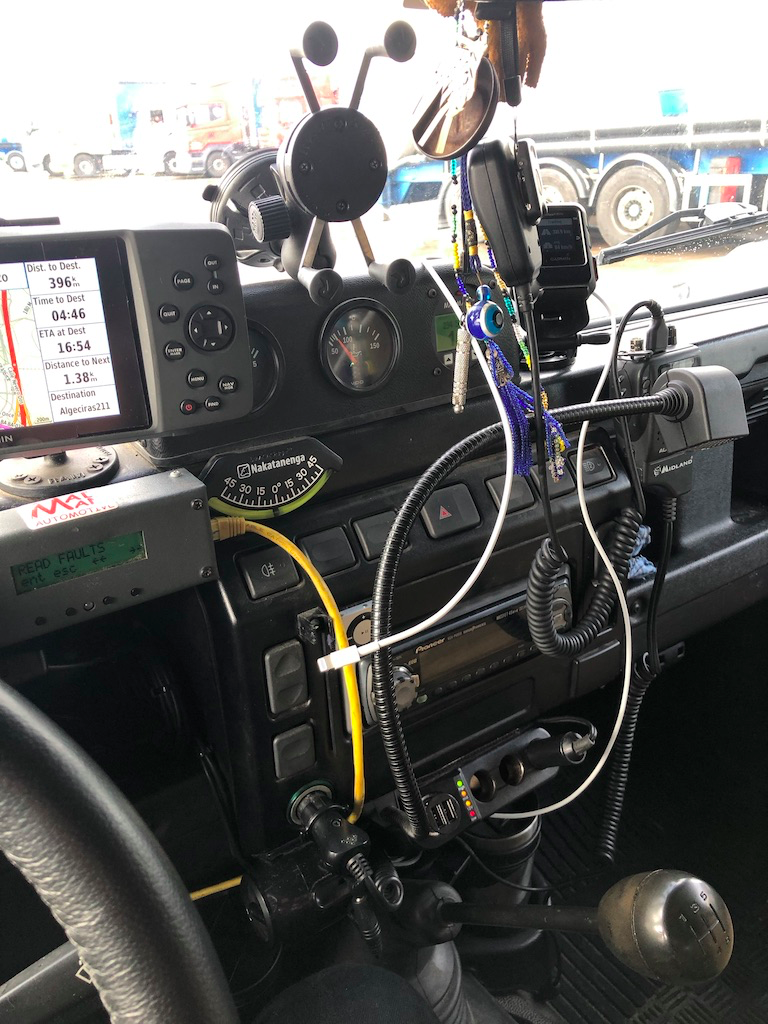
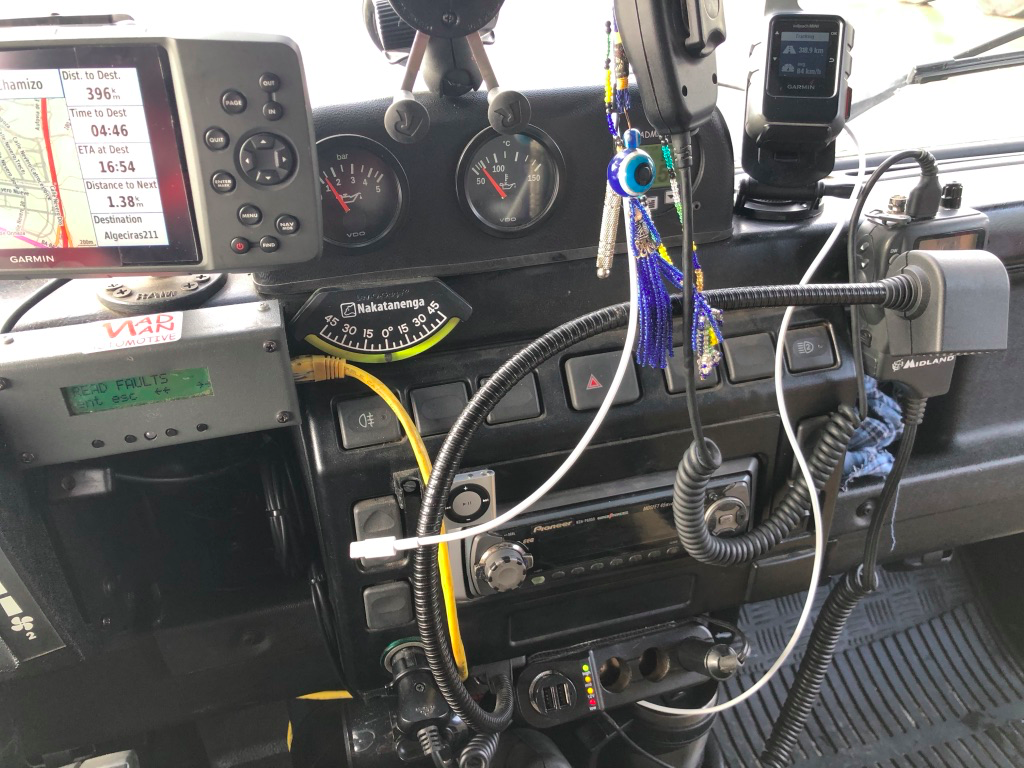
You can see the light position on the dashboard lower right..
Not wanting my Td5 coolant loss to happen undetected which is a very real threat, I wanted to fit a gauge that would mitigate the issues of having a low coolant level.
Using a coolant low sensor on the upper radiator hose with the correct wiring, we can create an alarm that we can wire up to a dashboard warning light that lets us know if the coolant level drops before it becomes a bigger problem.
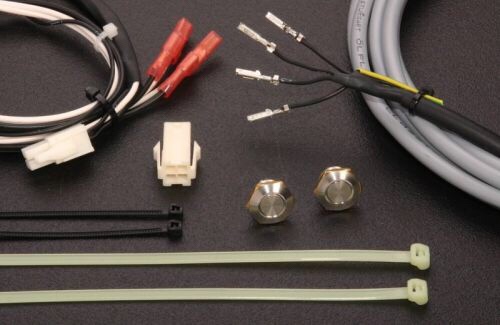
Where i bought my kit
You can see here how you fit
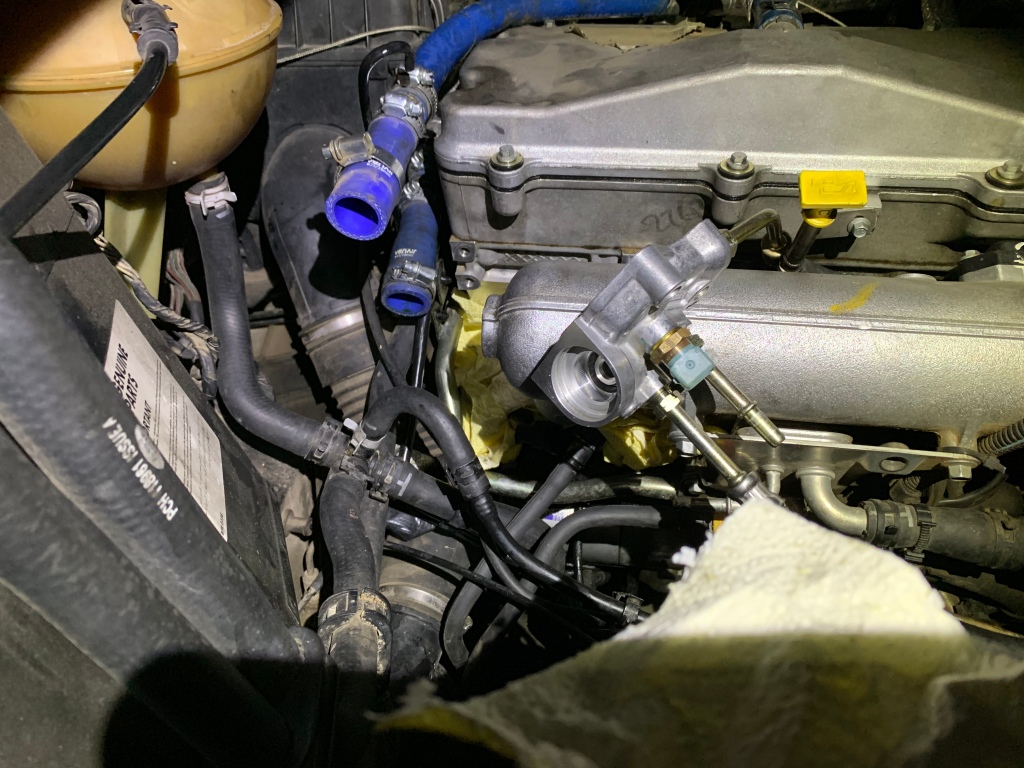
Just did this upgrade , pretty straight forward , some effort to take the originals out but once done it easy to fit the new ones in
Only trick in my opinion when you work your way to take the originals out start with the turbo hose then the intercooler one and when you put the silicone work your way the opposite direction.
silicone hose kit includes 3 hoses: Turbo to intercooler pipe, intercooler pipe to intercooler and intercooler to inlet manifold.
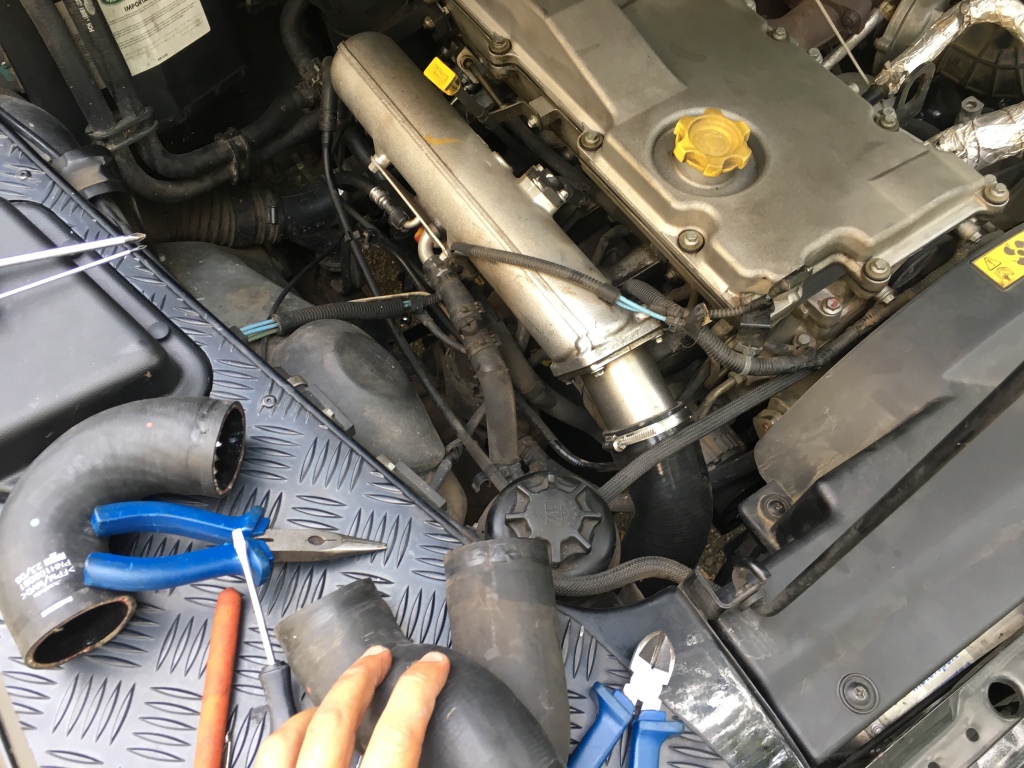
Price 373 Euros to Portugal, my next project, bought from ireland driverite talk to Mr. Vivek
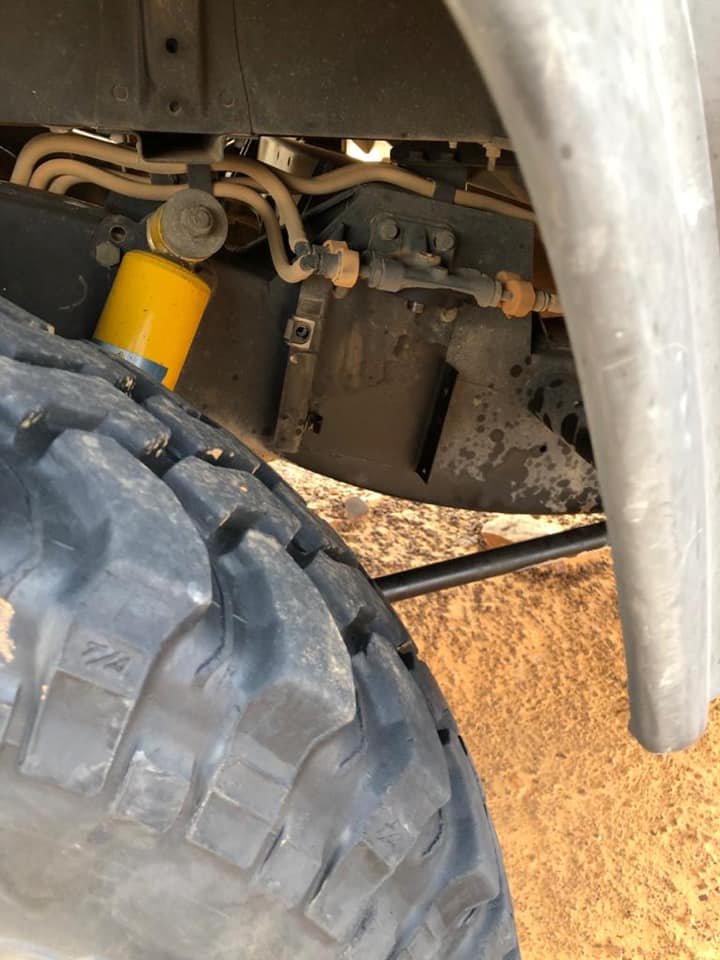
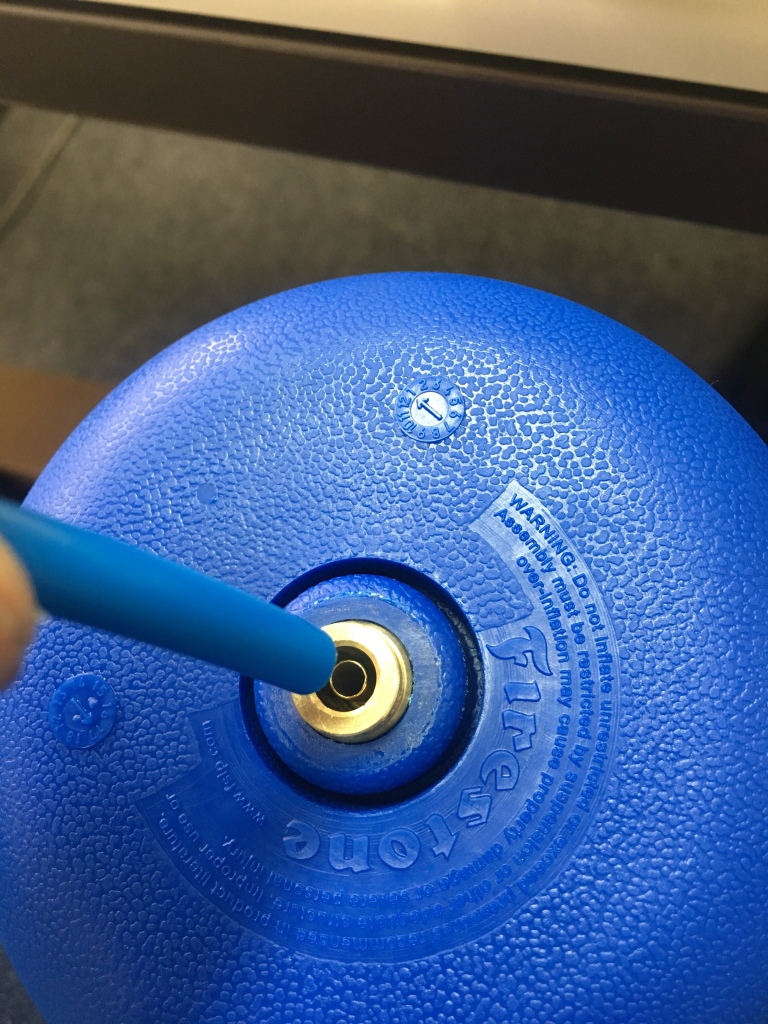
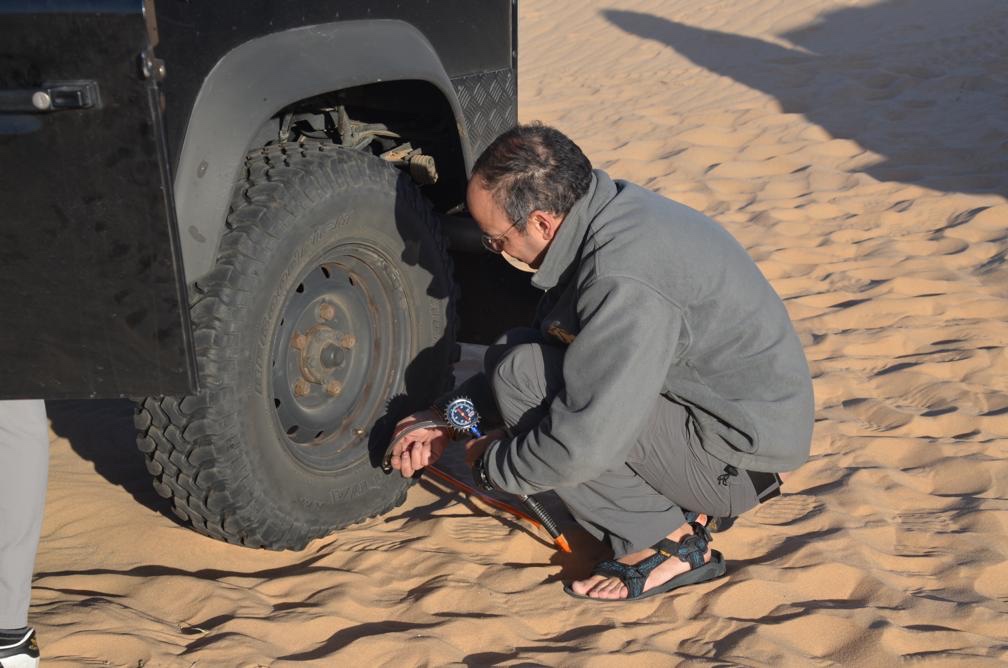
High Pressure kit for Heavy Towing and/or vehicles being loaded to Maximum Allowable Weights
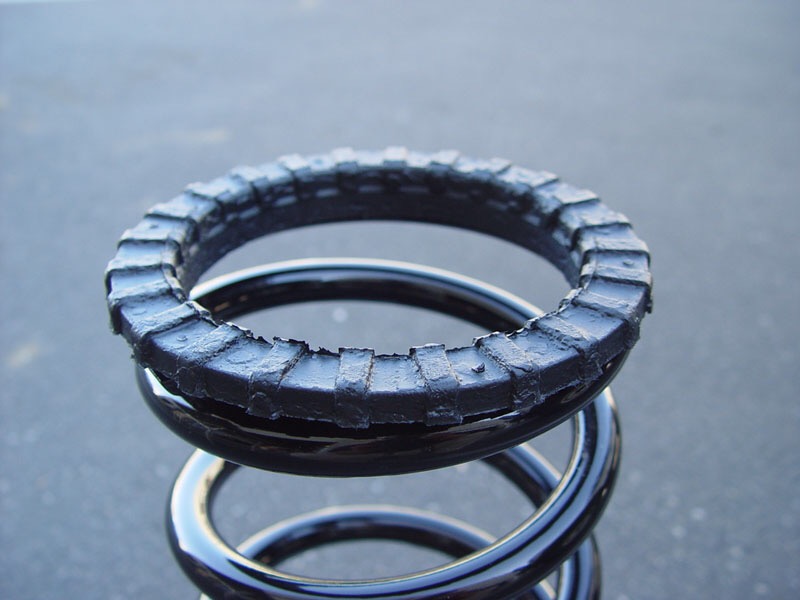
Airbags are fitted inside coil springs to provide load carrying assistance and are easily inflated or deflated to cater for the vehicle loading
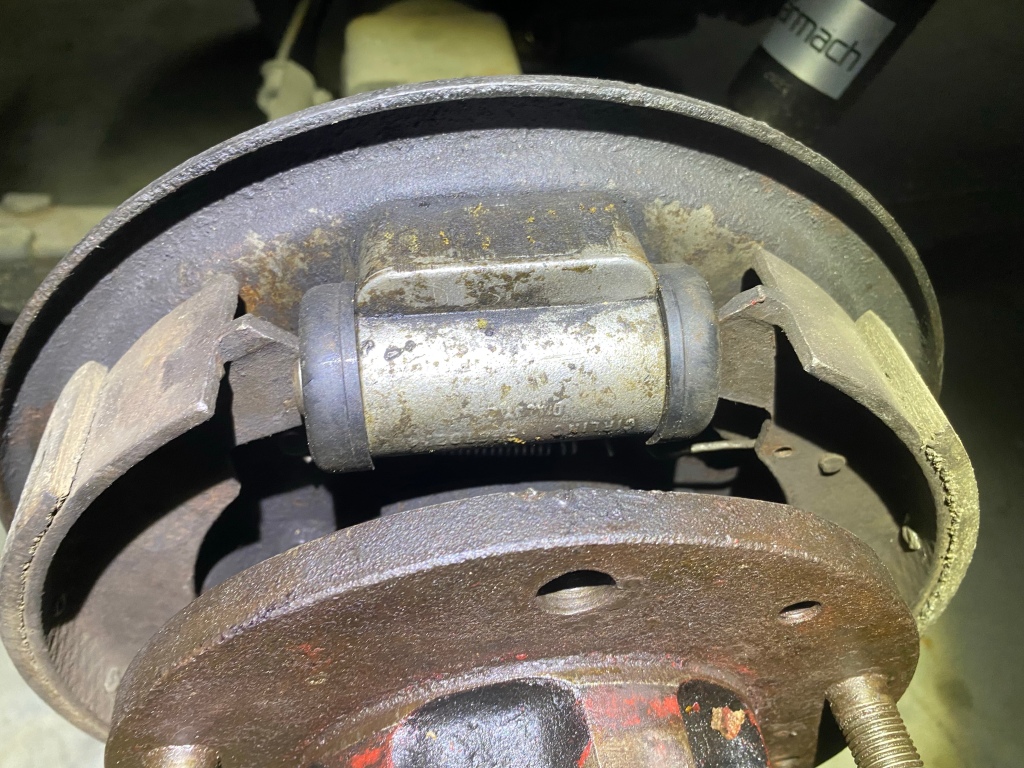
My experience regarding the fitting:
1- the best way to insert the airbags is effectively lift both rears and unscrew the rear wheels.
2- you will need to deflate the balloons as much as possible and block them the a piece of the blue tube and the red plug then you squueze them by twisting.
dont release the read plug until you put the sleeves in position
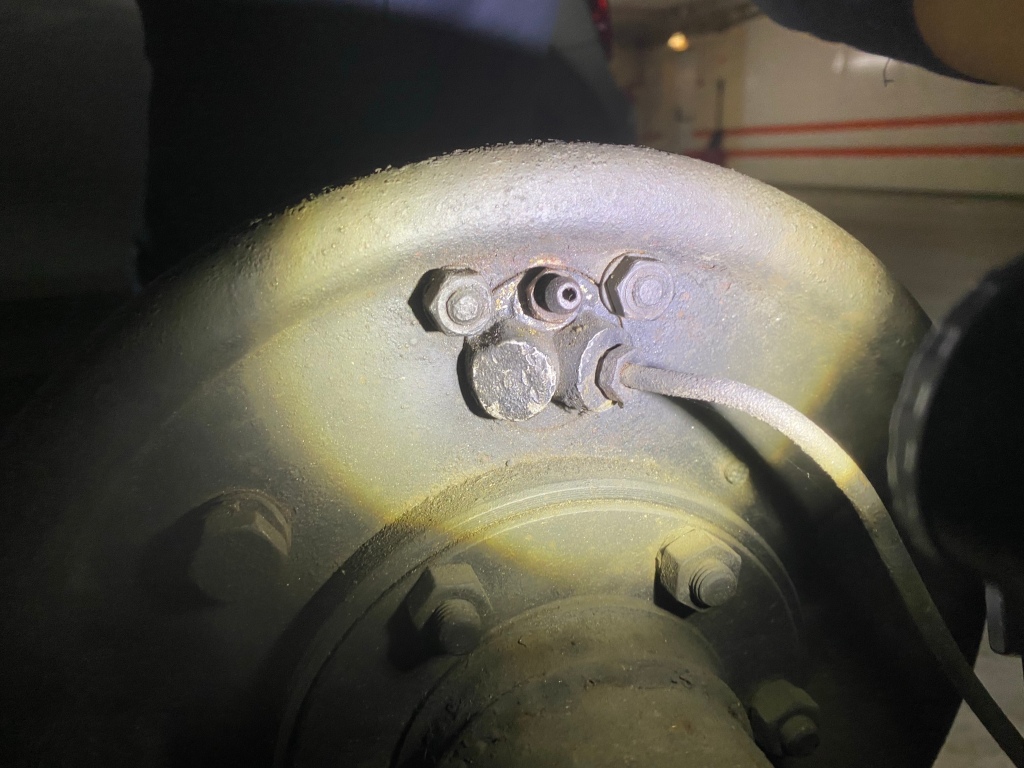
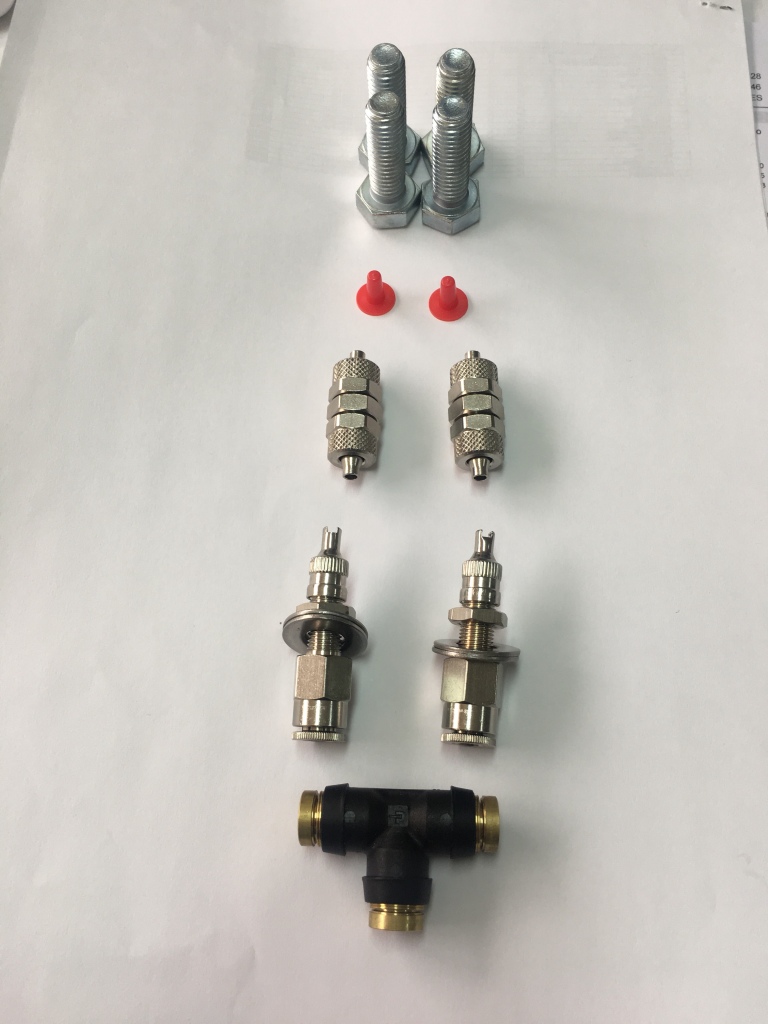
3- i was able the work out the rooting in my defender 90 as i used the T junction, which means i just needed one inlet as i will inflate both balloons with the same pressure on each side.
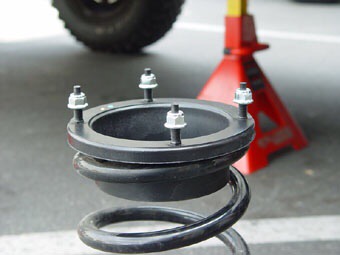
4- I fitted the main valve on the rear crossmember of the landy which has already hole ready.
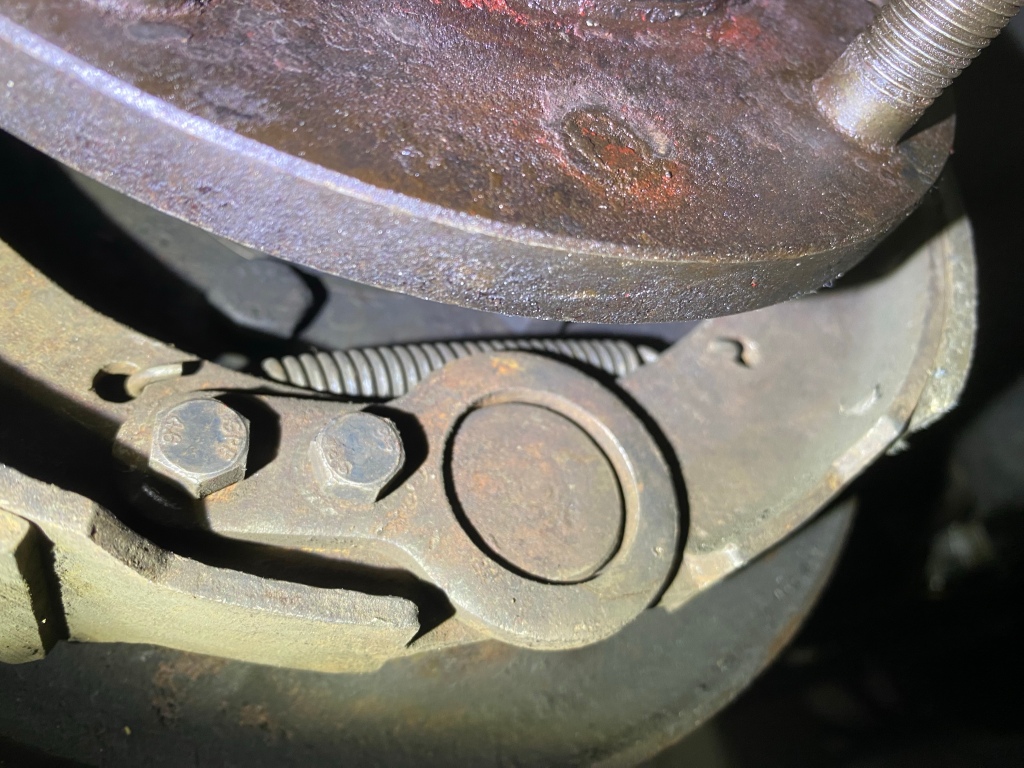
5- i have fitted the balloons with the sleeve to protect the balloon.
6- i recommend that you protect the blue tube by using some kind of sleeves to protect from heat of exhaust and dirt.
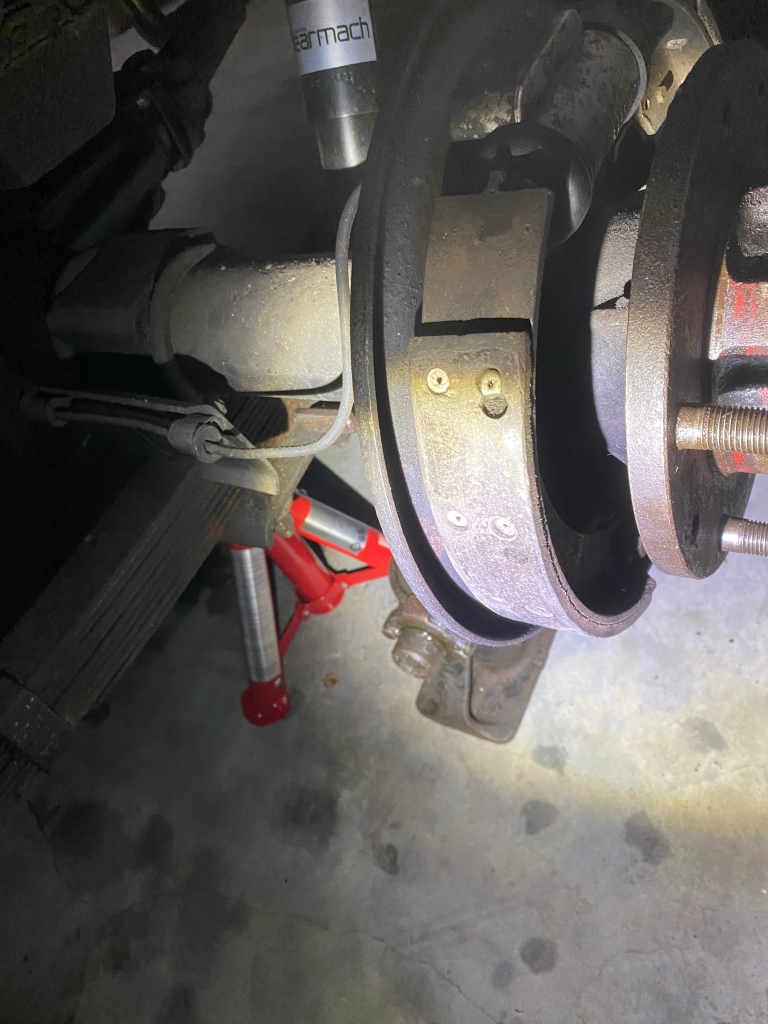
7- While you are working on the line allow line travel therefore dont cut exactly to size.
8- minimum inflation 5 PSI Max 35PSI.
My YouTube after i fitted and inflated to 35PSI max inflation, car was not landened i increased in height a couple of cm – i believe something like 58cm to 62cm.
I again think this works on leveling the weight on the rear rear springs by not allowing the coil to compress with the weight hence keeping the landy fro sagging.

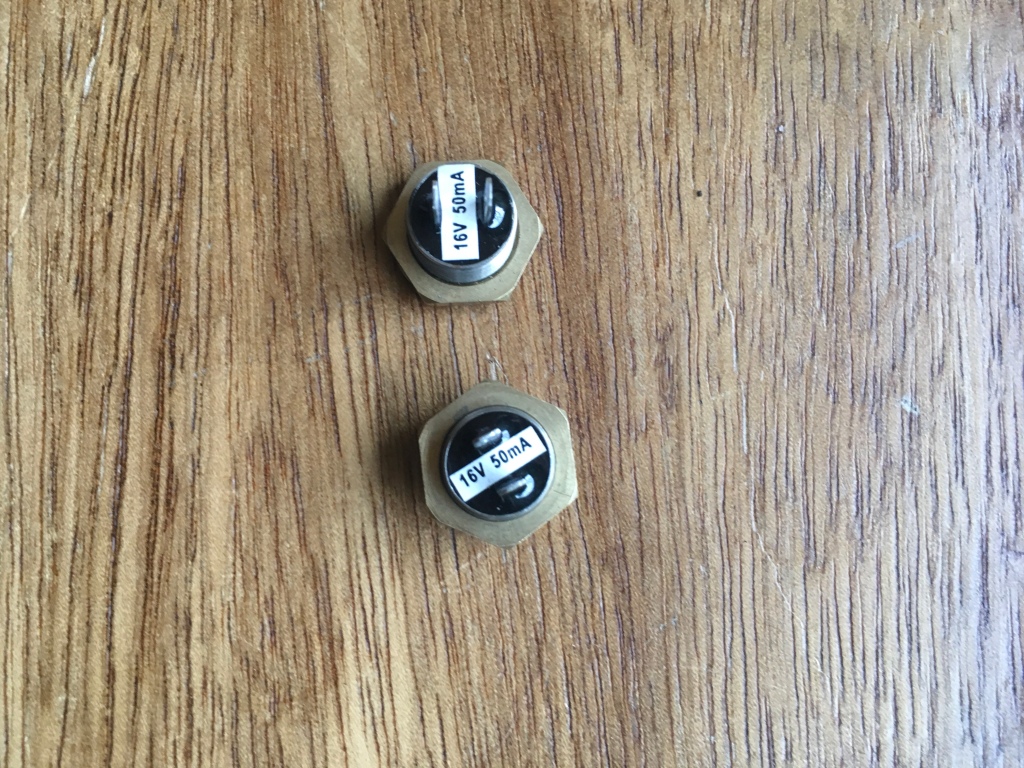
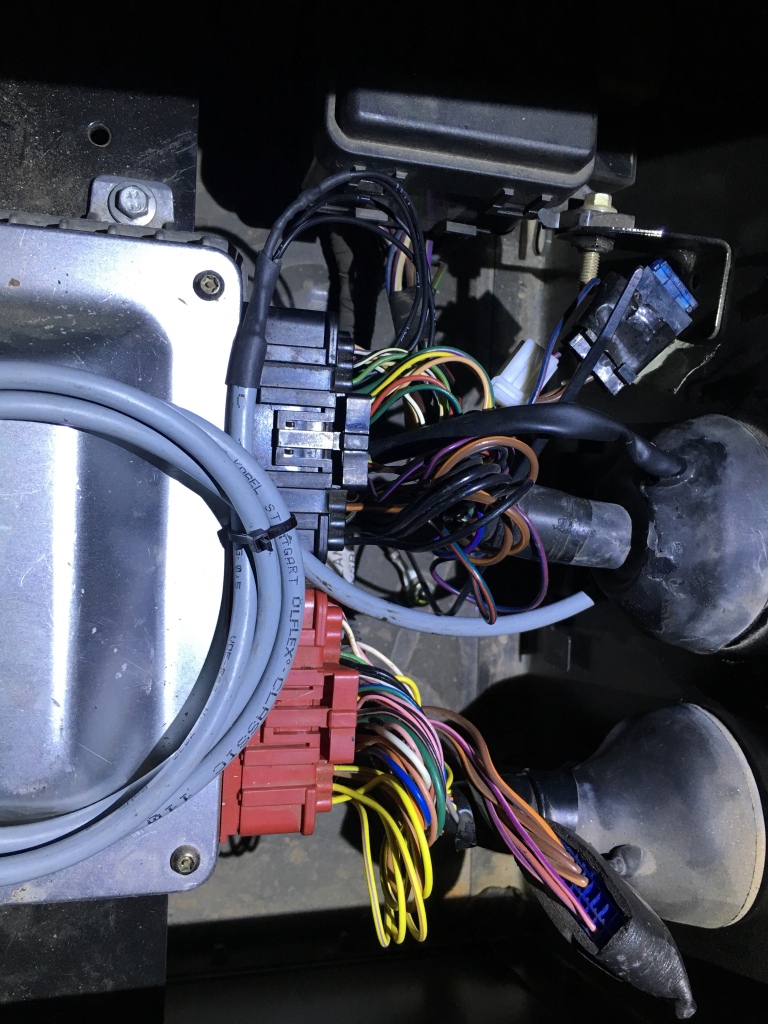
adding cruise control to a 2005 td5 with programable ecu…..
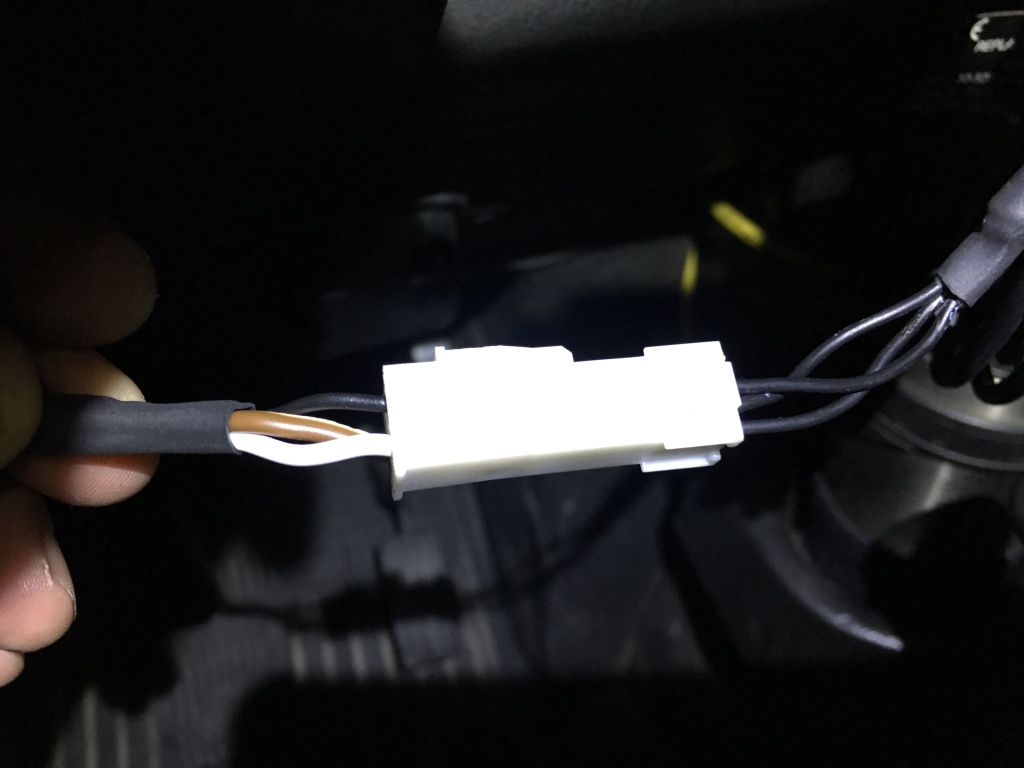
Hahahah …..they made 2 the buttons in black ( go figure) ….lucky new buyers
The 2 buttons one to set and another to reset/ resume
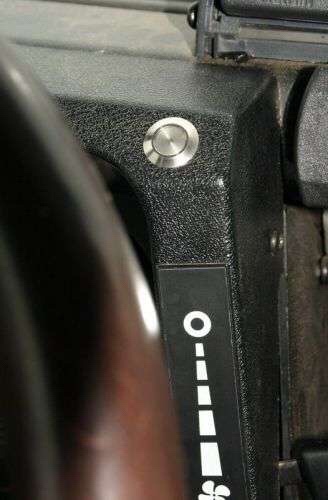
The brown wire for reset and resume the white wire for set …….should figure the position of each button on the dashboard
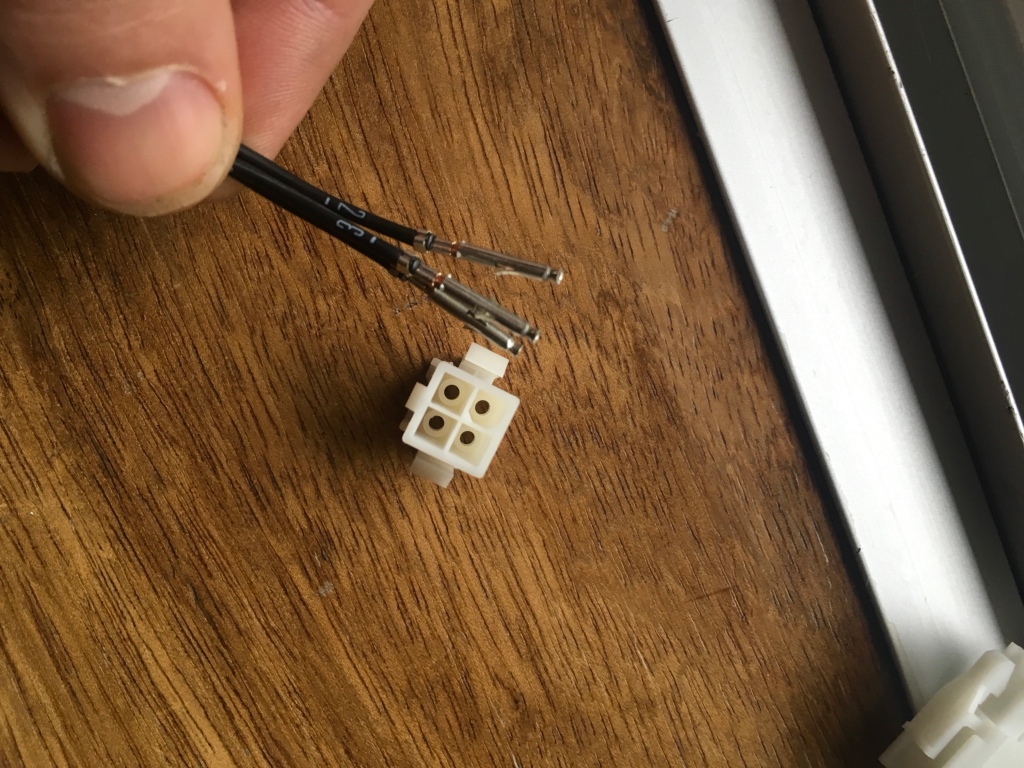
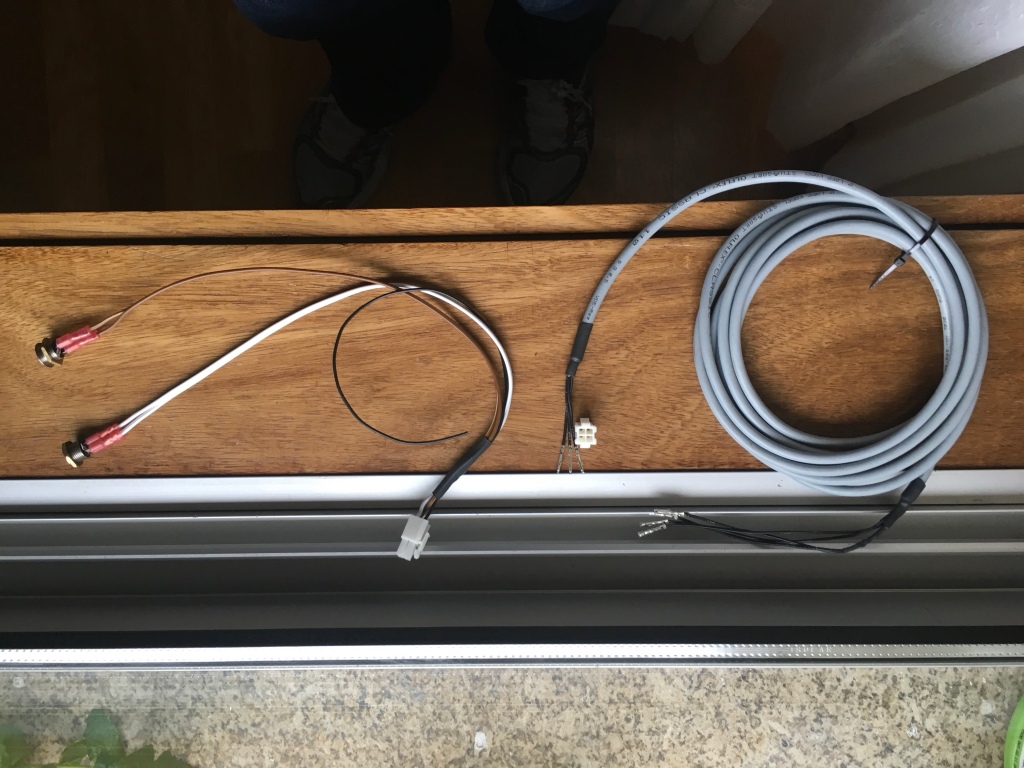
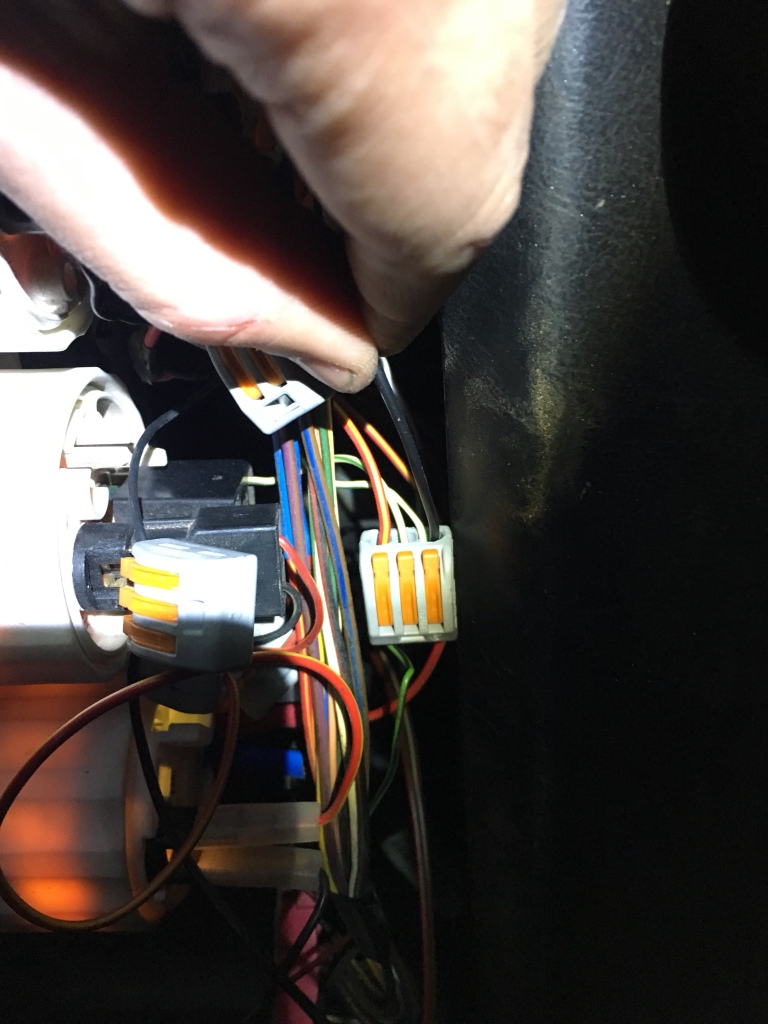
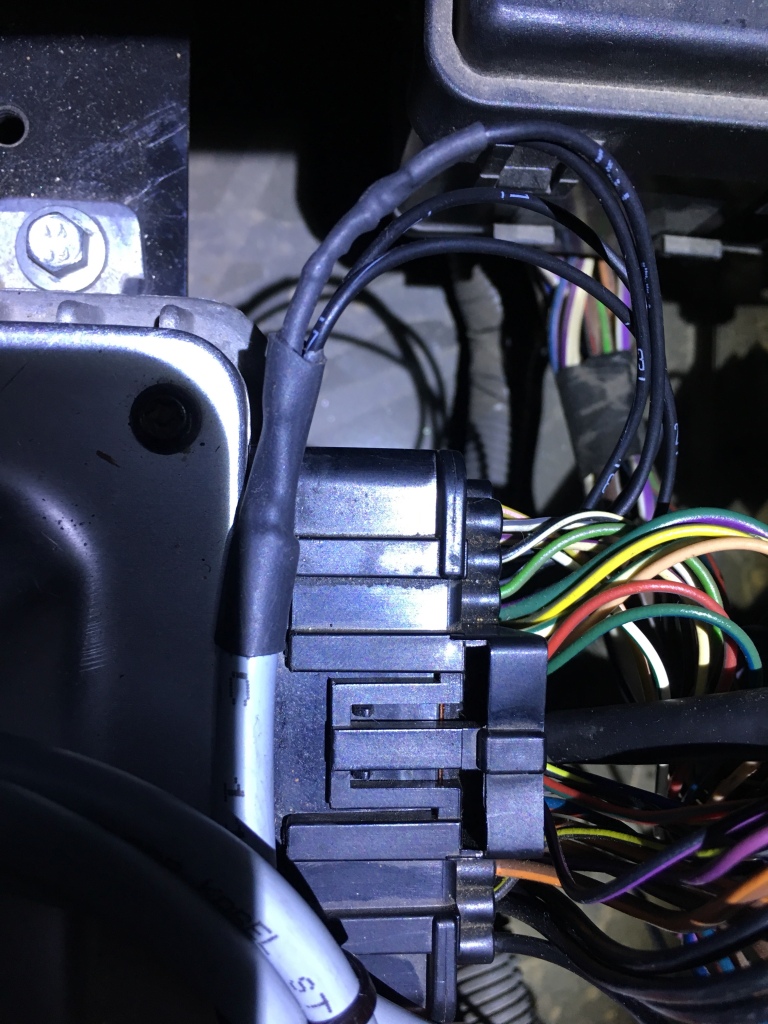
the three thin plugs are sensitive , cover them while you are taking the from the ecu all the way to the dashboard
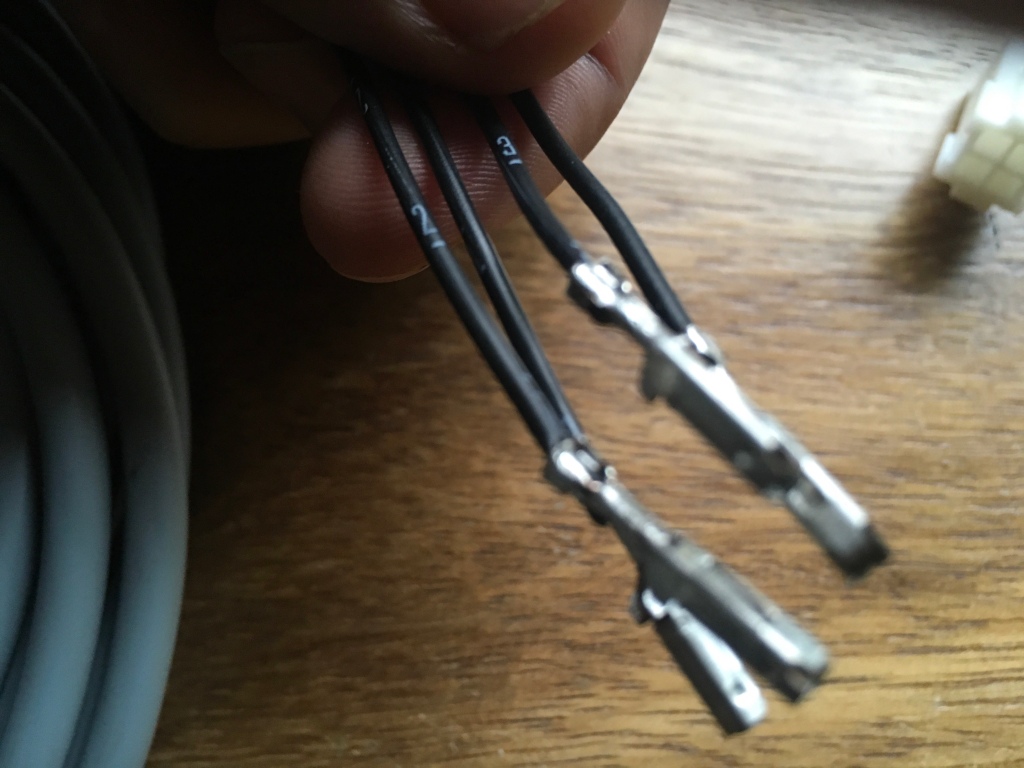
Again the wires are numbered as well for is position in the white plastic plug
The wires are numbered so that you cannot really miss, just locate the correct location in the black plug
Black wire is to hook it up with an ignition feed wire
Done


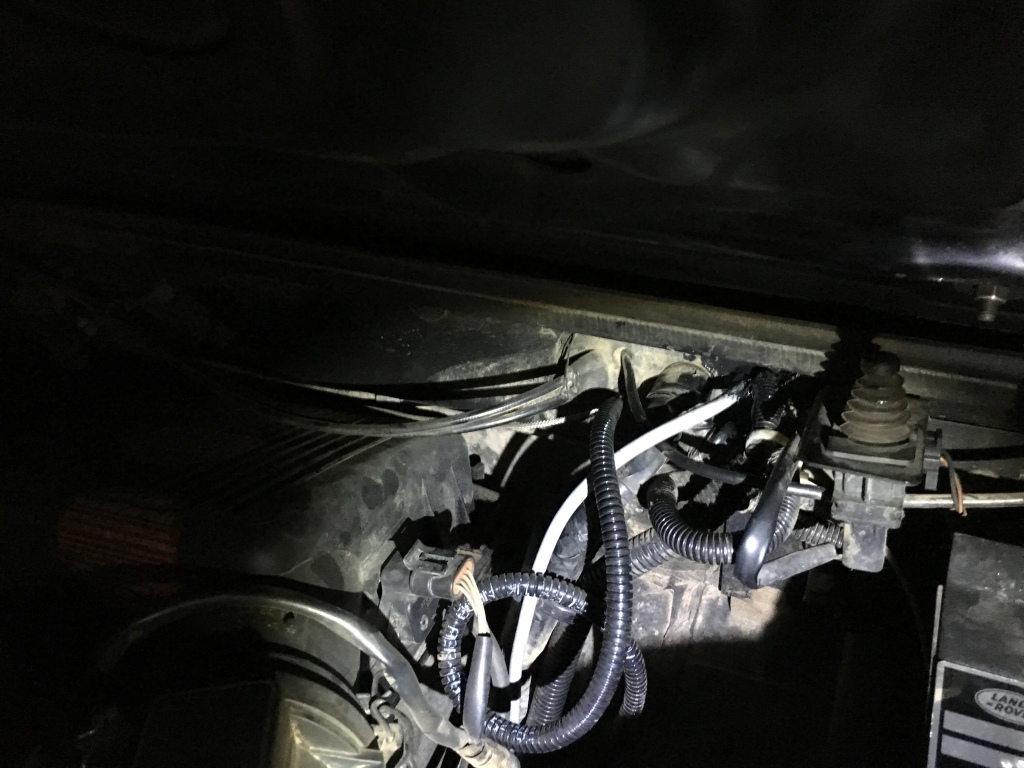
Now I need a test drive….crossing my fingers
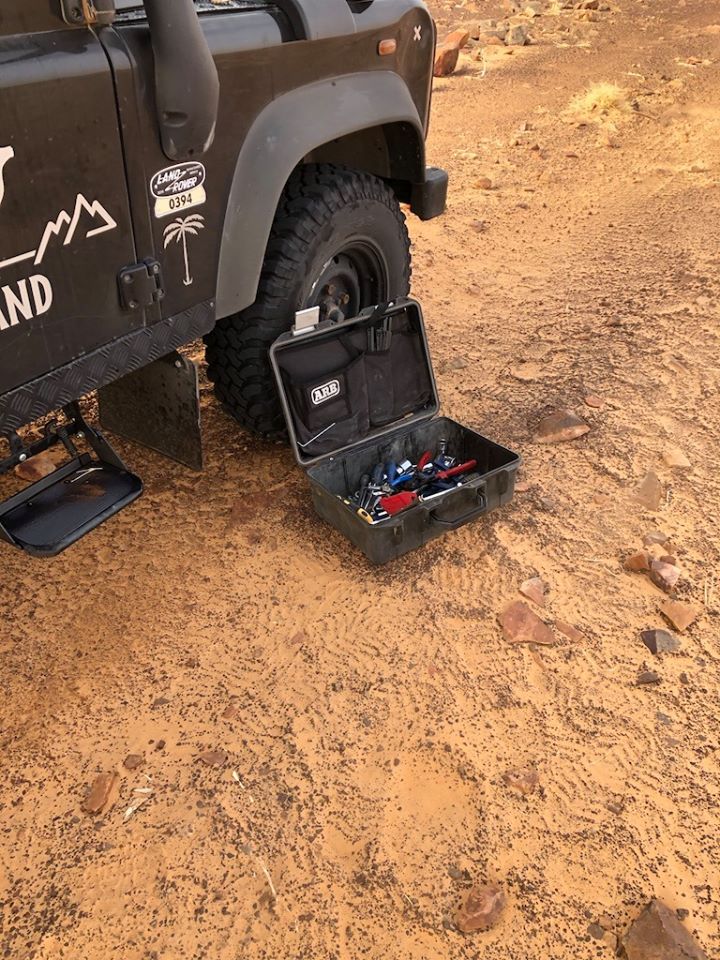
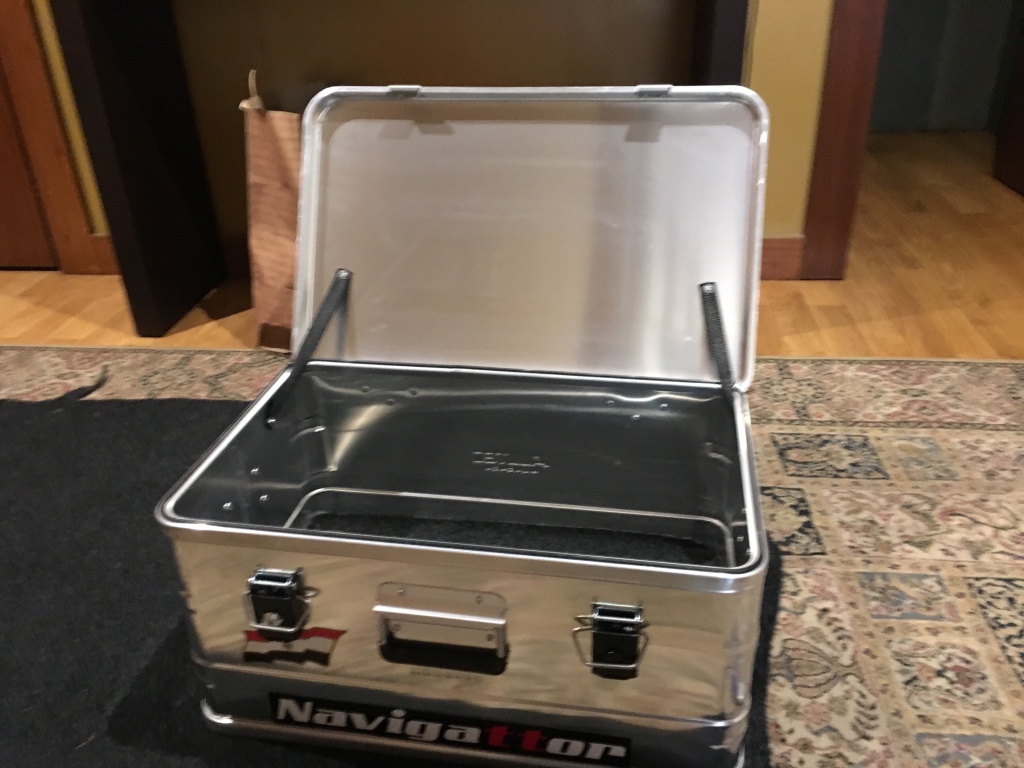
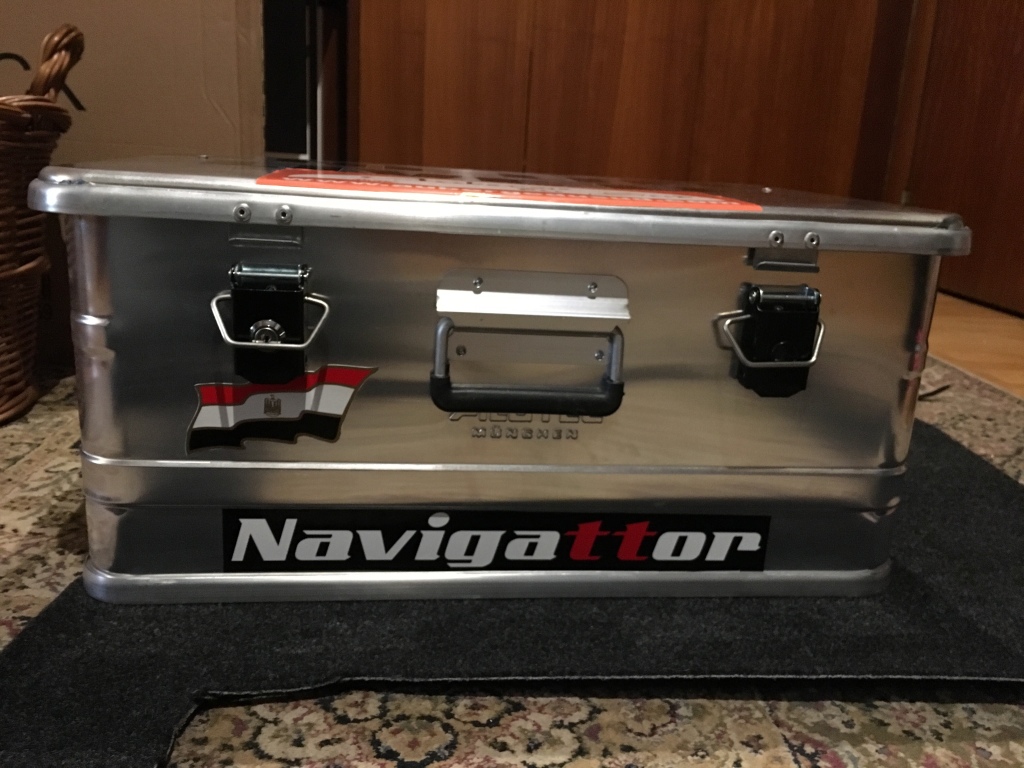
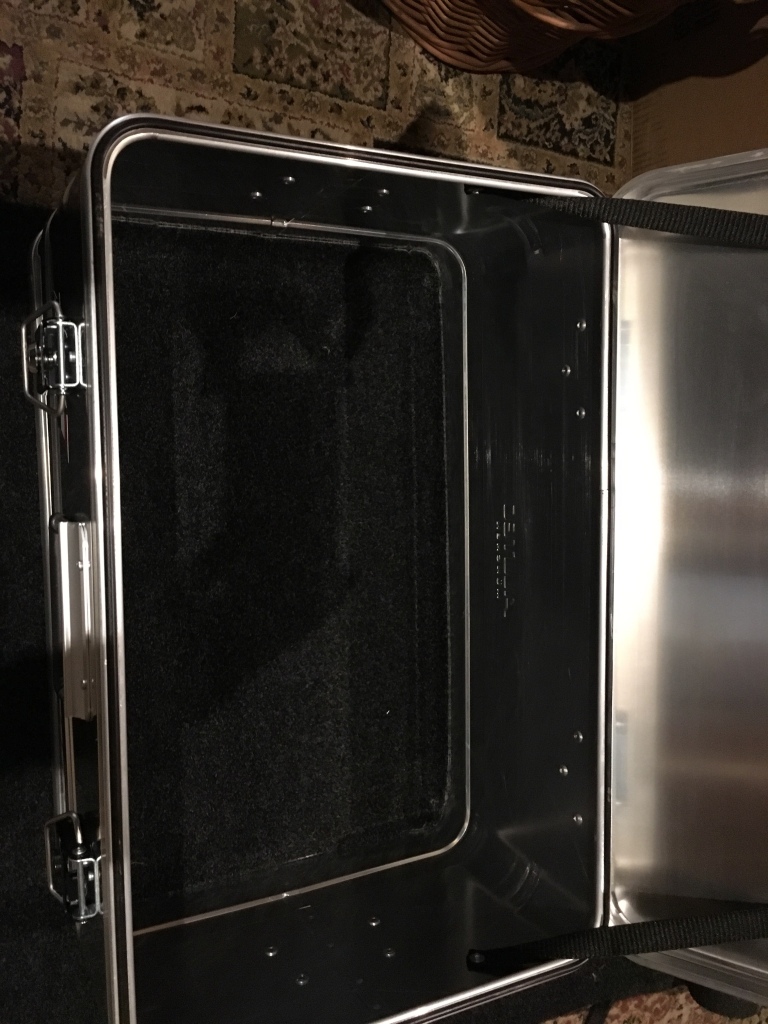
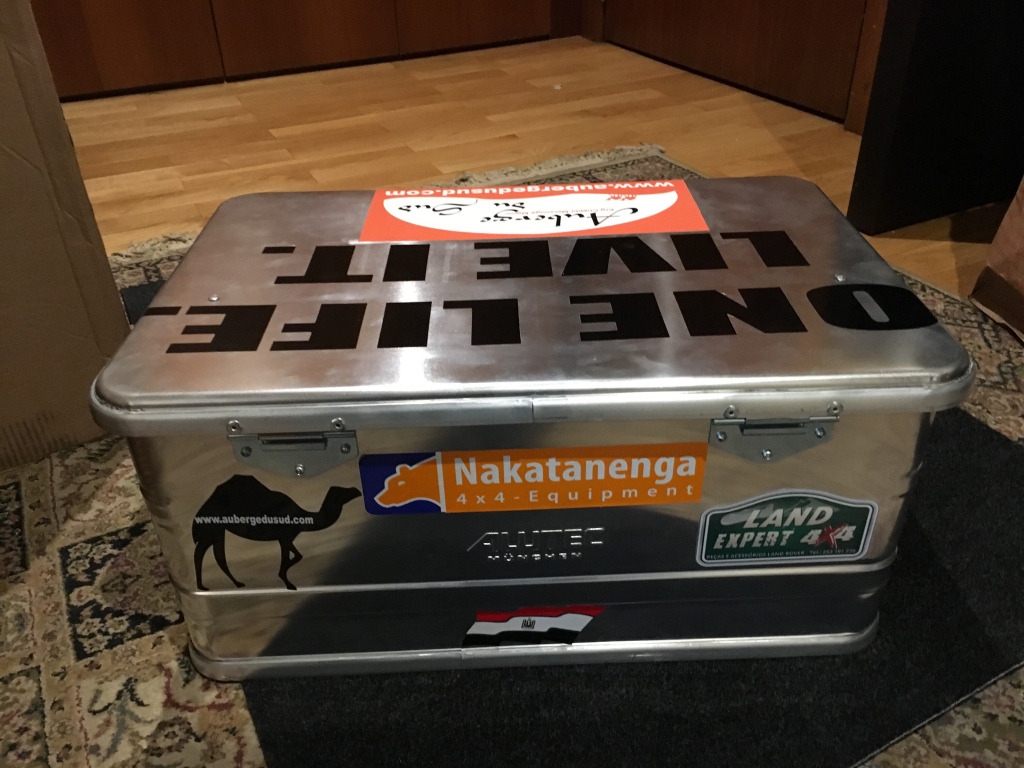
Got this Aluminium box from Amazon.de from a good brand Alutec
aluminum Alutec 30045 Dimensions (L x W x H) 582 x 385 x 277 mm Material 1.0 mm
Contents: 47 liters
Weight: 4.2 Kg
Dimensions: L 582 x W 385 x H 277 mm
Interior dimensions: L 550 x W 350 x H 245 mm
Material: Full aluminum sheet
Plus I got the lock for it
You find a quick explanation on here
http://www.alutec.net/en/c-box-series.html
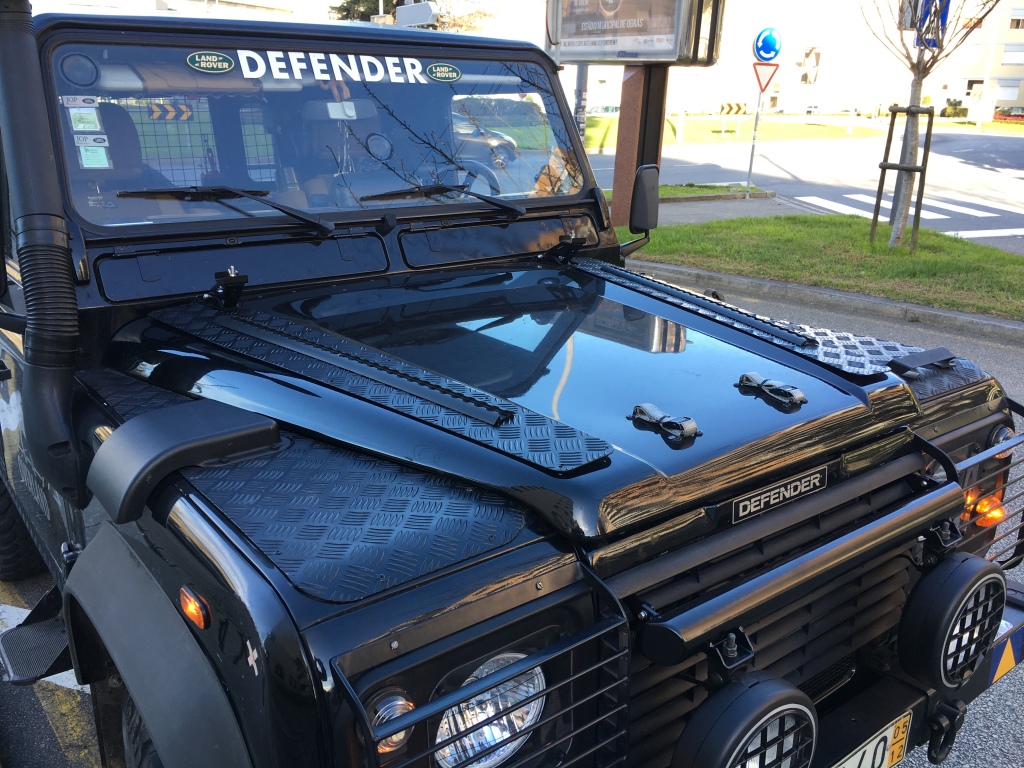

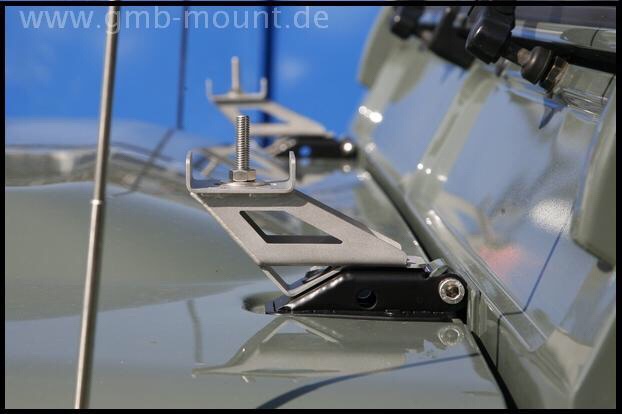
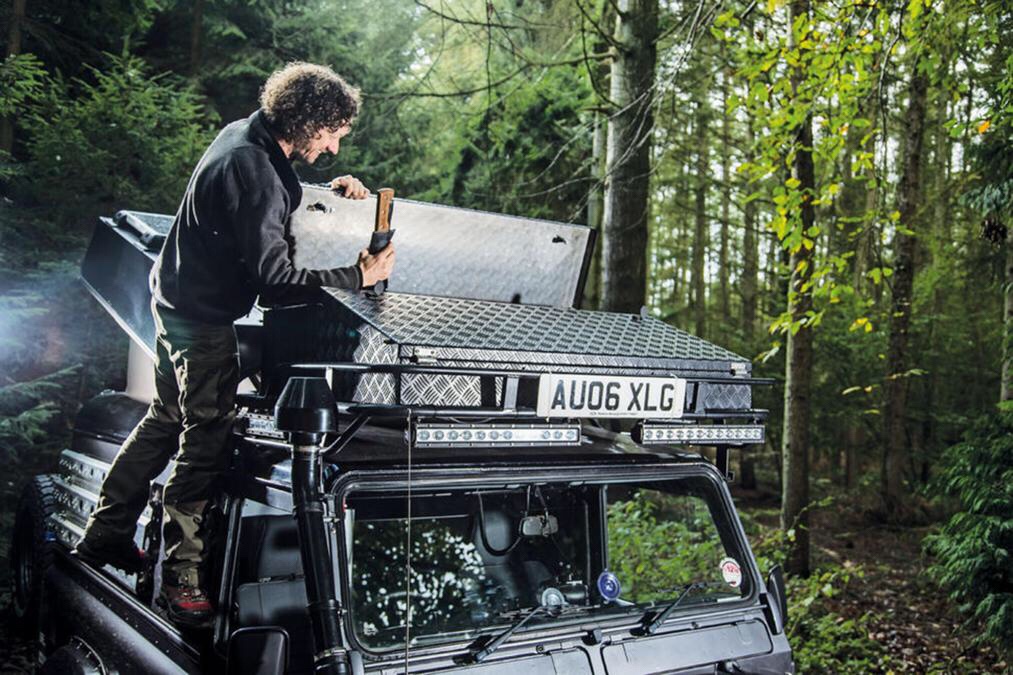
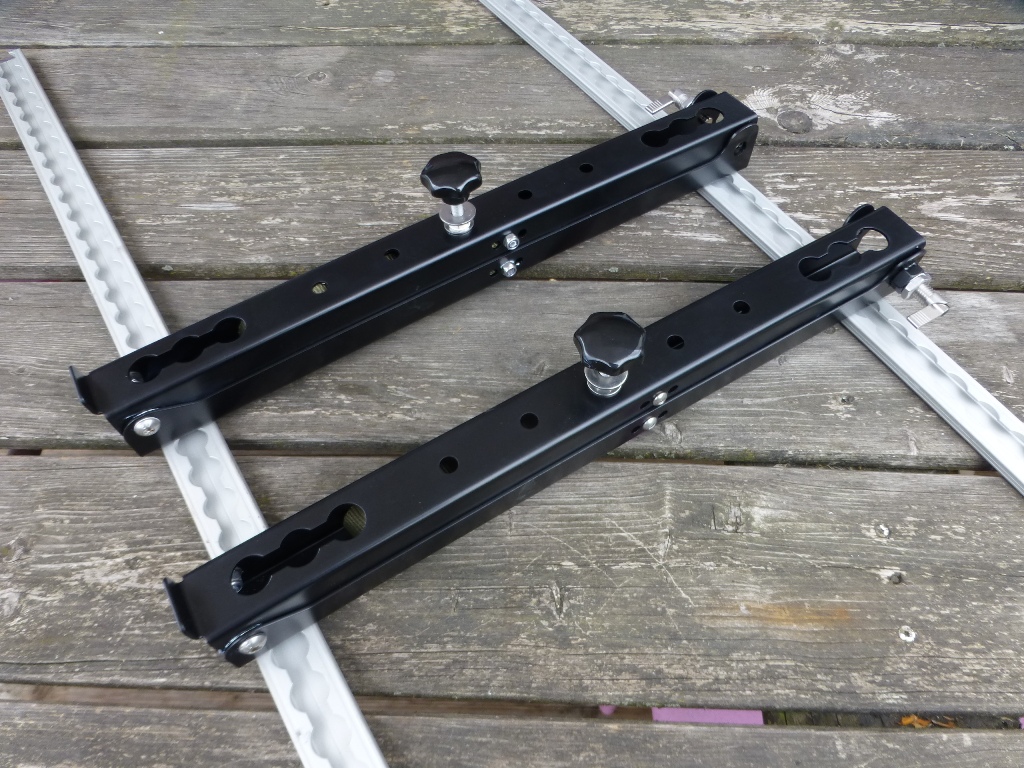
For the aluminium rail you can spot on the bonnet on Errol Defender above , I am preparing a project on that but I will do it on top of a chequer plate I found in Nakatamenga to be more solid as the thickness of the bonnet is not strong enough without a back support but with a chequer plate it would do the job
1-The rail was bought in black from navigattor
2-You can find it here in black
Nakatamenga bonnet chequer plate
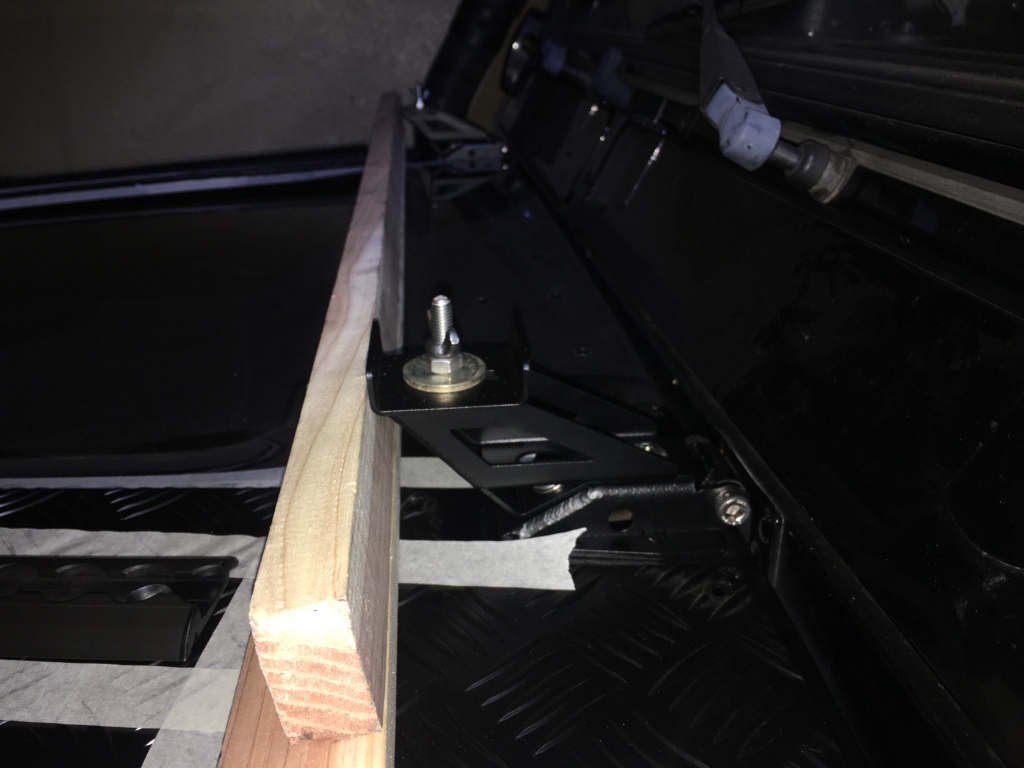
Measures are everything need to be patience and use of tools…start planning the position and angle you require

Use paper stripes to hold the position
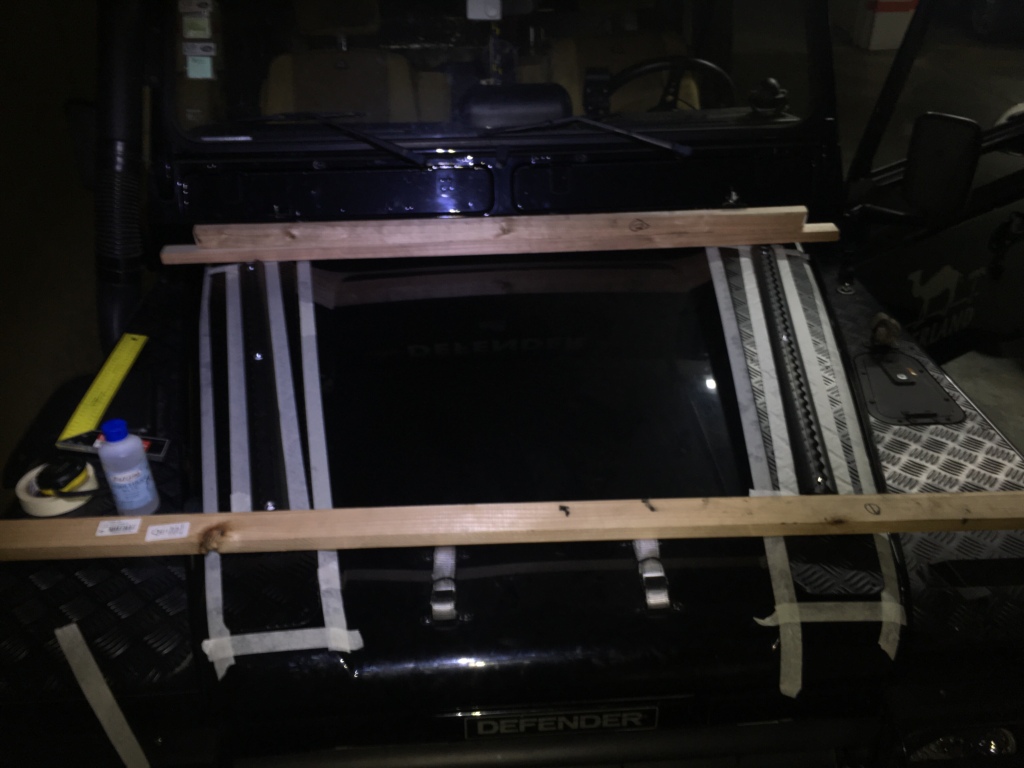
making te holes on the hood is a job that cannot aforad mistakes to center 3 holes
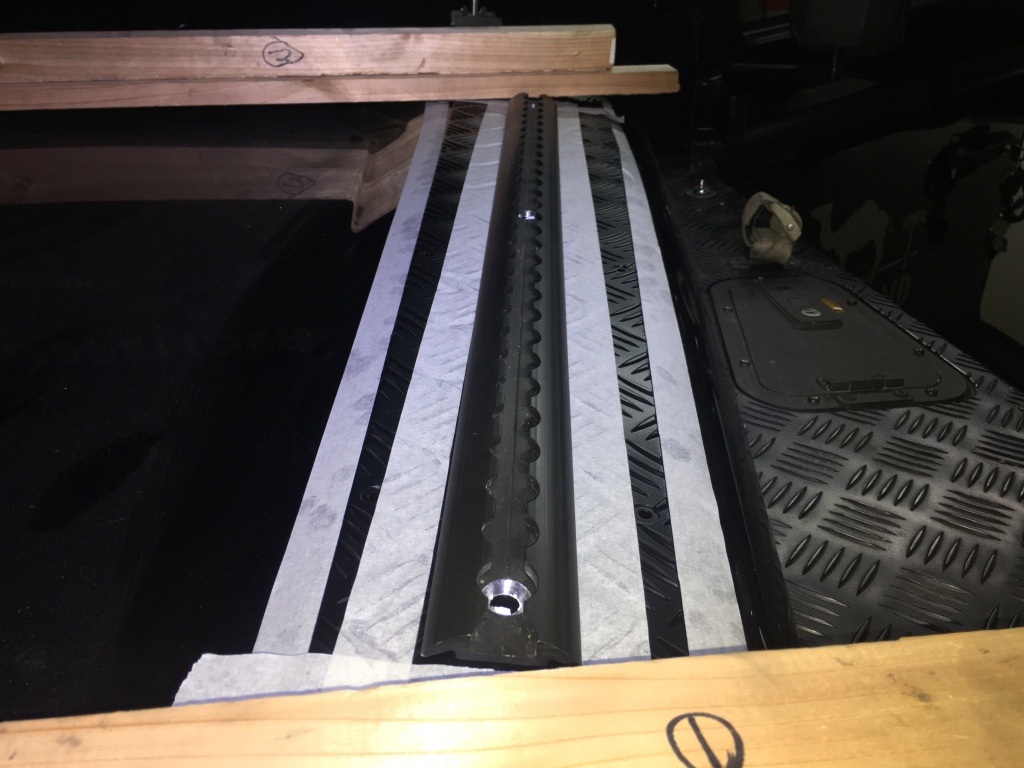
Not bad for the first one
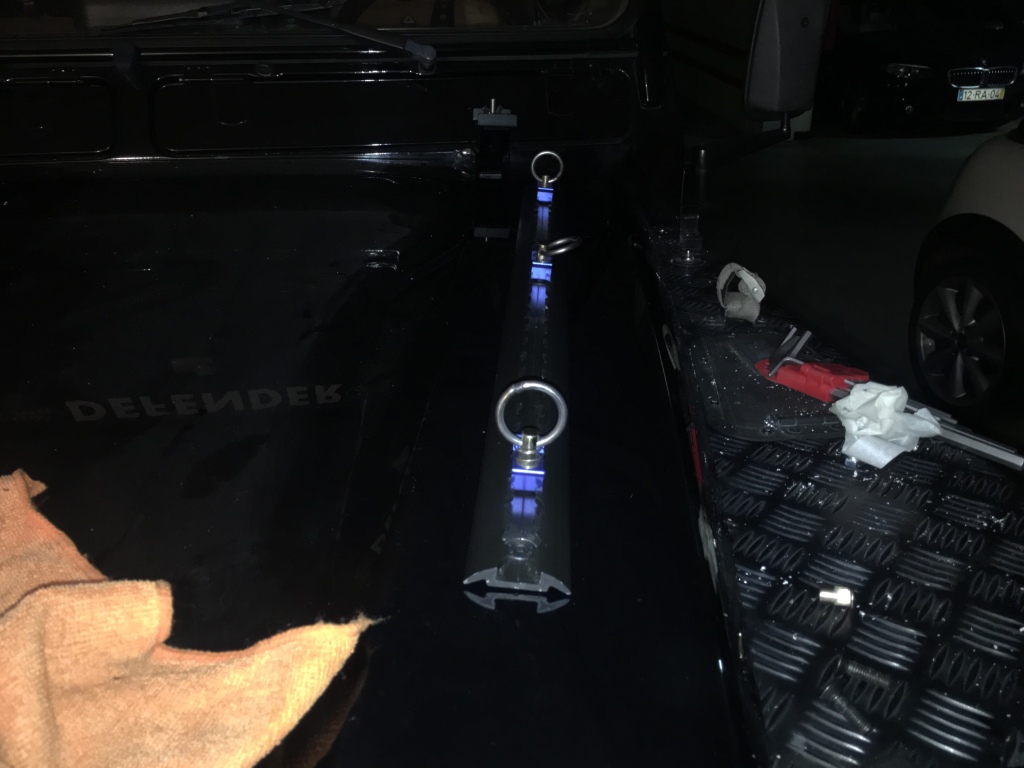
The nut rivet in action

This is the chequer plate I found…….
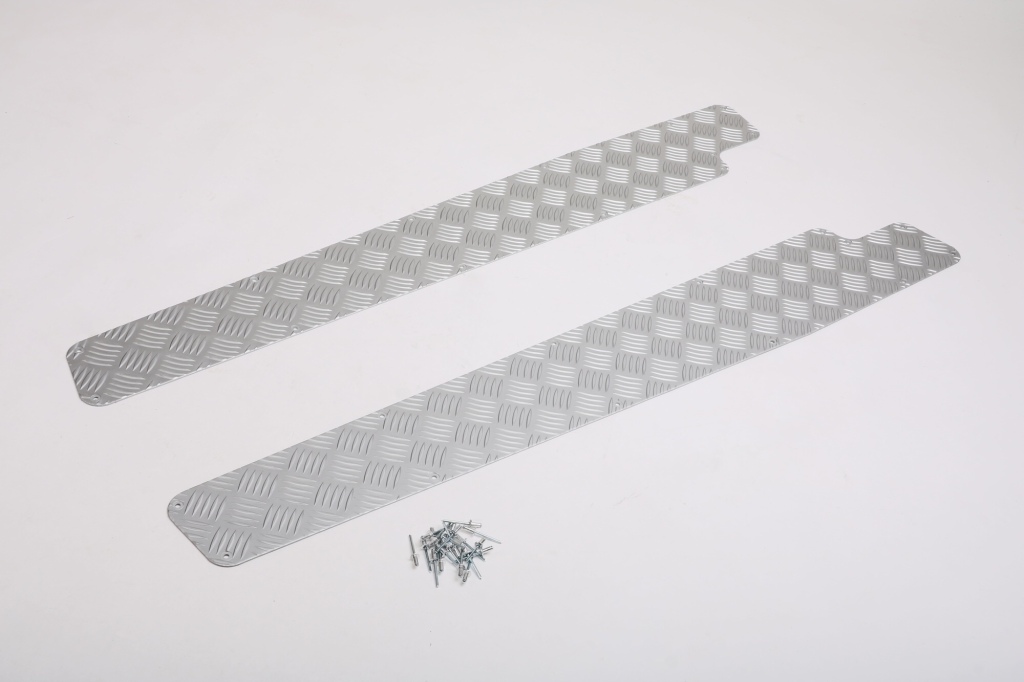
I liked this one but could not find it anywhere
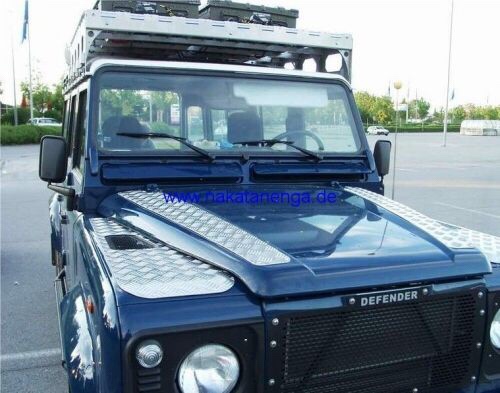
This is how it looks on the site
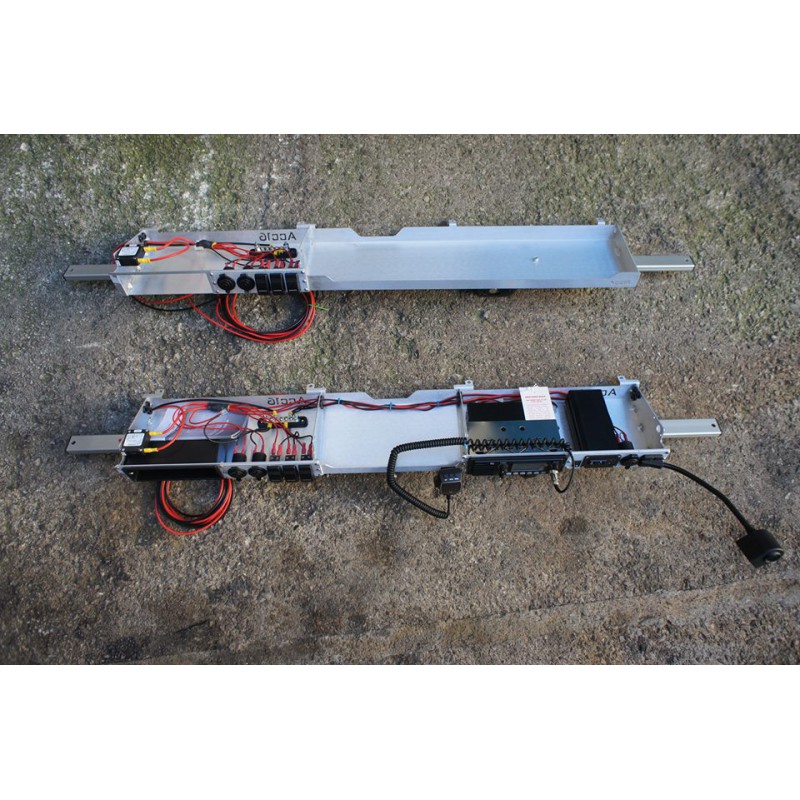
Purchased the roof console by the French supplier ACC 16 which have a roof console with modules that I am interested in, my configuration was basic

Check Below website
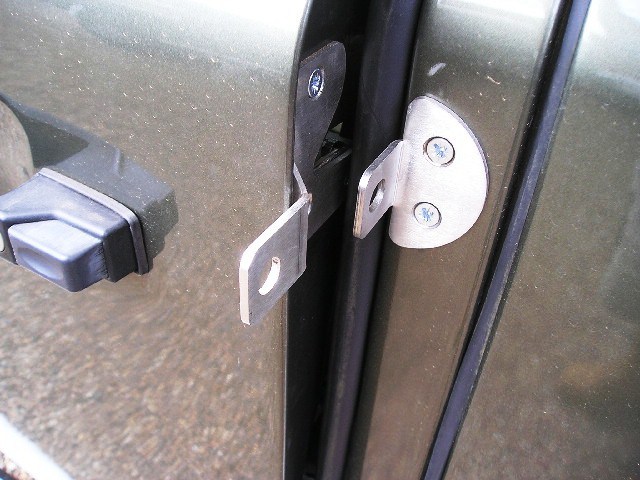
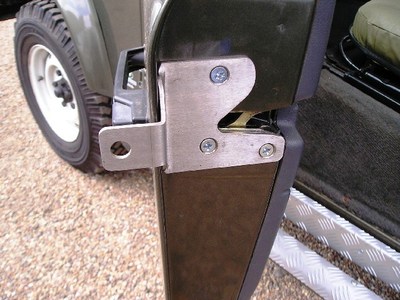
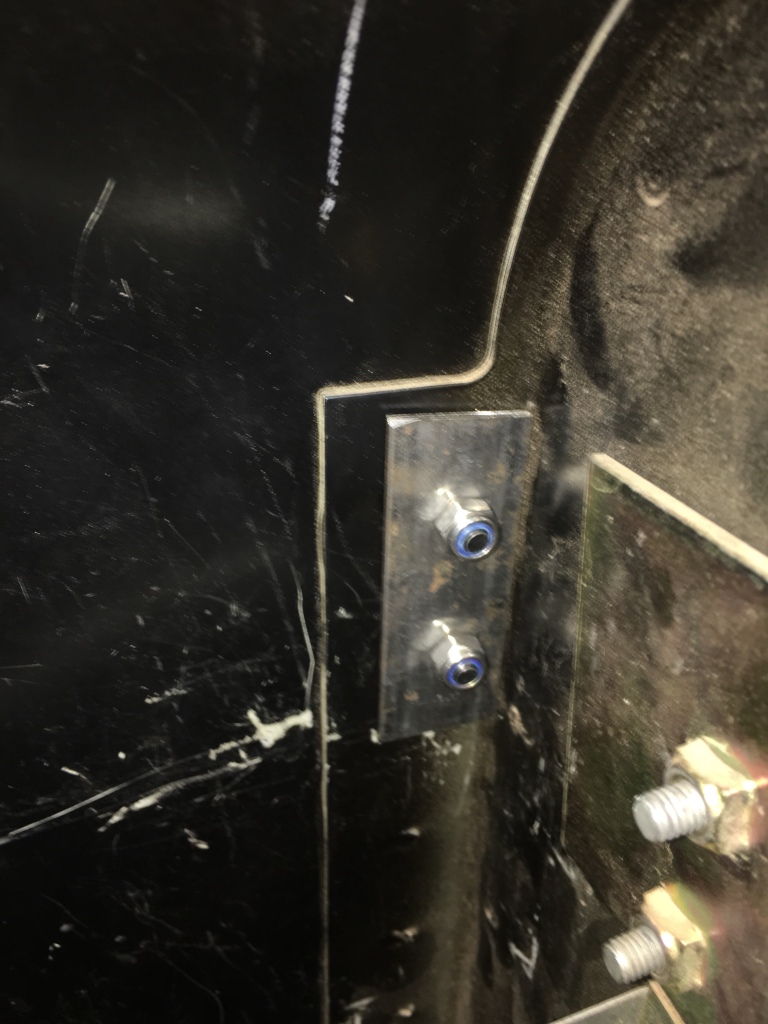
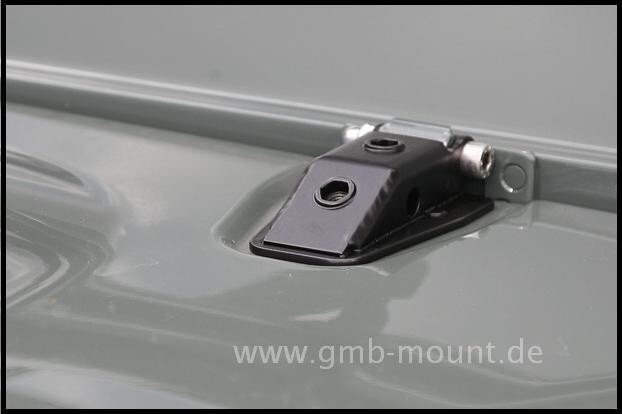
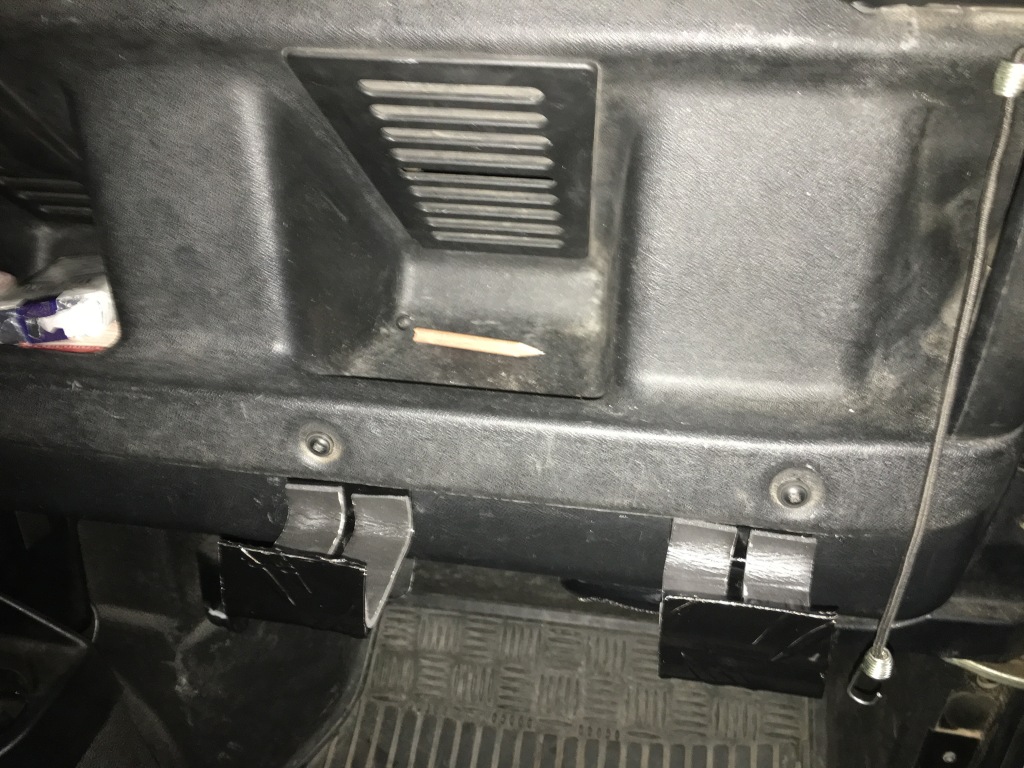
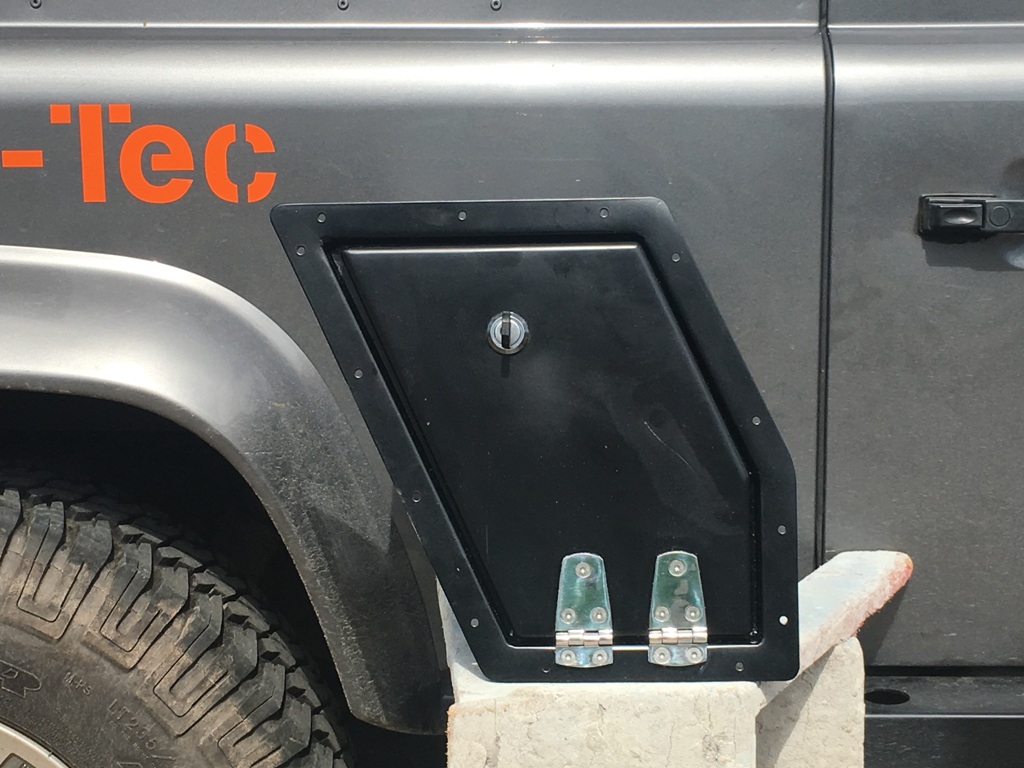
I am liking this idea as well to securing a bit more the landy driver and passenger side doors from a quick break.
One side is a bolt on using the same original hinge bolts and is a straight fit.
On the other side will need to make 2 holes and will need to secure the back side with 3 mm metal plate.
You have access to the back panel at least on my defender 90.


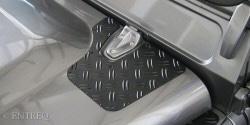
The advantage of this floor safe is that there is no cutting, it is a straight fit.
If you have a defender TD5 you will need to buy the adjustment plate 20€ and the safe itself 328€ from the passenger side only as this is what will fit the td5 ( no driver side footwell safe) take care of this issue.
Dimenssions:
Length: 297mm
Width: 266 mm
Height: 105 mm
In the case of Foleys you will need to cut through the floor and rivet it , the price though is much friendlier 99£ + 40£ transport cost and dimensions are a bit bigger
Dimenssions…..inner storage area
Length: 25 cm
Width: 20 cm
Height: 11 cm
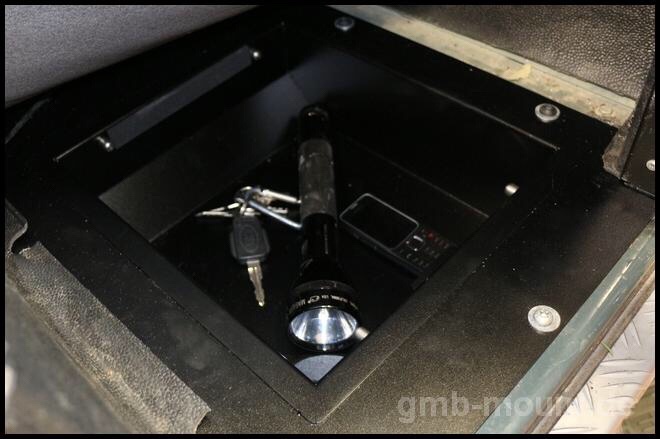
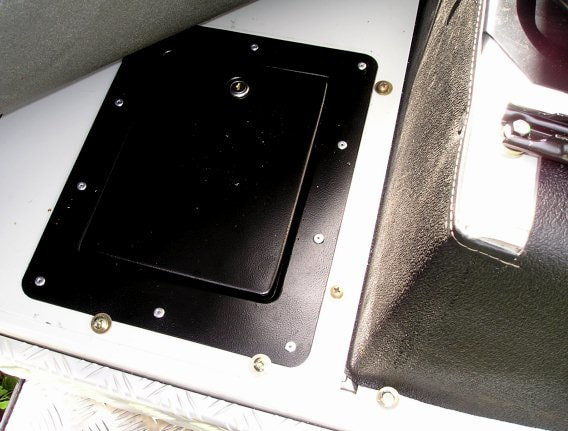
I went for foleys floor safe
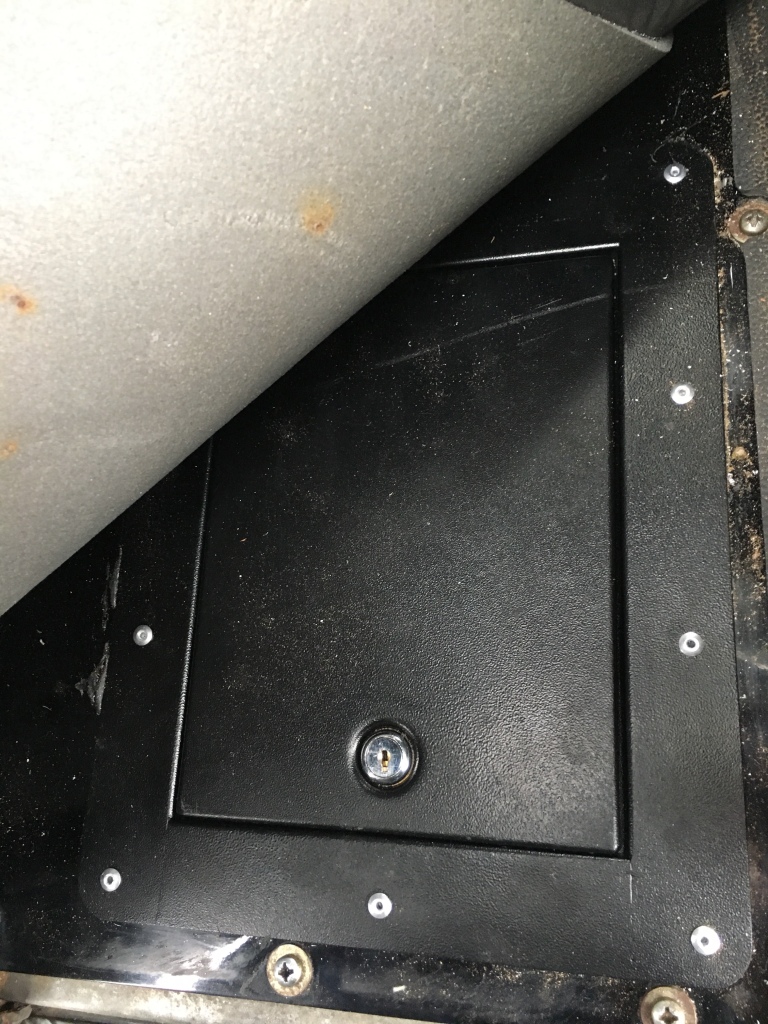
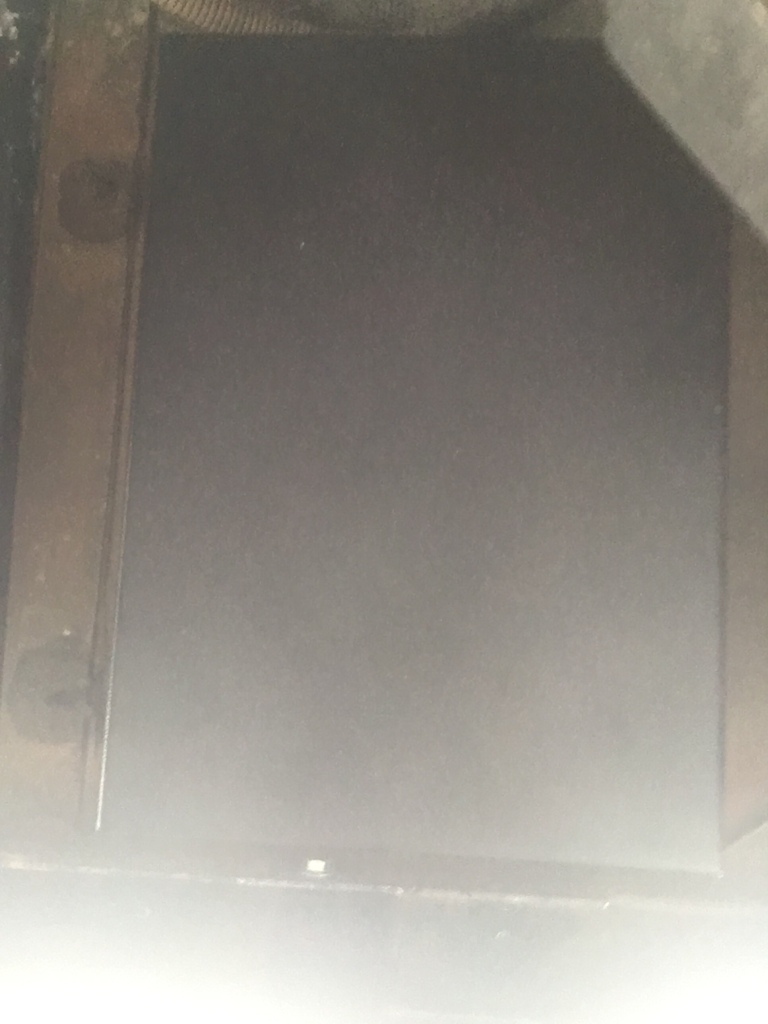
View from below
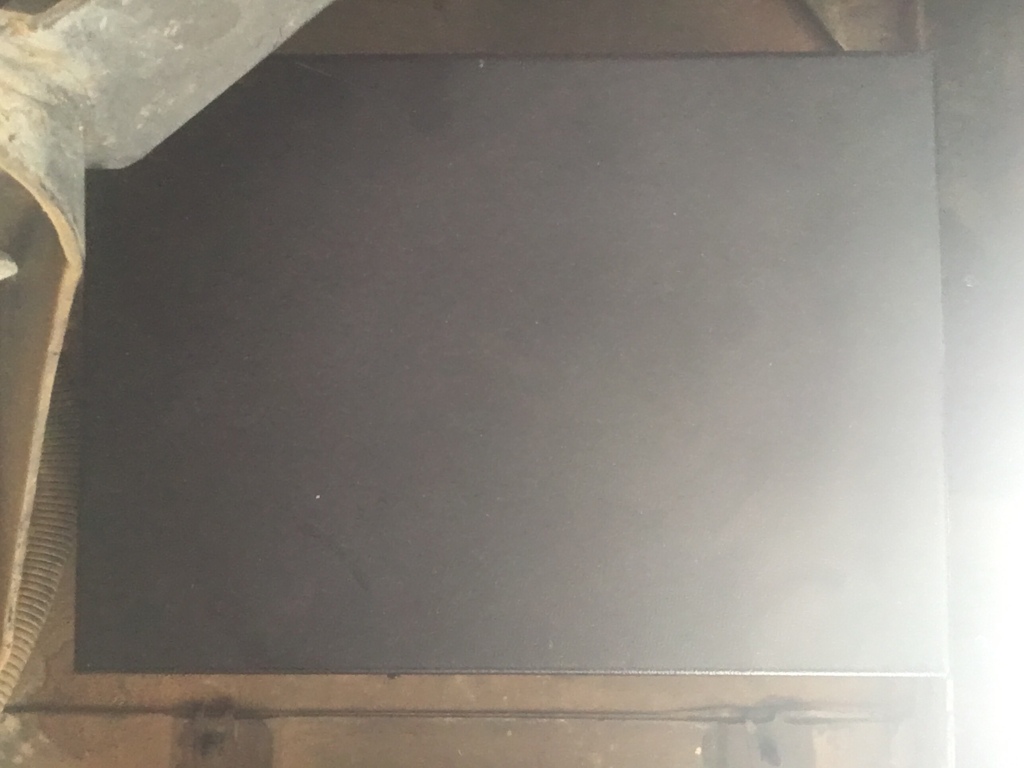
Fits perfectly underneath

My next project is the following application in which I will secure the bonnet and add the highlift application for any future need.
Will update soon ….
I already fitted the same with the following results
All went fine in terms of fitting all fitted in place had a small issue with one side with the black plastic round pieces that fit in the groove had to make it a little less with by grinding it
Also the highlift application is fine , it is a nice mode

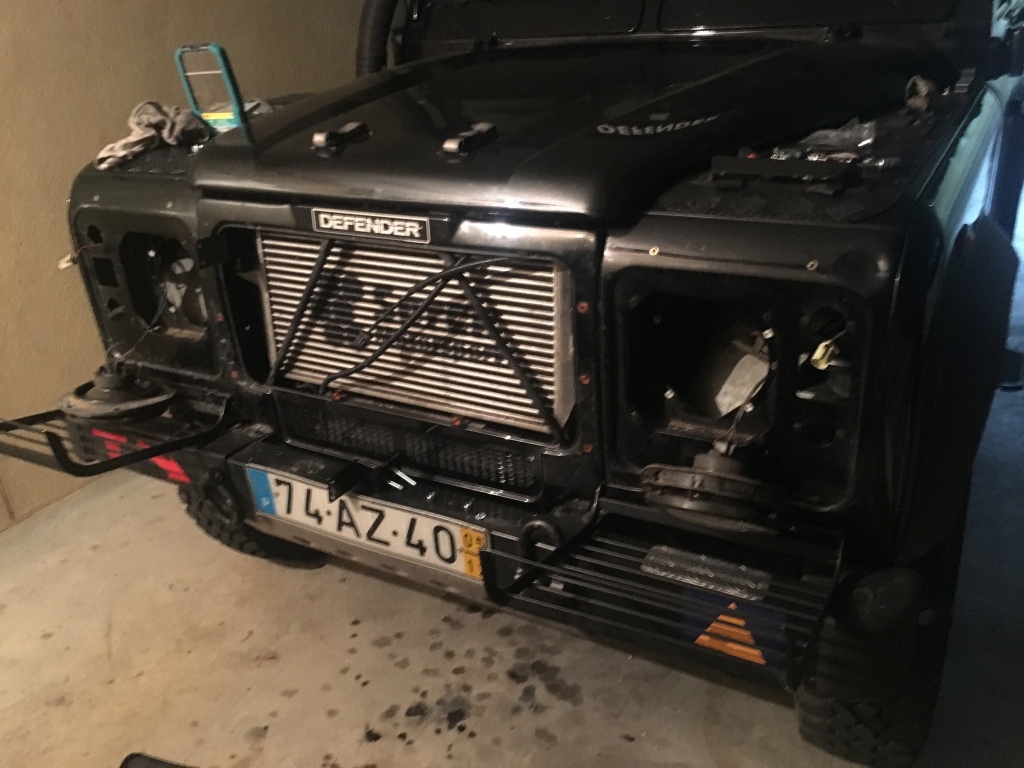
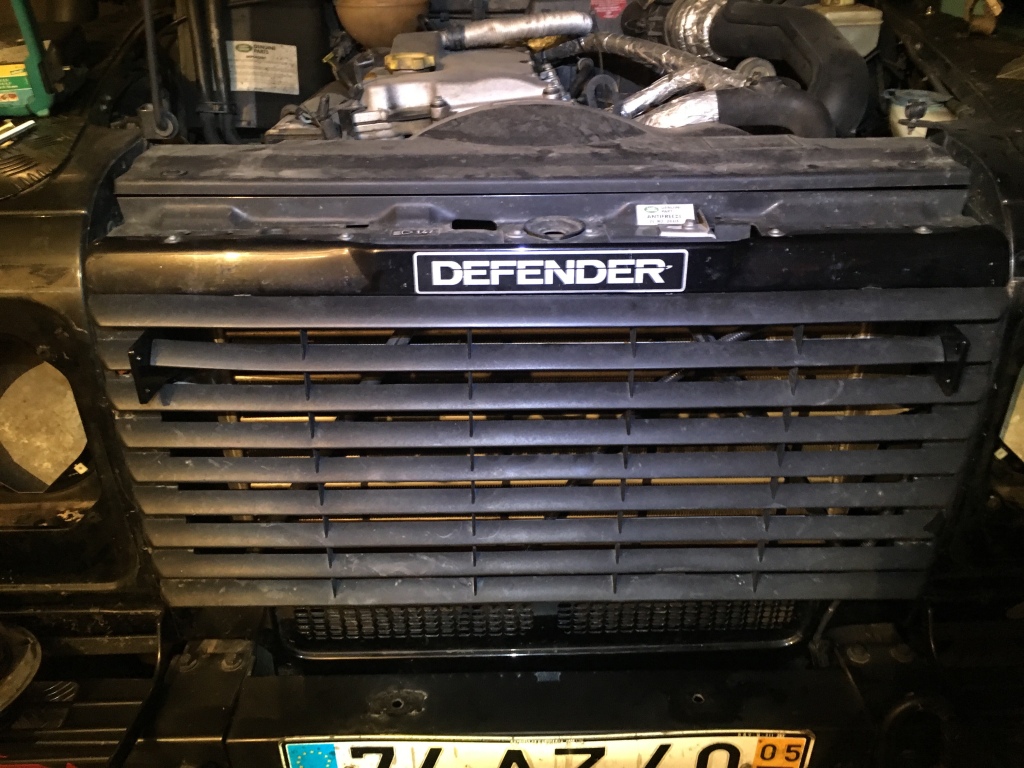
I have fitted today the britpart light bar DA5624, took me 3 hours, I had to make a couple of modification which had good results
To have access you will need to gain access to the area in front of the headlights, as you can see I had to take out many things.
2
If you want to buy you will find it here;
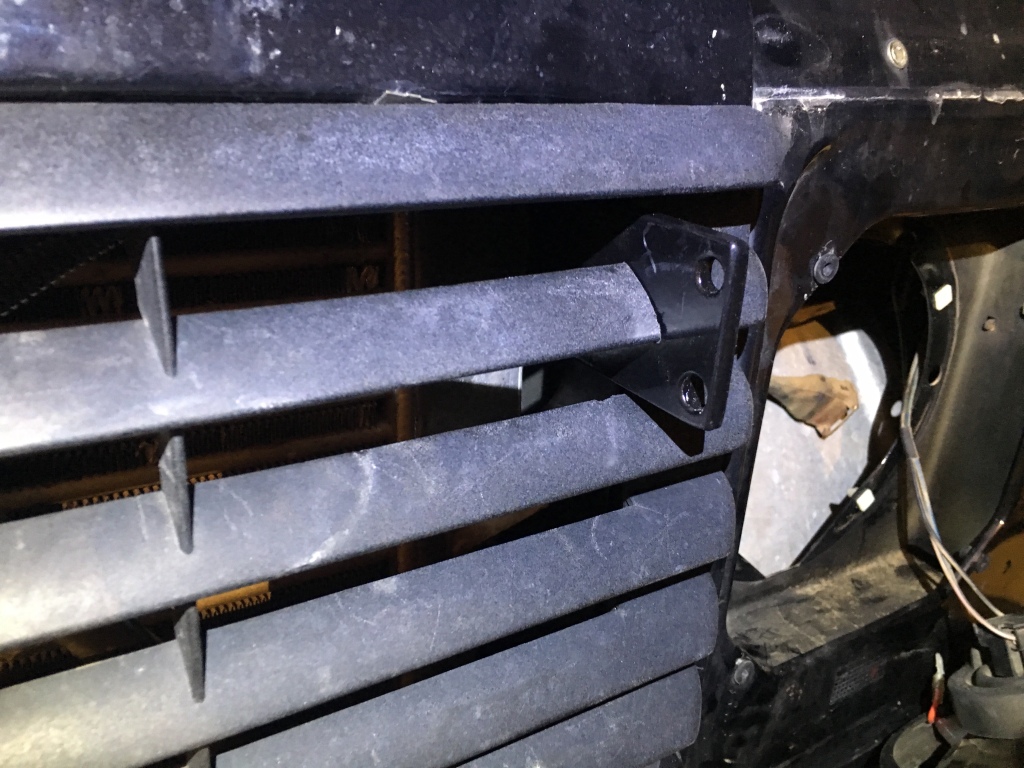
1- you will need the grill out of the way for sure to have access to the side.
2-No need to take out the headlight if you will make 2 holes as i did, if you will make 3 holes as there is a metal separation probably the third hole would be behind the headlight.
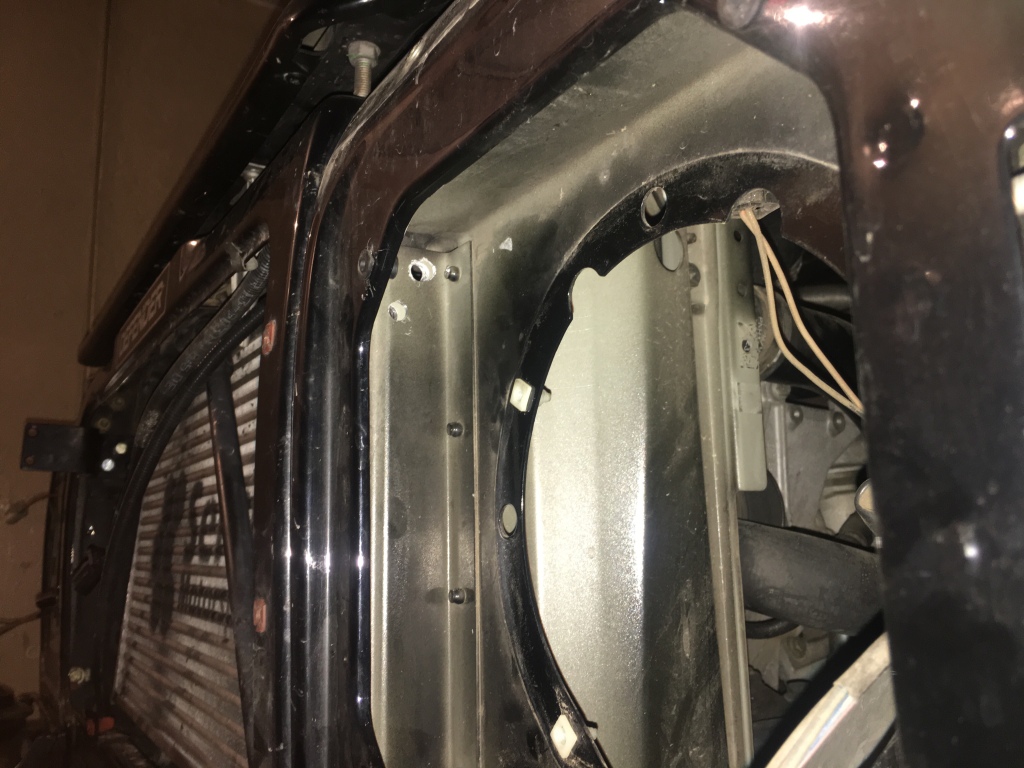
1- I made 2 x M8 holes instead of 3 holes ( no need for more it is well fixed)
– you cut through the grill in one place only so that the metal application comes through (even better from britpart fitting instructions that sliced through 2 grill lines)
– you cut through the grill in one place only so that the metal application comes through (even better from britpart fitting instructions that sliced through 2 grill lines)
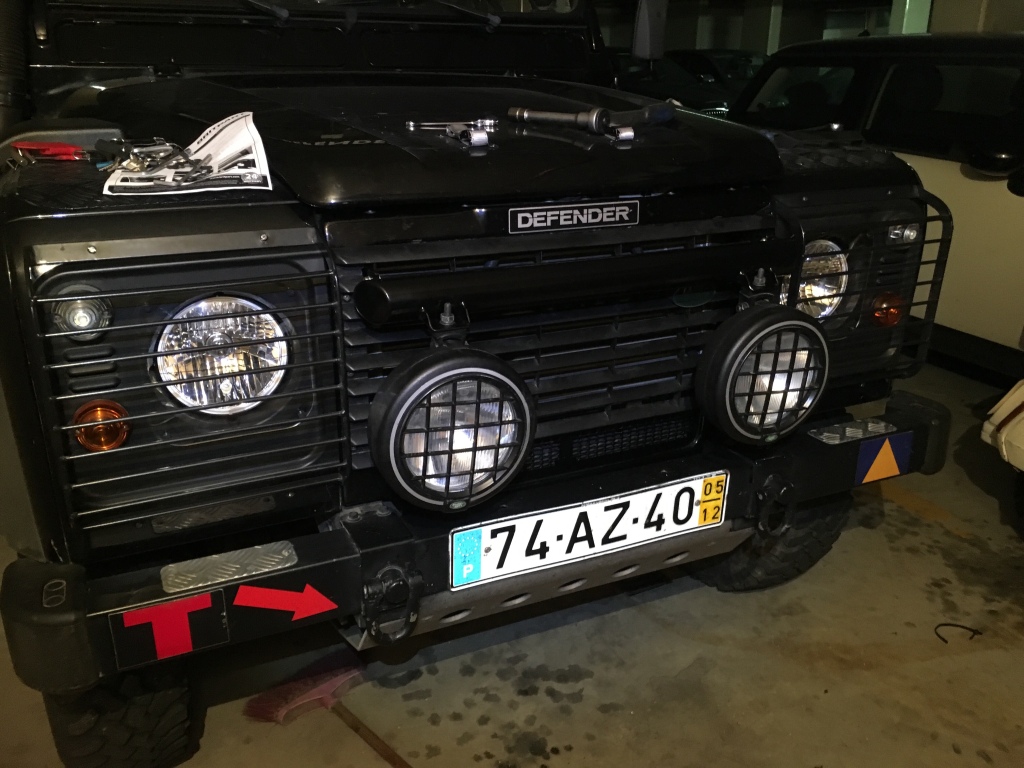
The end result is this
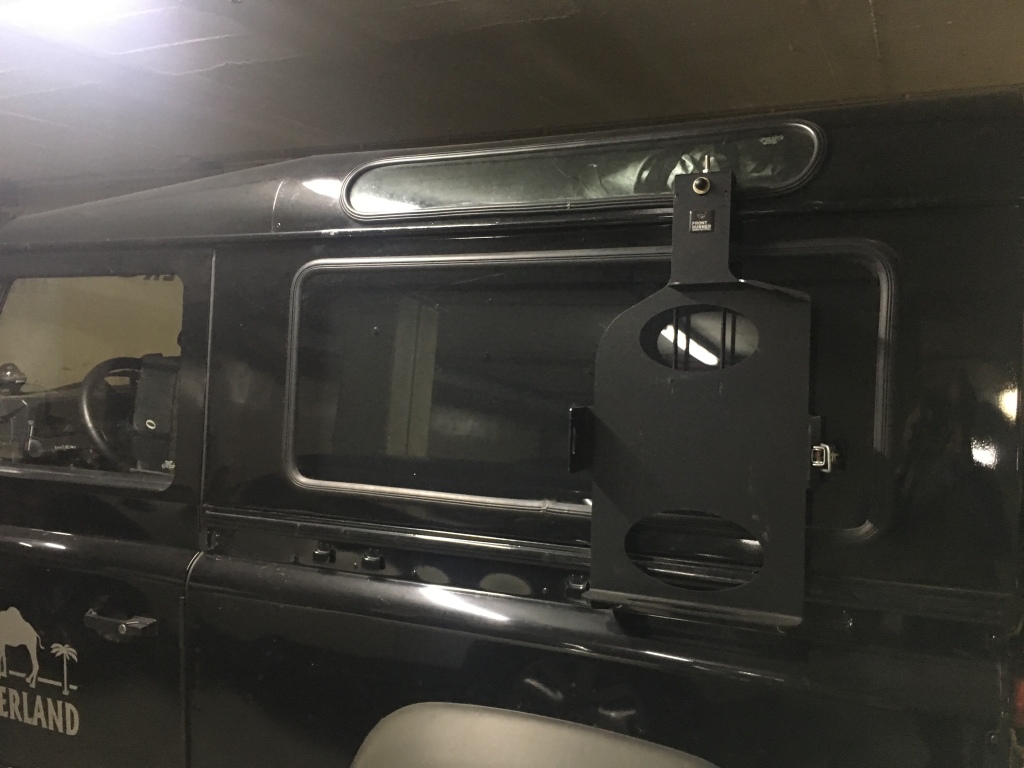
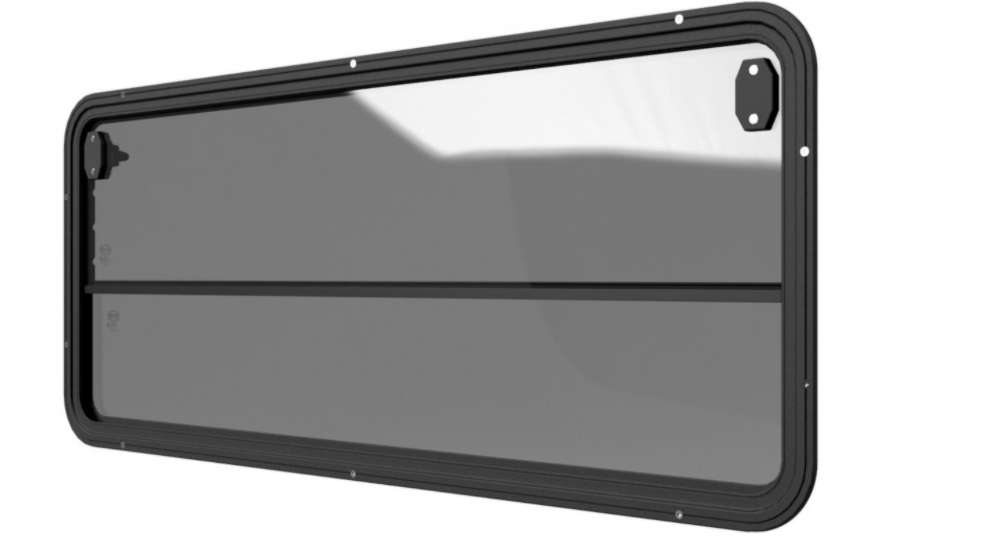
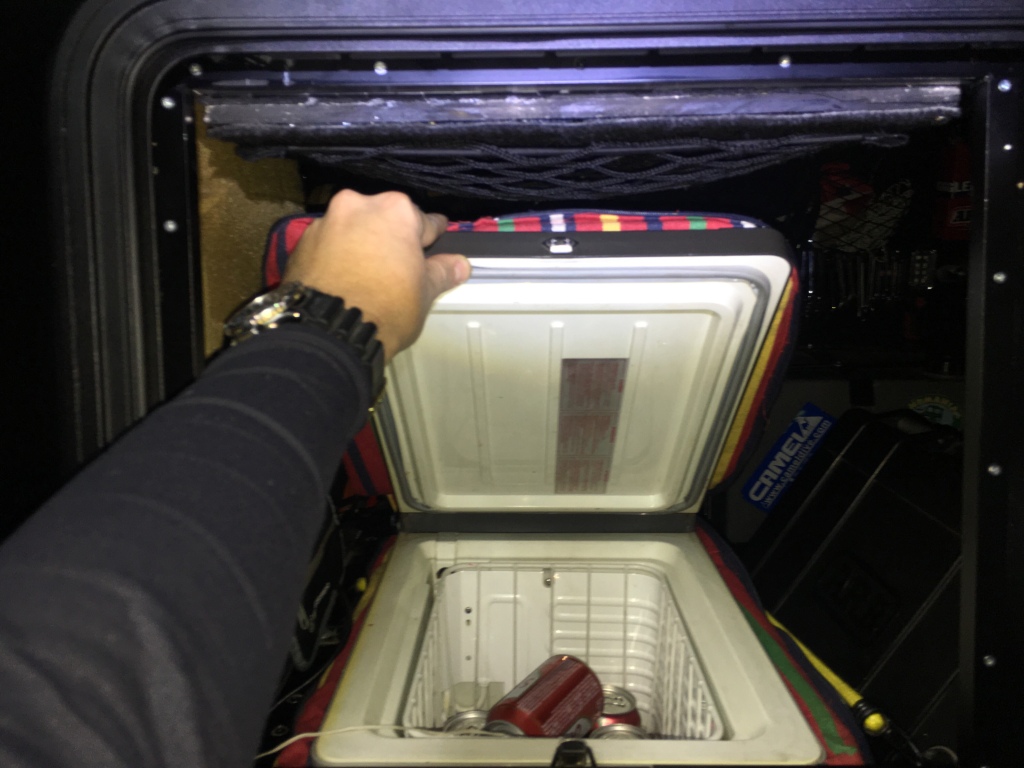
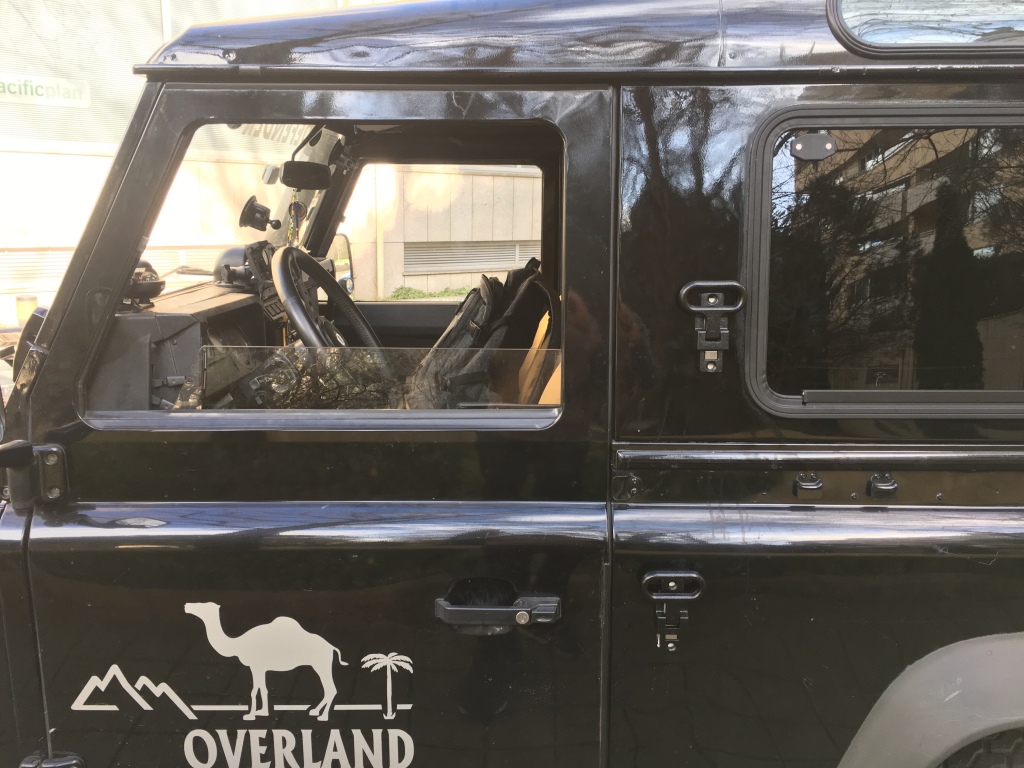
I am thinking to use one of those window sliding system from the driver side to have access to the fridge from the outside without the need to open my rear door.
As for the product specs and pricing you can find it here
I have selected this glass spec…..privacy grey, light transmission 20%
Sliding window 1055*425 Version 4 mm dark grey LT 20% Price€ 156,09
Transport cost is around 100 euros to Portugal
You can see in this you tube how to fit:
My fitting:


My idea here is to buy this bracket and fitted below my roof tent between the 2 bars in order to fit my solar panel portable bag to fit under my tent for easy access.
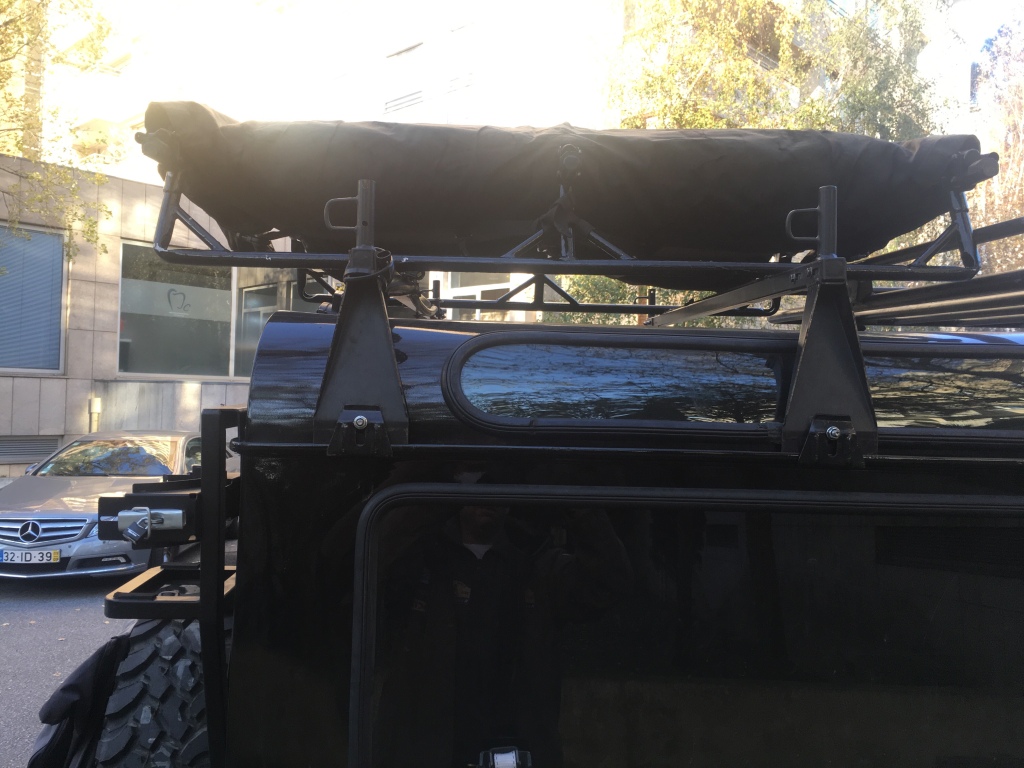
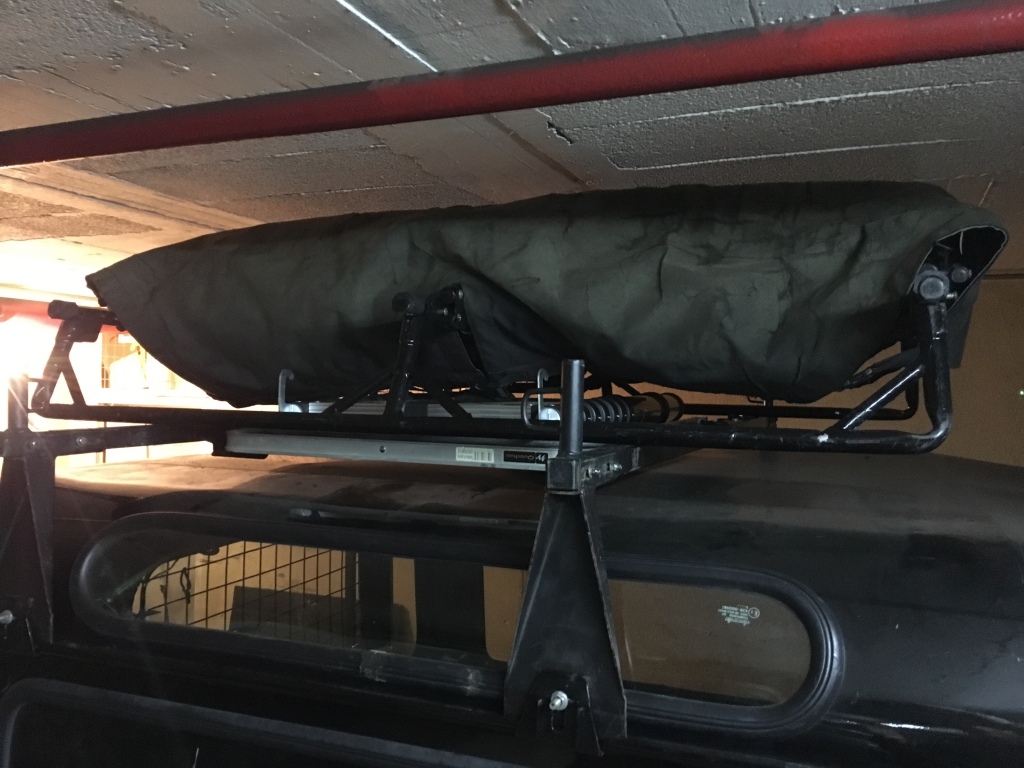
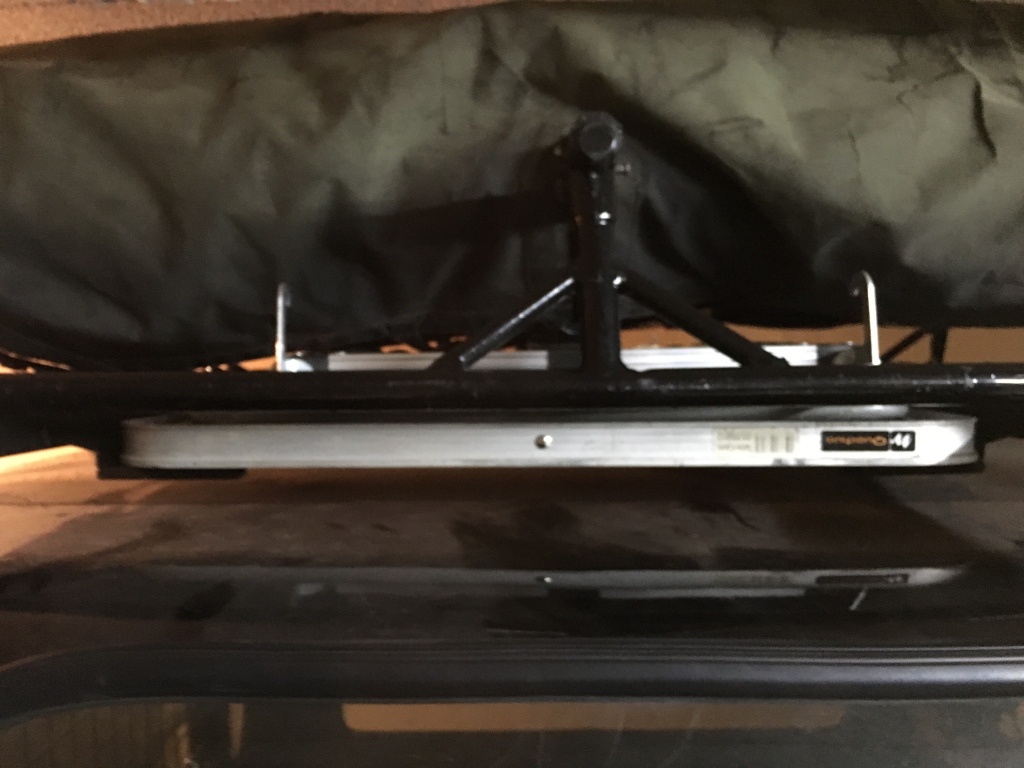
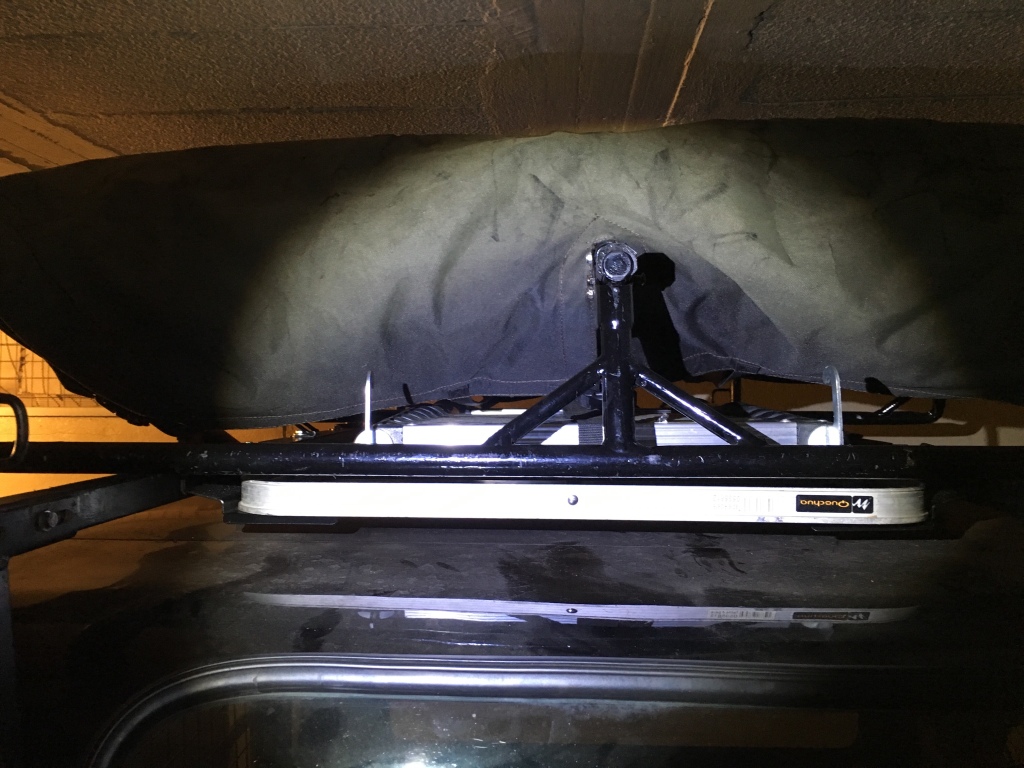
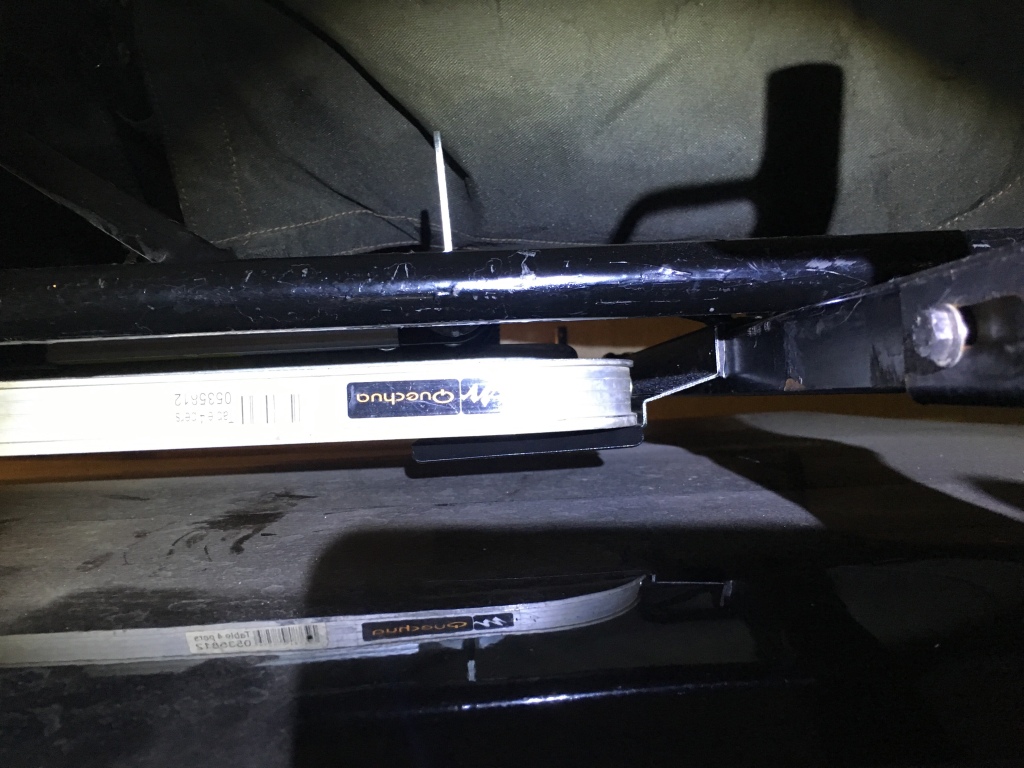
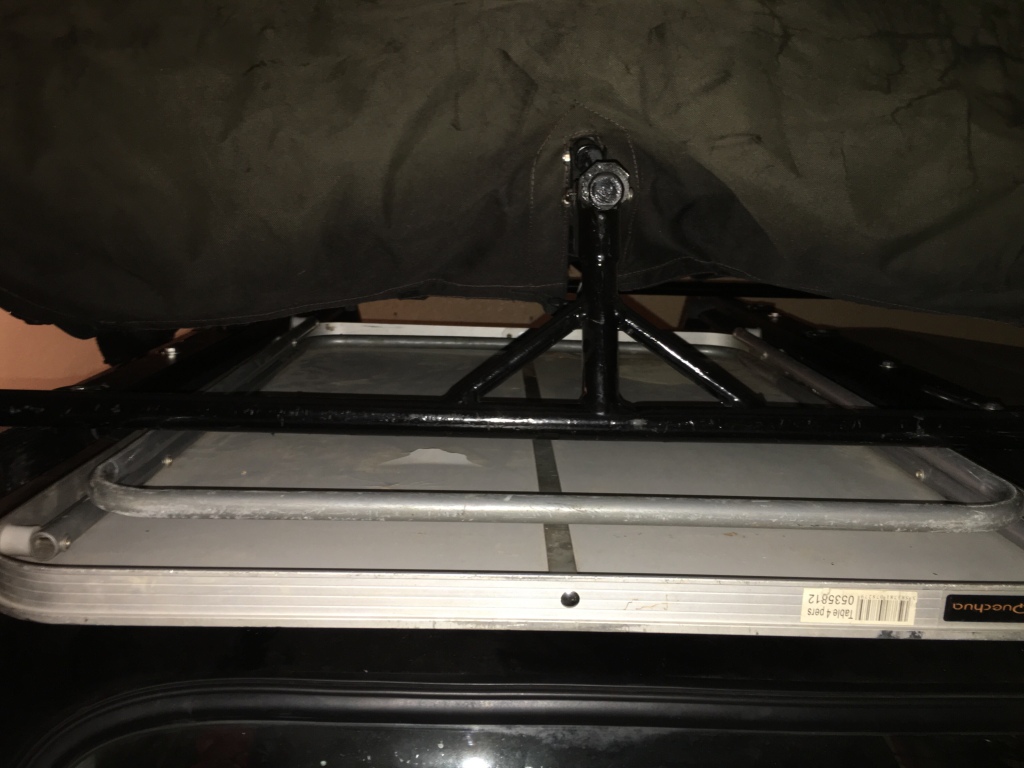
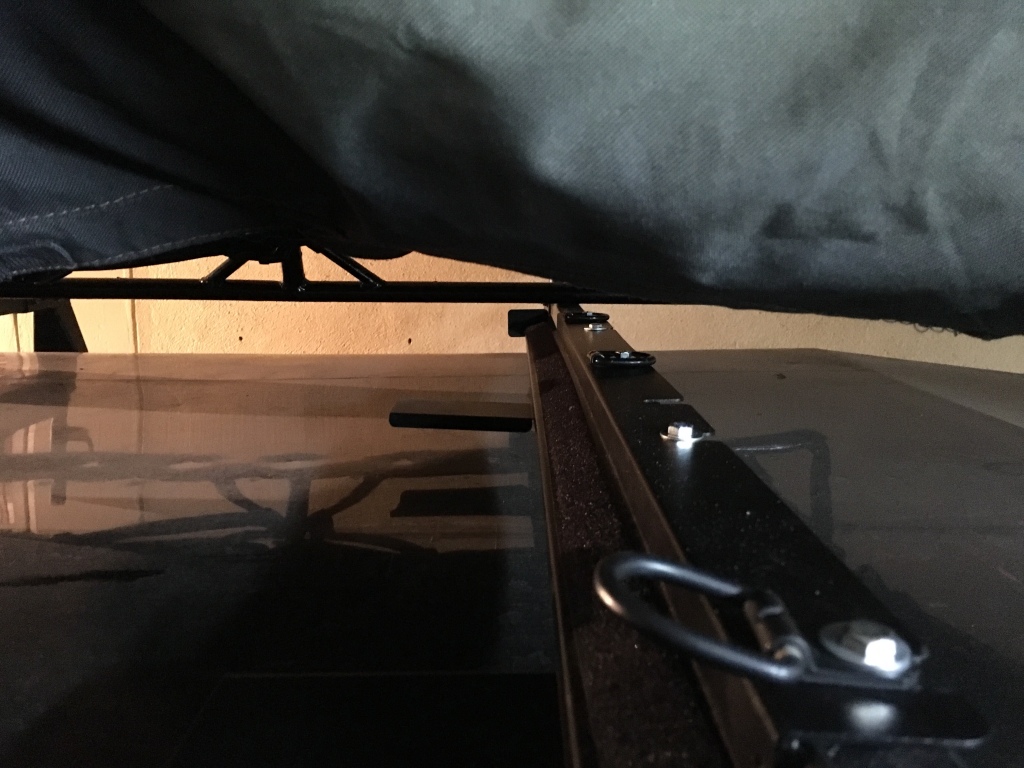
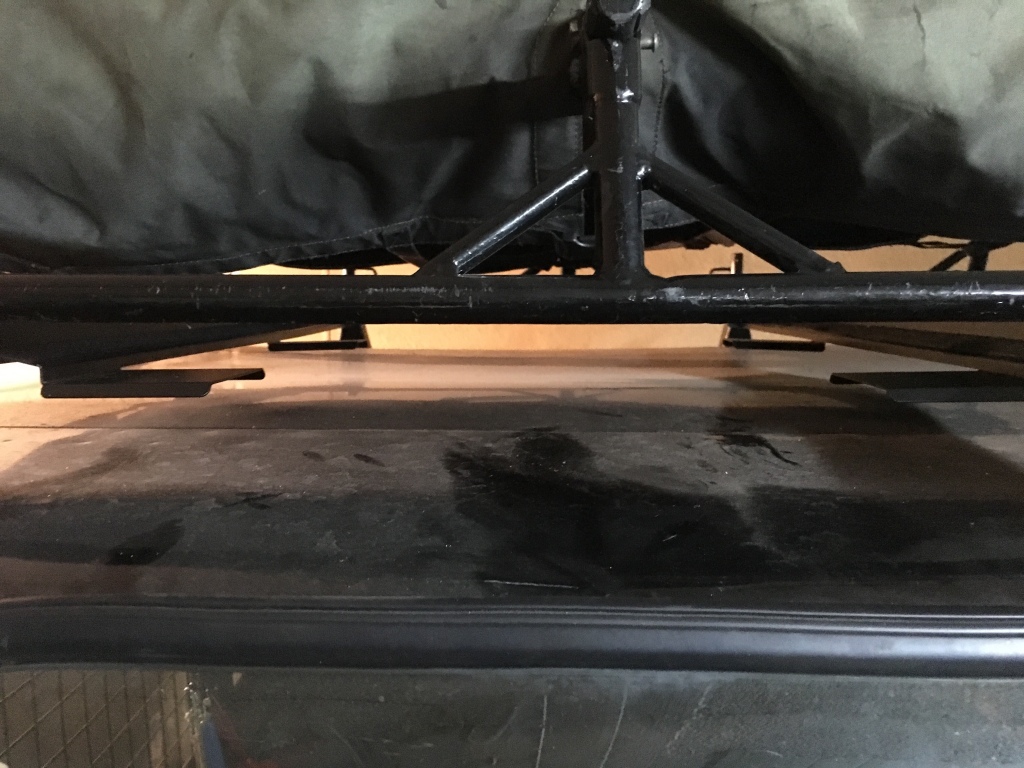
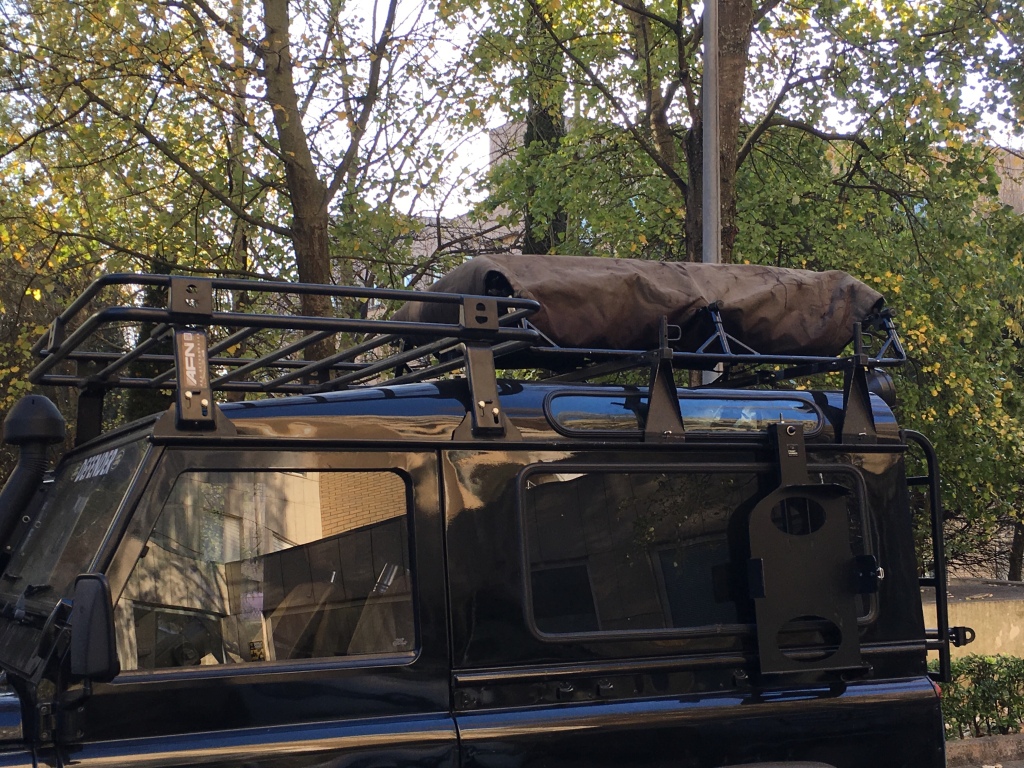
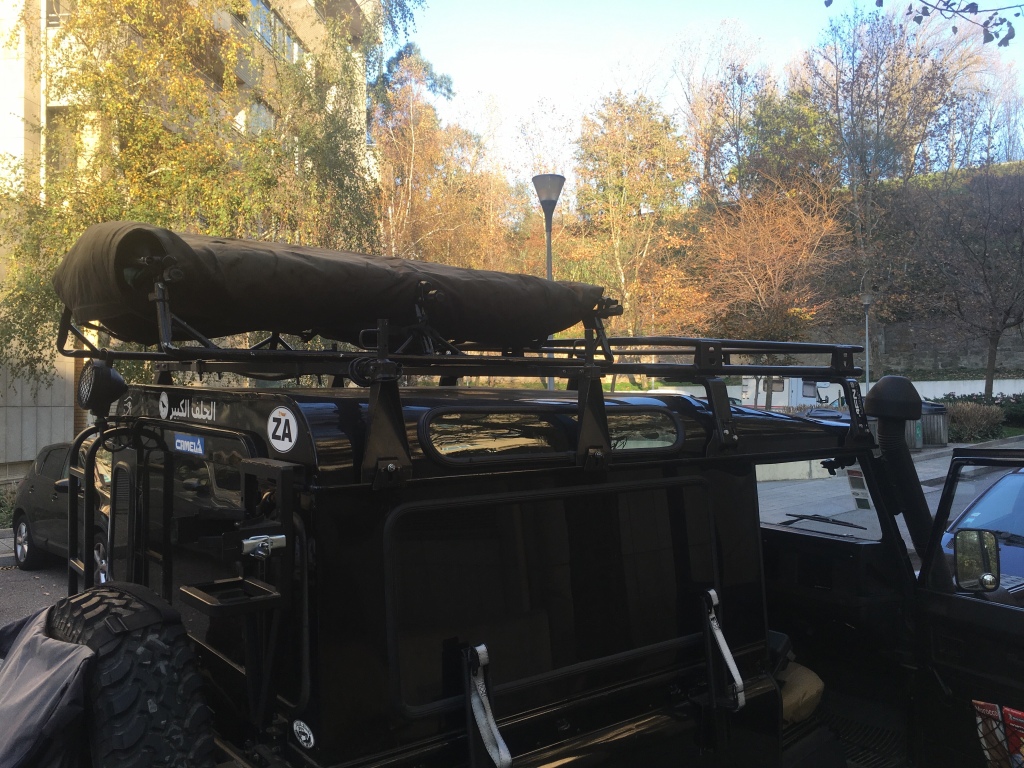
My idea was to combine both together and effectively I got the best of the two worlds both fitting the AFN roofrack in the front and the roof tent in the back….
Bought the drone in second hand and now will go through my learning curve …

Booked with my Mecanic for December 2017

Researching……
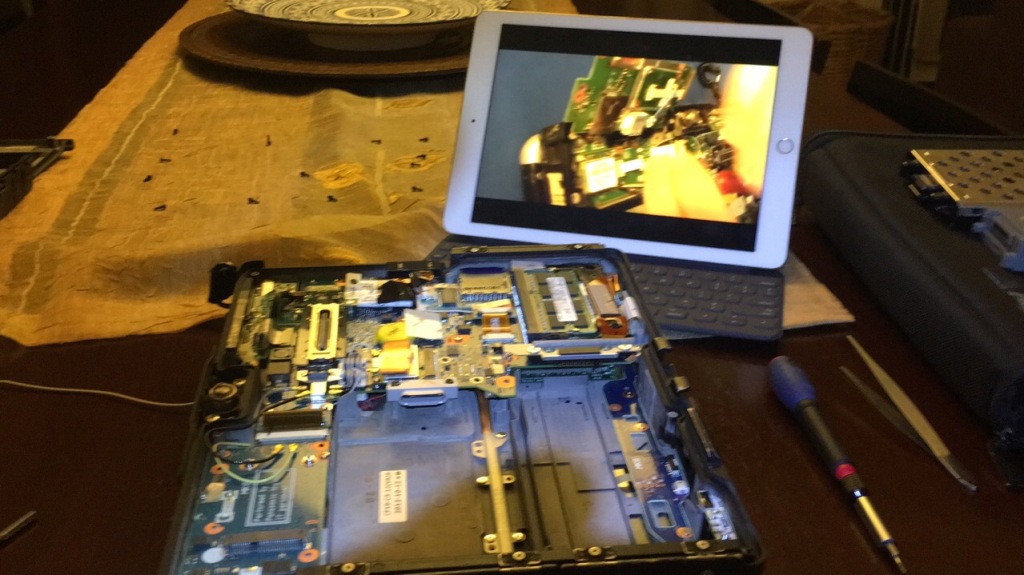
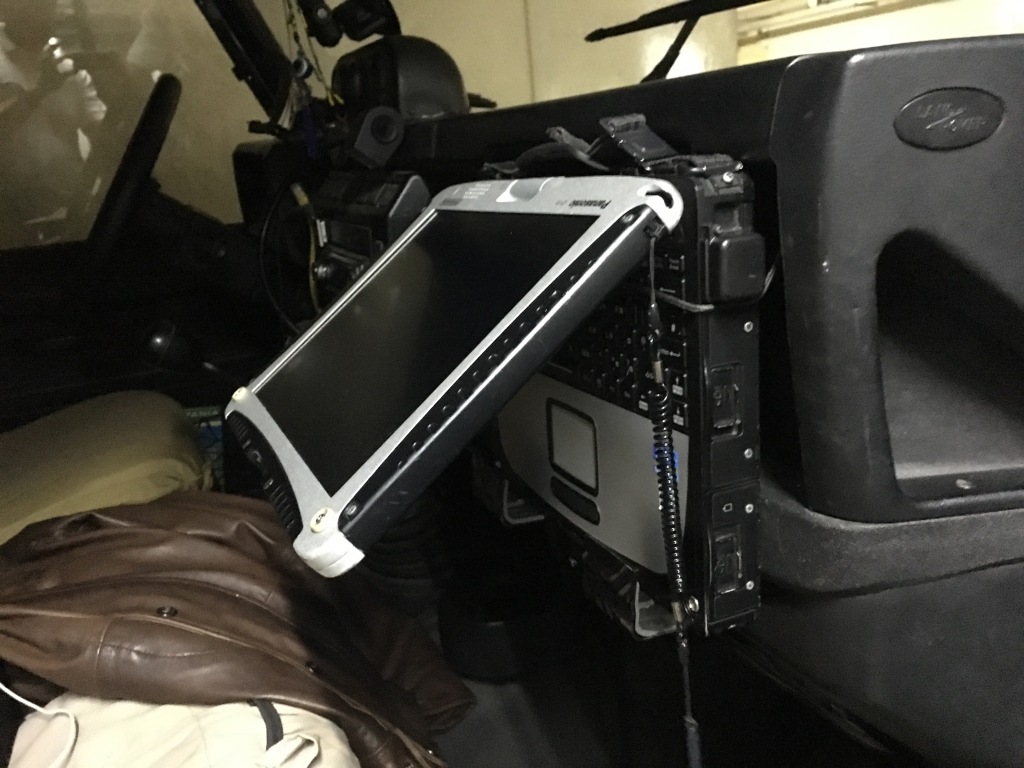
I fitted the GPS antena hardware for the Panasonic Toughbook CF-19.
For the hardware you have a couple of youtubes that explain exactly how to do it very clearly.
This was the easy part, the hard part was to make the GPS be visible first to satellite detection programs
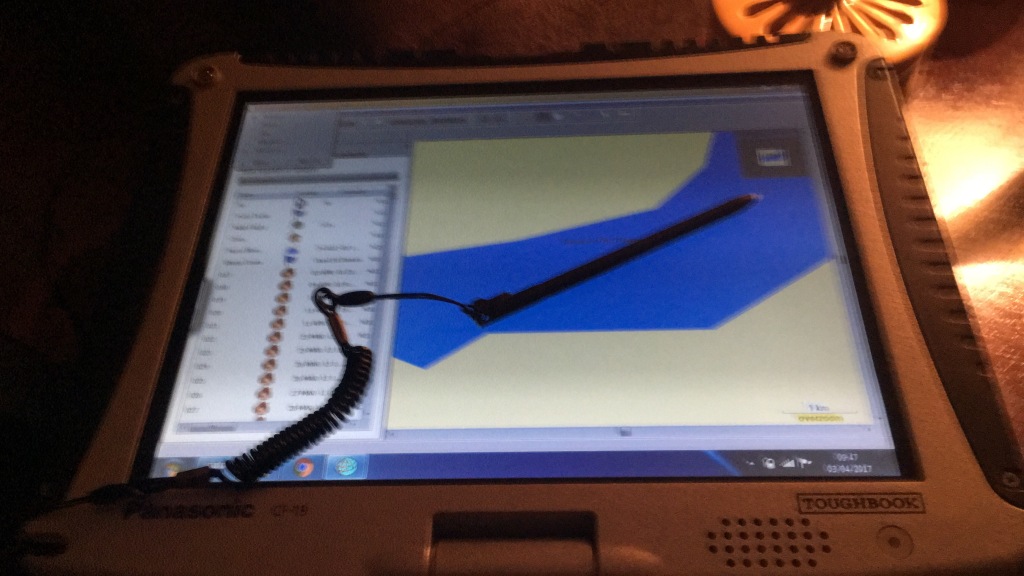
1- Satellite Viewer on the panasonic dashboard
2- Another software i installed recommended winfast navigator (more practical)
first thing you need to know is that at this stage the GPS antena installed works with one program at a time and you will need to figure which COM the GPS is on.
YOU DONT NEED TO INSTALL ANY DRIVERS ( NO DRIVERS ARE NEEDED)
Once you detect the COM (in my case COM 03) , it was detected from the panasonic gps viewer as it has a scan option.
Once i was sure it was working and i had a fix on satellites i closed the software and launched my navigation software NROUTE which is a garmin software and it can see mapsource installed maps.
Nroute enables you to navigate with your toughbook on a much bigger screen the problem was that the GPS protocol is MNEA and Nroute protocol is Garmin protocol (close but different) you need a software that converts the signal to a language Nroute understands and thats what exactly happened with GPSGATE SLITTER software.
http://gpsgate.com/support/client_users_guide
download splitter from this page:
The software immediately informed which COM is specifically ready for Nroute which works perfectly and created 5 virtual ports that makes me able to use 5 different programs all using GPS info. (from 1 program now i can use 5 simultaneously)
Well though i would share to save you guys 4 hours of internet surfin.
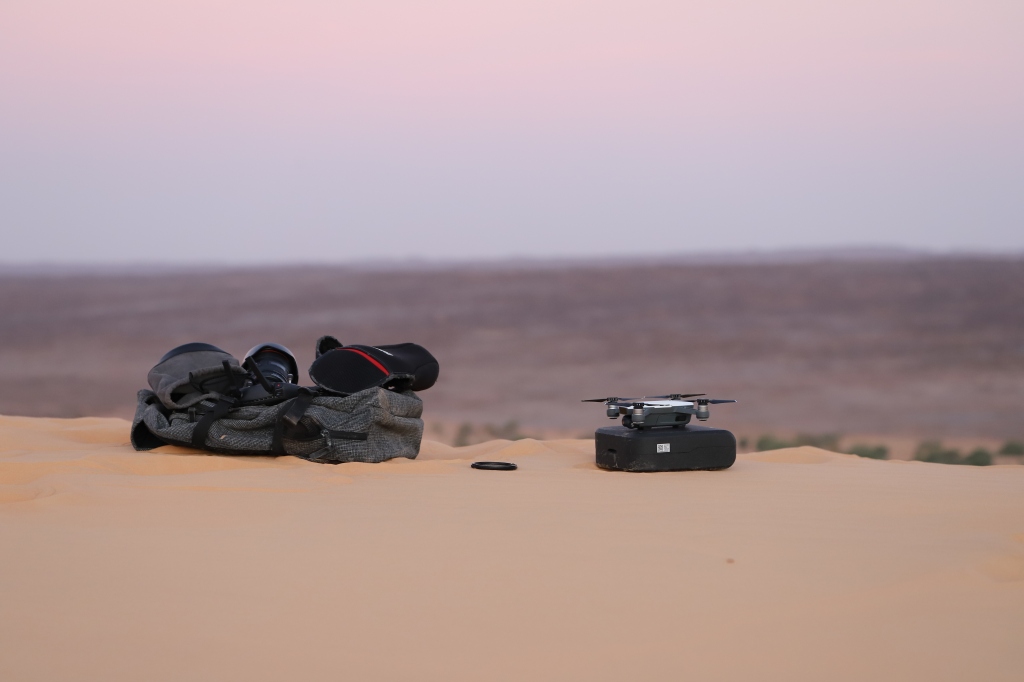
Let the prep begin….

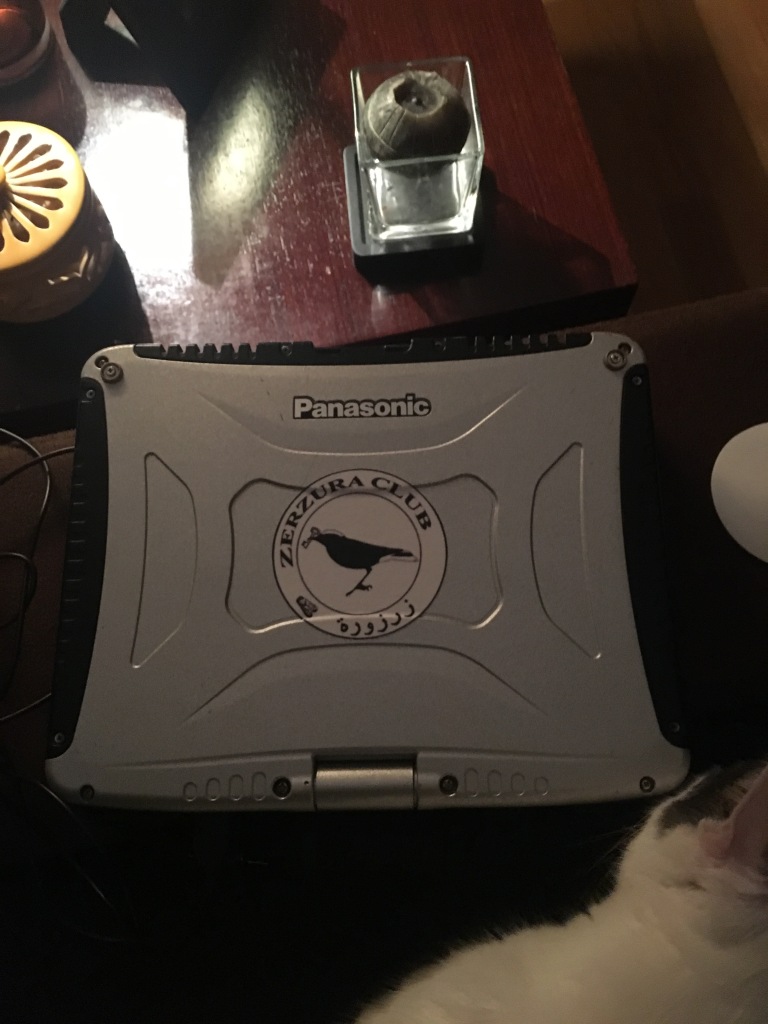
My new purchase …… lovely piece of equip for the overland
Bought it from eBay
Playing around , very happy so far
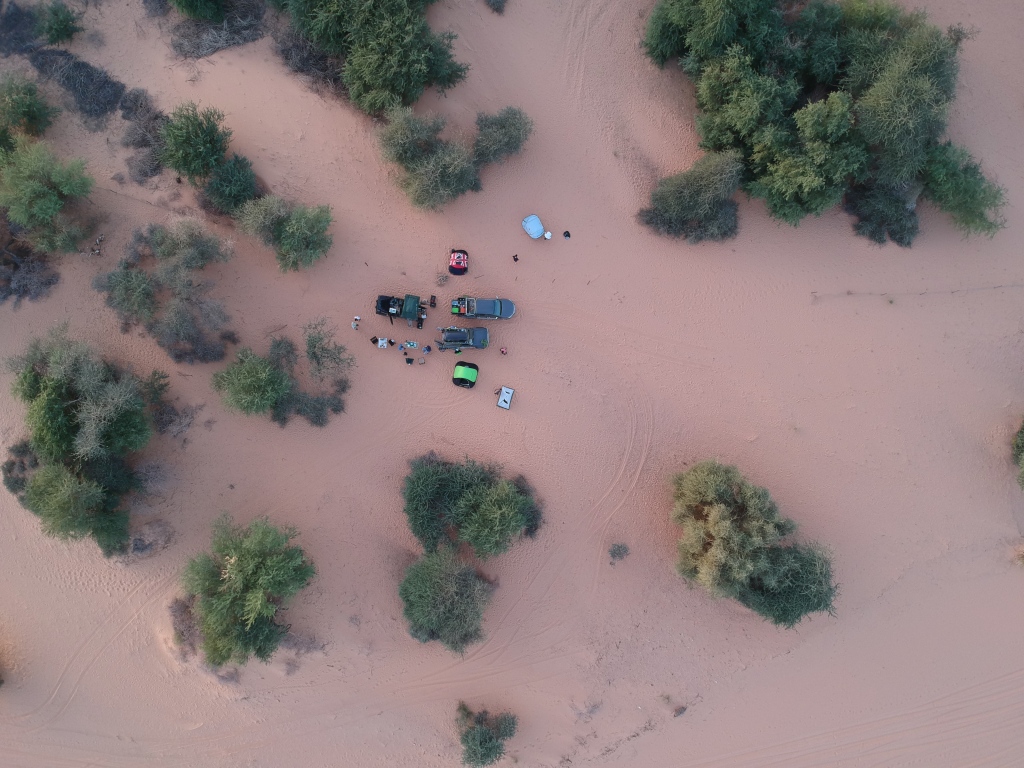
Documentary
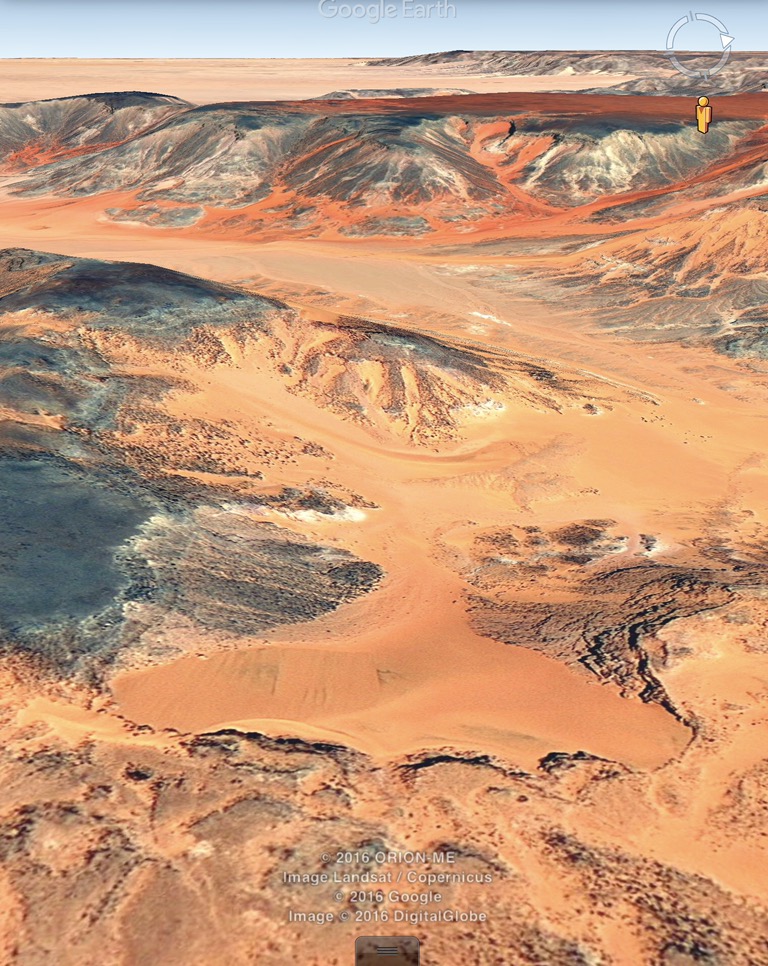
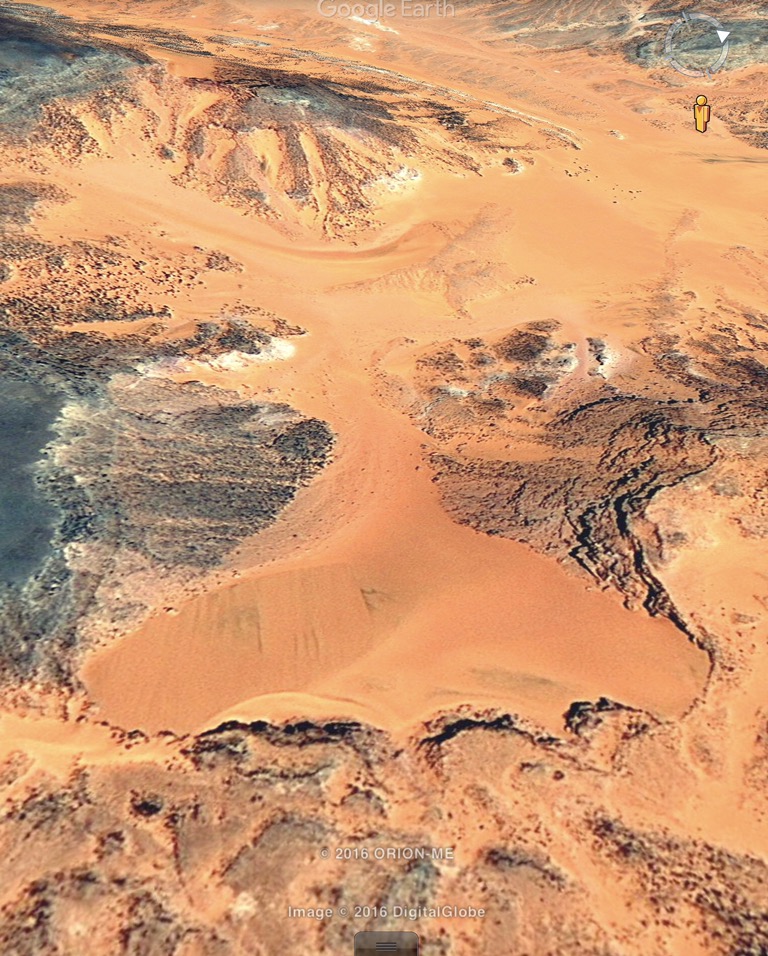
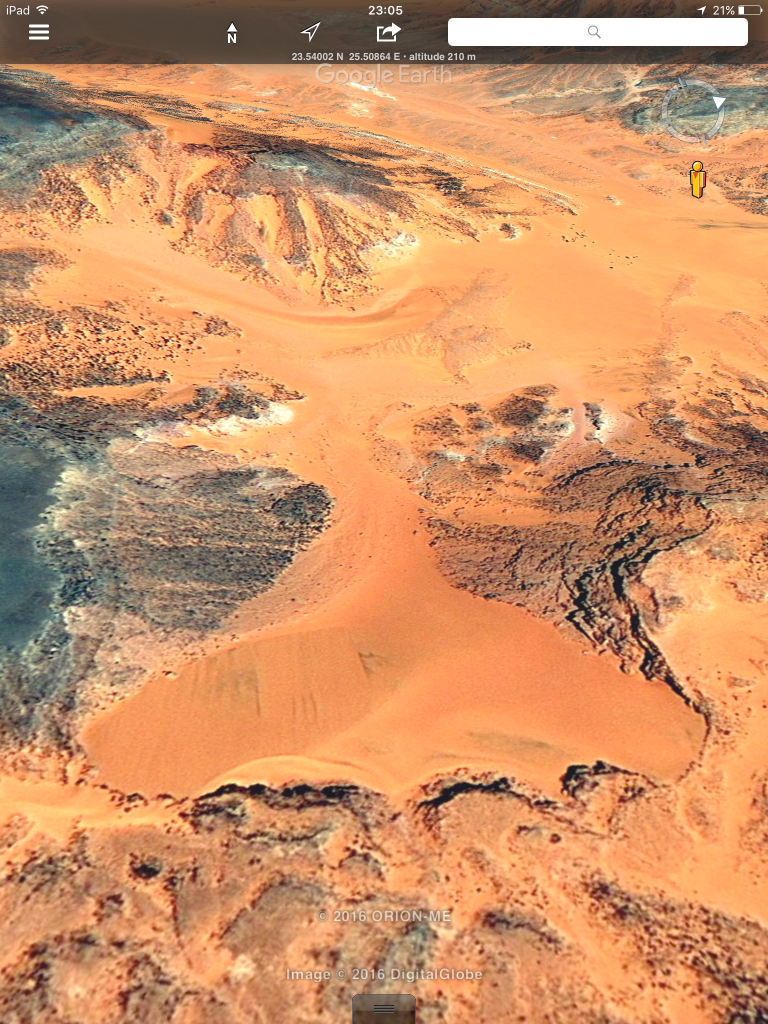
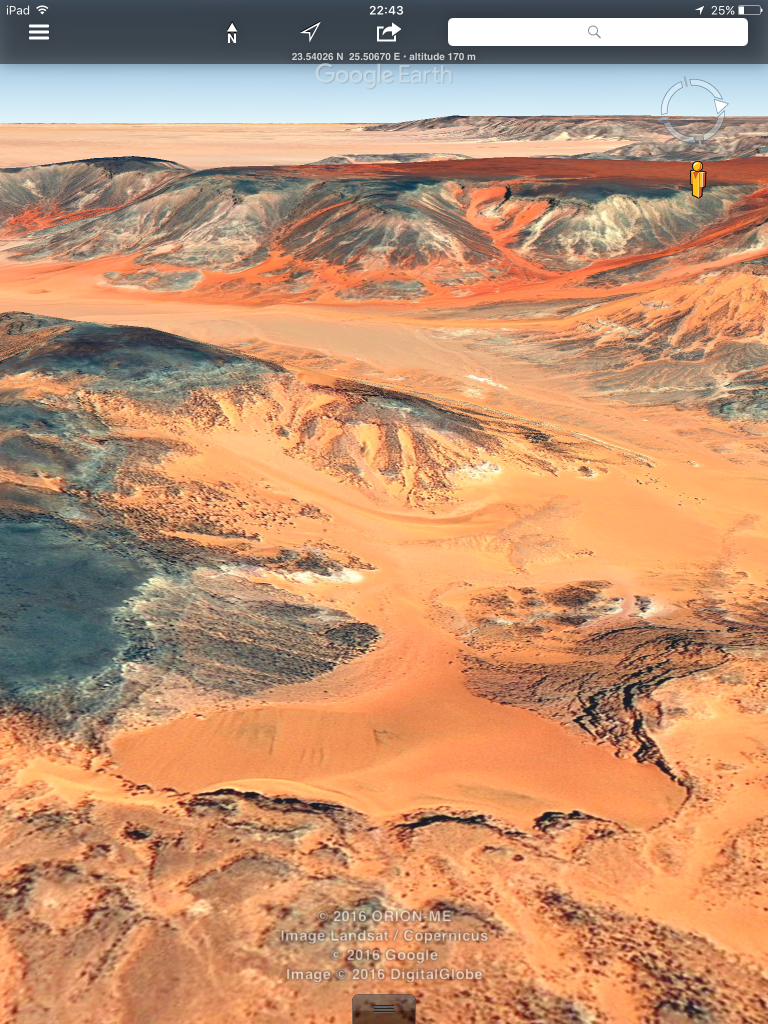
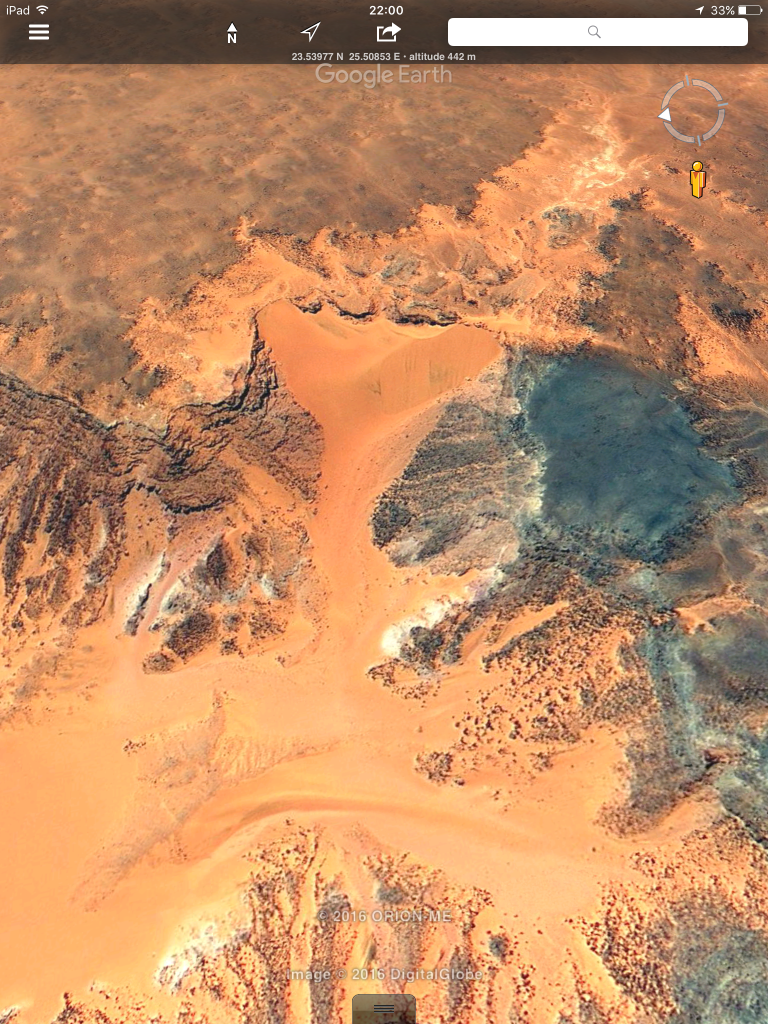
Extracted photos….
Pass found on Google earth……..west of Lama point and west from Aqaba pass (saves around 30kms on Aqaba detour)


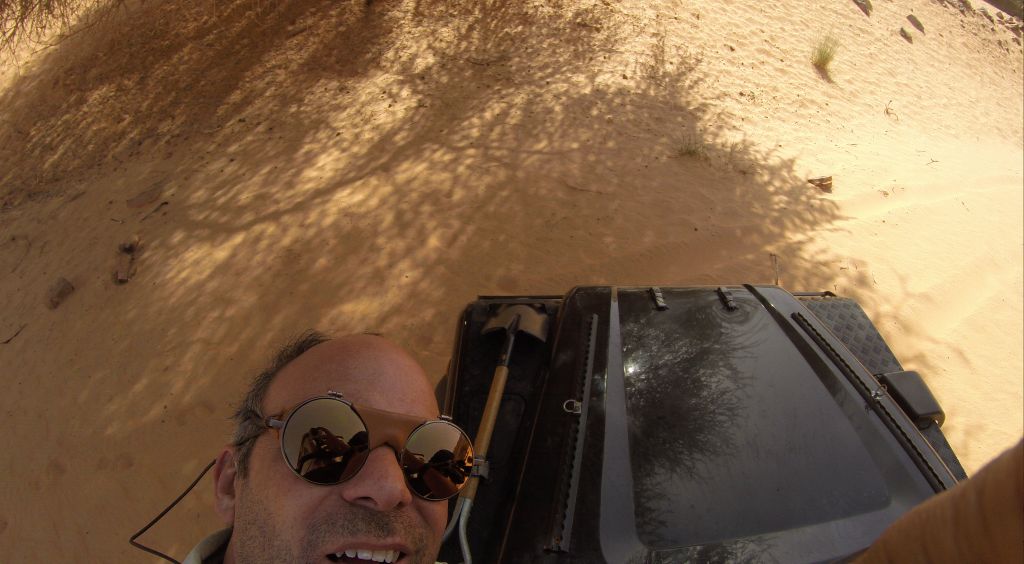
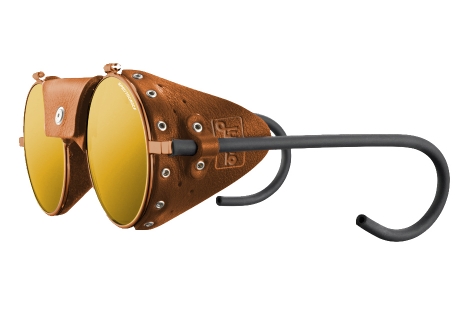
Julbo Vermont Classic
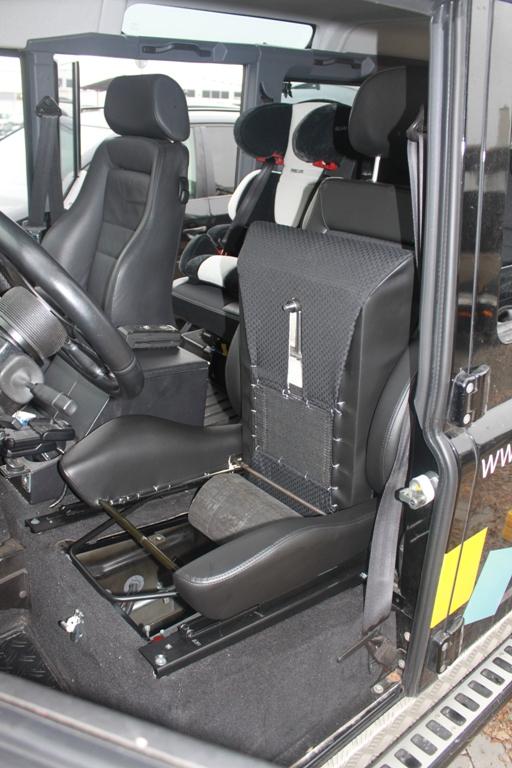
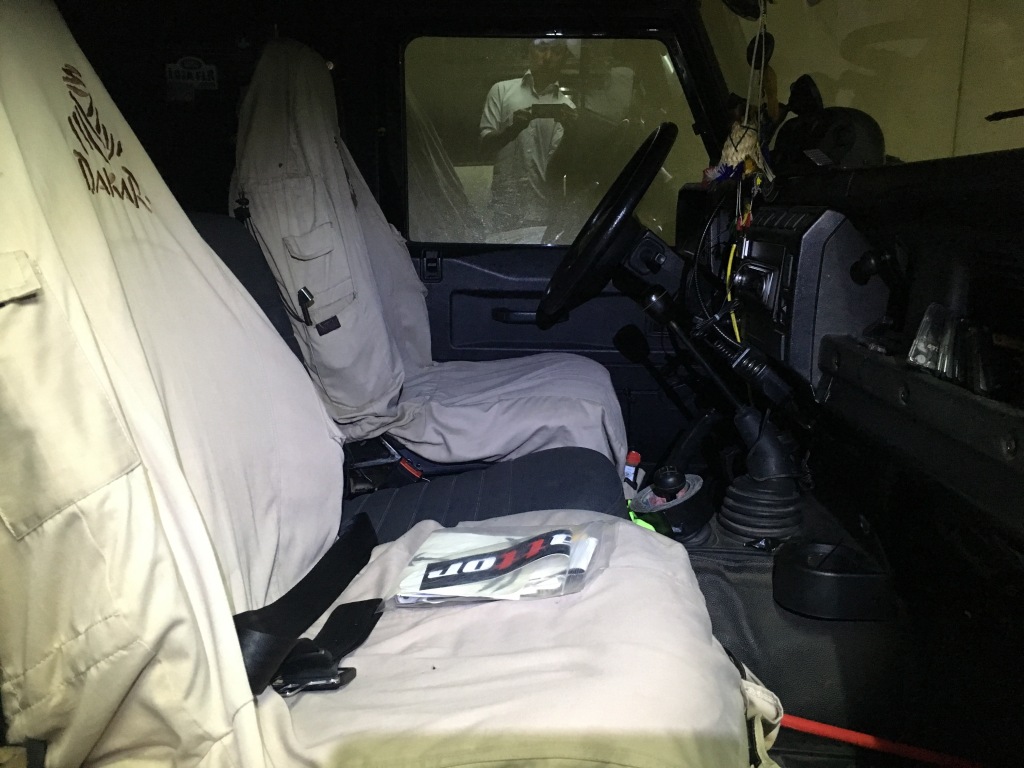
One more looks like a solid seat cover without being to expensive from Nakatamenga
Delta Bags driver seat cover Defender TD5
Or here:
https://delta-bags.de/Driver-Seat-Cover-TDI-TD5/O-5046-14.2
On its way….
A nice addition for documents and essential storage for quick access….@ 39 Euros
Nakatanenga sunscreen organizer
you get the idea if you take a look at this video:
Pretty straight forward …..all went well actually was happy to eliminate the slack as far as the shift itself can’t say that there is a tremendous difference but the throw is shorter but can live without it …… a mild upgrade ( should be done when you have done the essentials)
I will do it…..69 Euros come on


Final result almost zero expenses ….all made from scrap I had

It is done
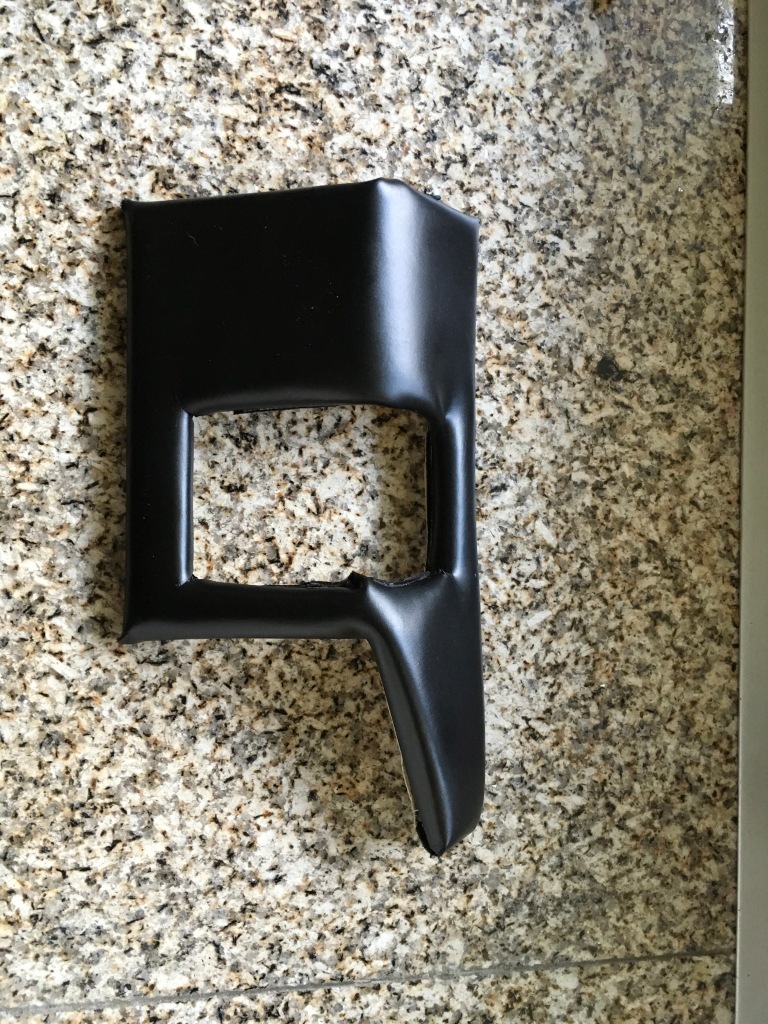
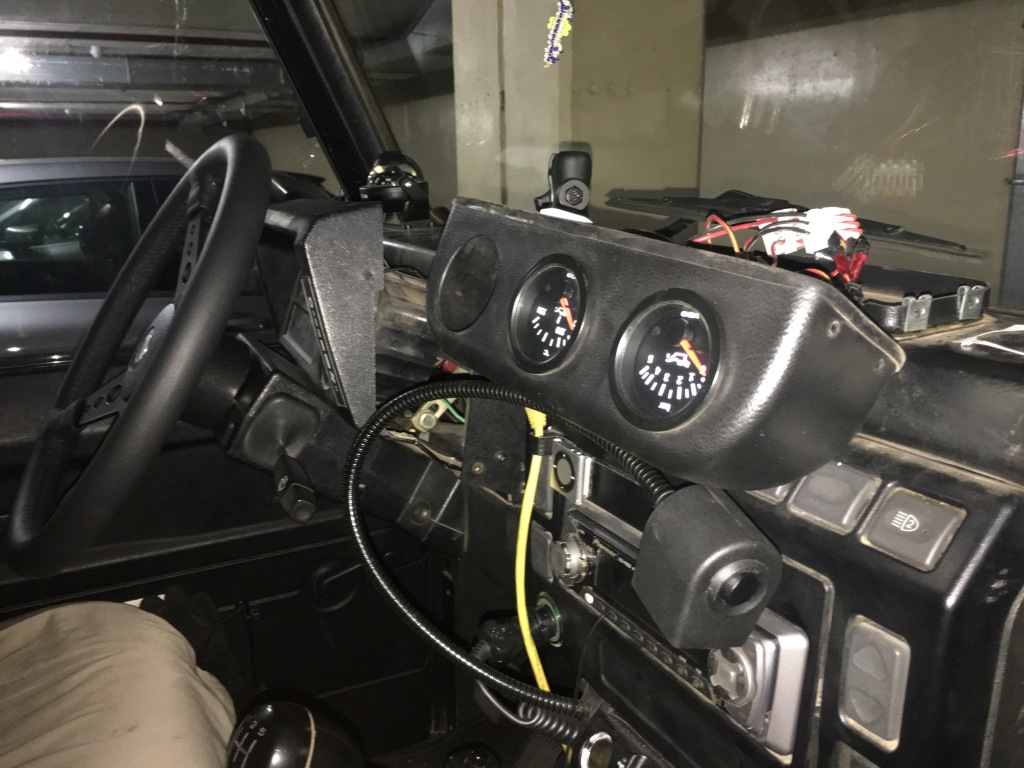
The most difficult part was to pin point the 4 holes in the Croytec pod , I took out the clock and put something useful instead.
As per my previous installation for the oil temp and pressure I took the +ve & -ve from the oil temp right next to my EGT gauge which is operational on ignition.
Just had to Find the way for the wire get from the engine bay to through the bulkhead to the pod
Not a big fan of electrical looms and diagrams…
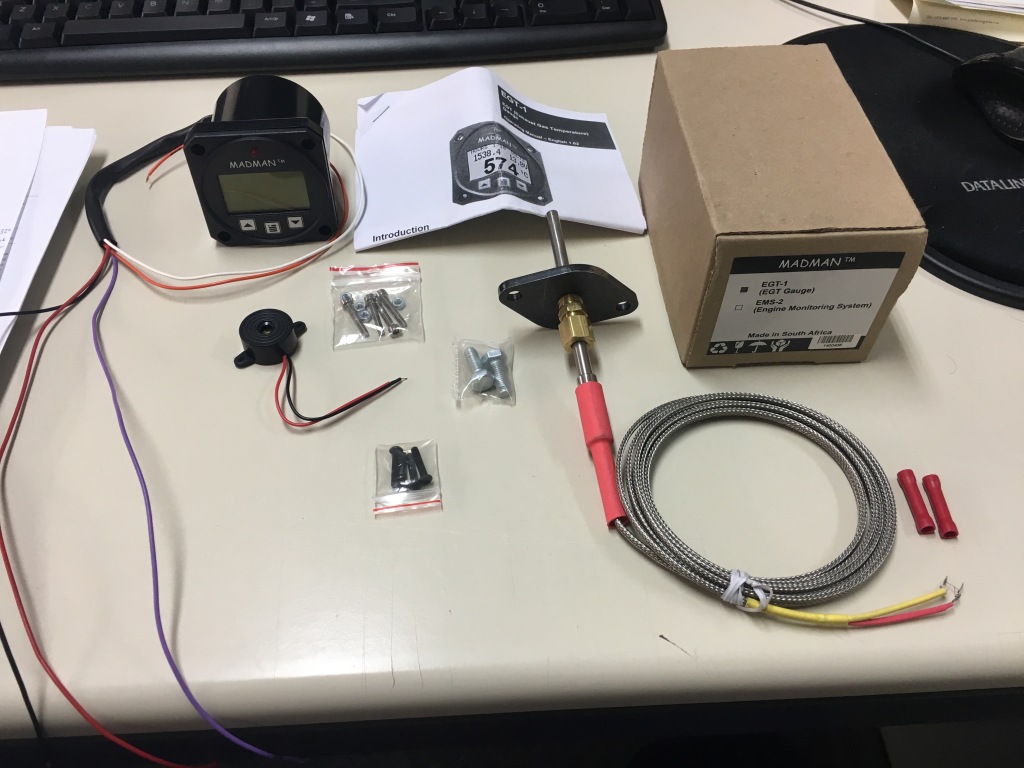
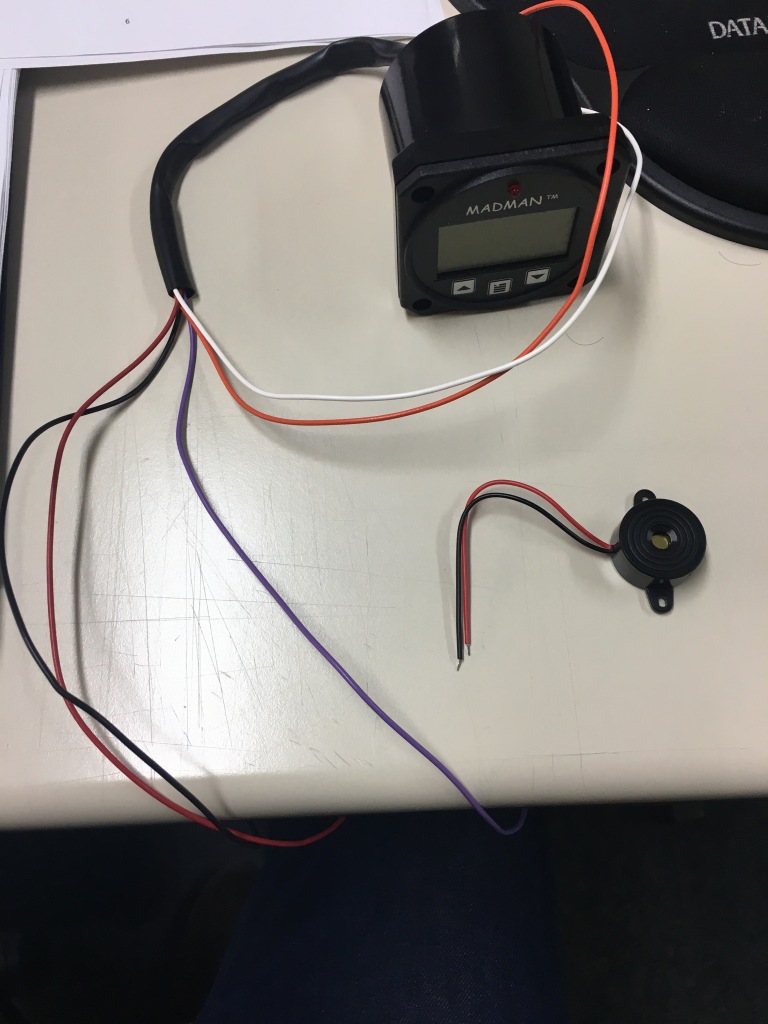
The Madman setup
The famous 12V buzzer…..very loud (Gauge internal alarm and red light is more than enough for alerts) (violet to red & black to black) wiring
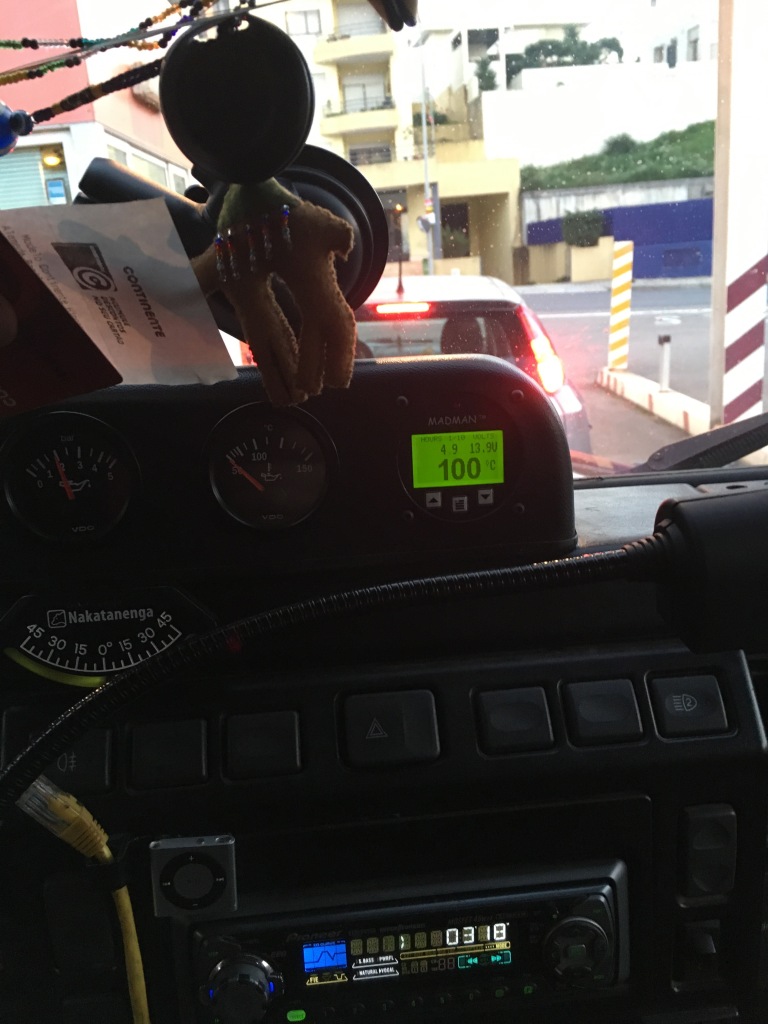
With my Td5inside soft remap i am keeping an eye on the temp of gases from exhaust manifold.
Happy with the gauge, it serves as a security check on the manifold.
In the last 3 days that i was checking it the Temp went up to a Max of 400Cº which is not not significant knowing that the alarm is set @720 Cº and heard that the manifold could withstand upto 850Cº for very short peeks.
I bought it from here ask for Brendan (very nice guy and helpfull on e-mail)
Madman EGT1 Exhaust Gas Temperature Meter
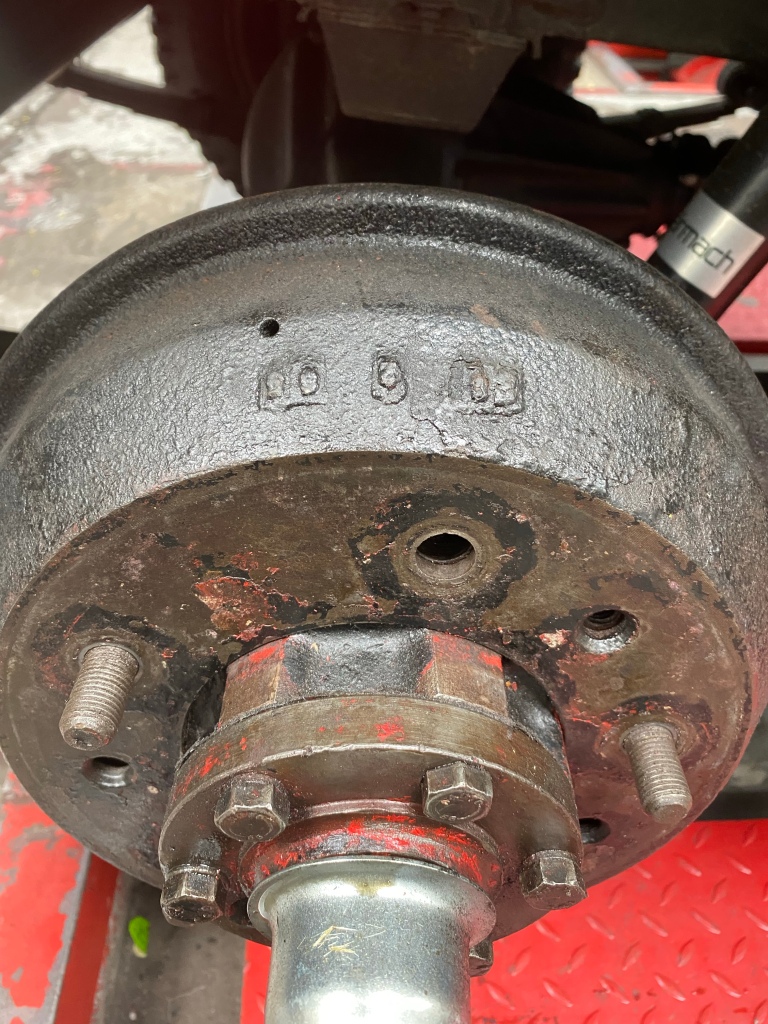
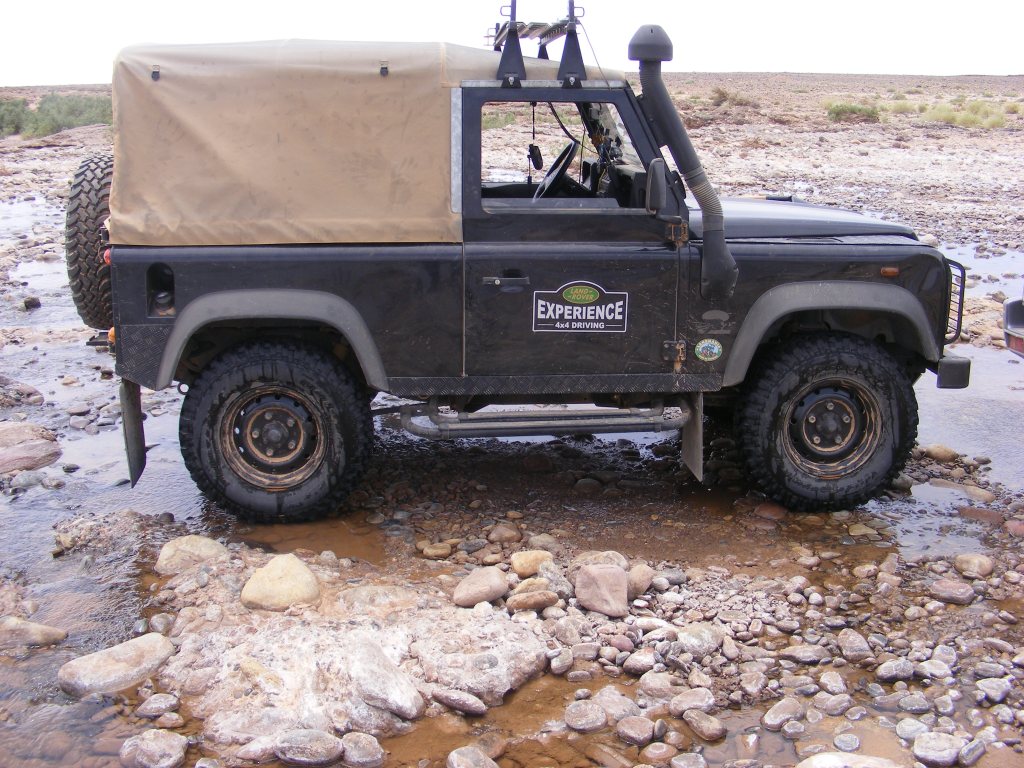
There is no such things as ‘Wolf rims’ As you may be aware the military variant of the Defender was code-named WOLF….. Wheel On Left Flank. These came with HD rims and it was the first time this design was used so many people out there nicknamed the wheels ‘Wolf wheels’ where they are just plain and simple ‘Land Rover HD rims’.
article in LRO some years back where they interviewed some/one of the military XD design team, and they said that the wheel on left flank accronym was an urban myth (especially if it’s a LHD vehicle, then the spare wheel would be on the RH side), more that the vehicle was a wolf in sheeps clothing….
New product to monitor rd5 engine …….a mix between nanocom and Madman with a touchscreen
AFTER
I did today the famous td5inside remap and I did it with the man himself, Jose Amorin. I am very confident that he knows exactly what he is doing, very professional and helpful fully covered me on all my questions, he already has so many projects in the pipeline.
He copied my original map from my ECU and added his tweeks on it and that what makes the whole difference, no standard mapping ( he says no map is equal as he listen to what I wanted)
I purchase from him a ecu + remap somewhere between stage 1 and stage 2 I am about 169hp.
The Landy instantly was reborn, what a difference!!!
So far I felt significant changes instantly on the below, I am actually enjoying again driving the Landy ……something I was starting to have less
Power/Torque
throttle input / response (less lag – no flat spot)
better motorway hill climbing
Less stress on engine (Reving less the engine)
At the end Jose told to try it for a few days and get back to him for any changes I might need.
The after sale service from this guy is great, he confirmed to me that i should go around for a while and if i need any changes to let him know and he will make sure to rectify for me personally.
He offered me as well the Hybrid Turbo form them that i have to give my turbo when busted and they will redo the interior parts with better performance parts for almost the same price of a new one…..sounds interesting!!!
Check him out here:
https://www.facebook.com/Td5Inside/
————————————————————————-
BEFORE
The big day is getting closer, I do believe more and more about a soft remap that will improve economy, drivability and Torque up to a max. 155hp without stressing engine and parts on the opposite prolong the engine life and efficiency…..
For starters I need to find a second hand ecu same as mine 500020 to remap.I have decided to have one original and a remapped.
TD5 inside stages:
Stage 1 155 cv/365Nm…………….this is the one i am looking into
Stage 2 170 cv/400Nm
Stage 3 – 190cv/500Nm*
Will try to share my experience and research….
It is important to have the following mods done before you remap lets say to fully take advantage of the remap
For starters I need to find a second hand ecu same as mine 500020 to remap.I have decided to have one original and a remapped.
What am i looking for:
Since a long time I haven’t seen such an interesting YouTube from an enthusiast on overland and remap limit for such travels, enjoy
I will add below thoughts of enthusiate that i find interesting about remapping and their insights:
Yep, td5 inside stage 2 remap.
The low down torque when starting off from a standstill it a big improvement. You touch the throttle and the rubber bands winds up straight away unlike the factory mapping which takes a couple of seconds to think about it. Also when normal driving and you come to merge in traffic and someone wants to make a race of it even though they are 2 car lengths behind you can now use a bit of the loud pedal and away she goes. Instant response. It now glides up hills which it had to drop back a gear for before and it revved its head off just to maintain some semblance of forward motion. I’m probably being a bit harsh but it’s hard to describe how much difference there is. It’s a new vehicle. I love driving it again ")
I bought the nanocom after umming and arring for the last couple of years. I wanted to be able to do the remapping myself and play with the other options. So finally bit the bullet and bought it and a madman ems2 to mount in the new mudpod on the dash to monitor EGT. Once I had those in and sorted I contacted Jose again and a couple of hours later had the newly remapped file. Took me about 10 mins to check, double check and finally triple check the instructions and then upload the new file. Start her up and off I went.
From what I have been told the Td5 ecu was mapped to be able to handle all sorts of diesel all over the world. So for example it needed to be able to handle the poor quality fuel in Africa (an example) so the factory tune was pretty mild. A lot of testing later there is a few companies who will use your downloaded map and alter it so that you get instant increase in torque and power without a lot of expensive mods. It’s supposedly still in the safe range of performance for the engine etc so shouldn’t be breaking things left, right and centre. For the relatively small outlay for the remap I’m stoked.
Quote:
Warped manifolds and snapped studs are caused by excessive EGT (exhaust gas temperatures), which on a diesel is caused by excessive fuel, a Diesel will quickly ramp up EGT and can causes the manifold to warp. However, due to manufacturing tolerances some manifolds will warp at lower EGT – which is why it’s a problem even on some standard cars. Usually once a manifold has warped – a quick skim soon repairs it.
The other thing that can cause problems is thrashing it from cold – a sudden change in temperature can make the manifold do funny things.
As long as you look after your Td5… so regular servicing, good quality fuel, let it warm up and down etc etc then you should not have any problems.
Quote
so my advice would be to drive it as you usually would do, not to just put your foot to the floor and expect it to push you back in your seat. By that time your used to it being better, you’re already kind of used to it and need to drive the old un-mapped vehicle again to appreciate what it used to be like
Quote:
I think they way to think about it with modern remaps (as opposed to the old tuning boxes) is that the same fuel may be used more efficiently. Therefore, the same fuel may mean more power and less fuel may mean the same power as the original set-up. That’s all very generalised though, and both driving style and usage will still have a significant effect on the final outcome.
less gear changes in a manual and more ooomph for hills, better cruising etc
Quote: Ian IRB
Don’t think it as more power = more fuel.
A remap, well changes done to the engine ECU calibration (done properly) is more than just using adding fuel.
Diesel technology has advanced with leaps and bounds over the last 10 years, gone are days when all you do is increase the fuel (pulse width).
Modern diesel calibrations are based on torque strategies where the ECU determines how much fuel to inject (and when) based on throttle demand, air temp, load, air density, boost pressure etc etc. It does not just run off a basic map that says ‘x’ amount of fuel for ‘y’ amount of throttle pedal demand.
Modifying a Defender calibration all about changes to the torque and power curves – i.e. making much better use of the torque capability of the engine. And making sure certain things are optimised.
By giving the vehicle a much more usable torque band, you will not need to drive the vehicle has hard and you will be able to use higher gears etc etc… basically you end up with a much more relaxed drive.
By doing this, you will increase efficiency.
I have seen failures… but only from people who do not know what they are doing playing with calibration. These companies think they need to play with pulse width, injector timing and then try and increase the boost to get rid of the smoke (regardless of the fact they will never make the power they claim as other limits kick in). The over fuelling from playing with pulse width and timing leads to excessive smoke and high EGT – but more dangerously will lead to bore wash and ramped up bore/cylinder wear.
Regardless of whether then engine is tuned or not – regular (on time) servicing with good quality oil is critical to the longevity of the Tdci engine.
In my opinion, that is the wrong way to do it…
The standard calibration in a Defender has been developed to work with the standard intercooler and standard exhaust. As such, changing components without changing the calibration means you will not get the full benefits.
Removing the CAT and centre pipe dramatically reduces exhaust back pressure – which if you want to preserve the life of the turbo – means that the calibration should really be adjusted to match these changes.
The same does apply to the intercooler – whilst a more efficient intercooler will keep air intake temperatures lower – the down side is that it is a big change to the air path circuit, and really this should be accounted for within the calibration.
If it was me – I’d make sure everything is set up correctly (in terms of pilot correction and fuel pump learn) and then do a first level calibration change – with EGR removal – and a few changes to the air intake system.
Quote:
Simply speacking, a OEM map done for respect the emission limits are not “efficient” for maximize the engine efficiency.
With a good remap (and with the EGR blanked) not only you increase the power, but also increase the engine overall efficiency. That means that at the same “driving style” the remapped engine need less fuel…..
Just for explain you:
The EGR recirculate part of the burned air (no oxigen) to reduce the combustion temperature (and reduce the NOx). But it is clear that the engine not runs at 100%….
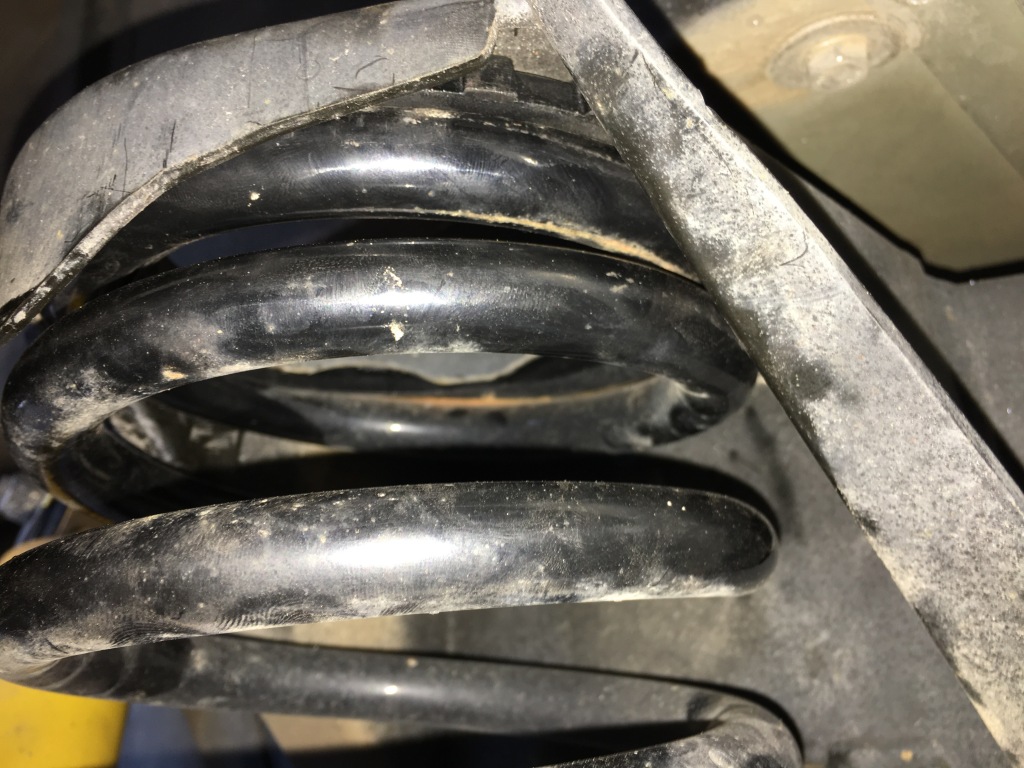
These rubber is yet again something really simple but has significant impact on confort and cabin noise.
I have fitted ANR2938 on the rear springs on the upper part each rubber isolator is 8mm thick.
These 2 rubber isolators are used on the discovery and the idea is not to have metal on metal ( meaning spring metal in contact with body chassis)
You can use 2 in the rear up and down but in the front you can use one in the lower part ANR 2938 but on the top only RBC 100111
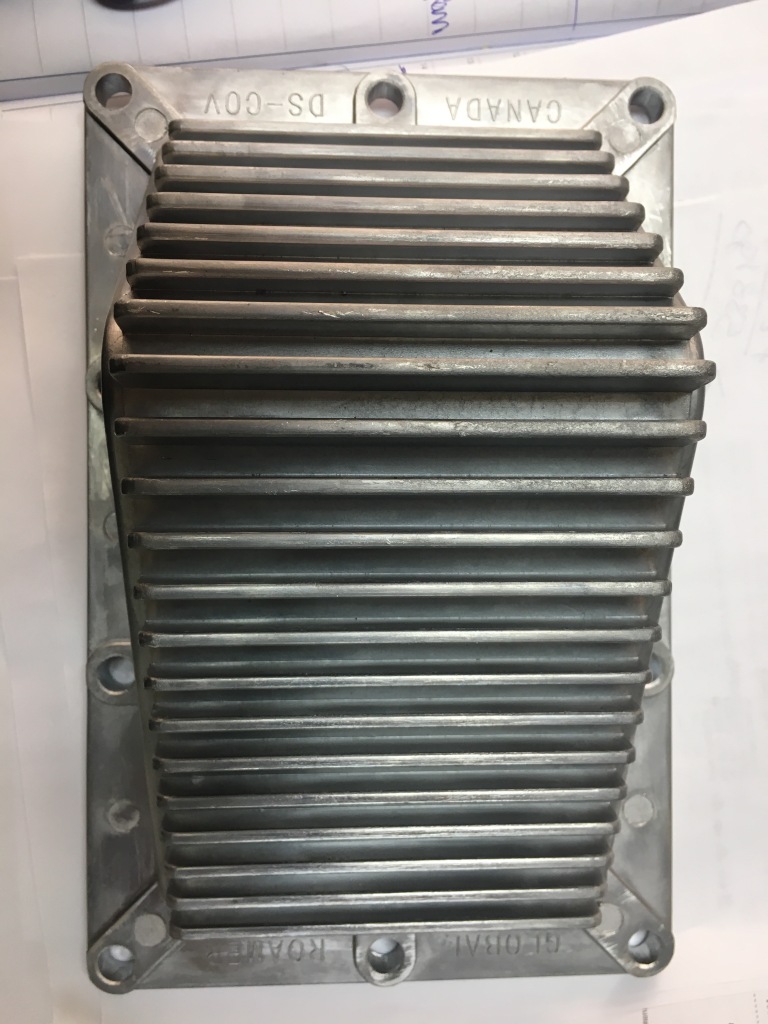
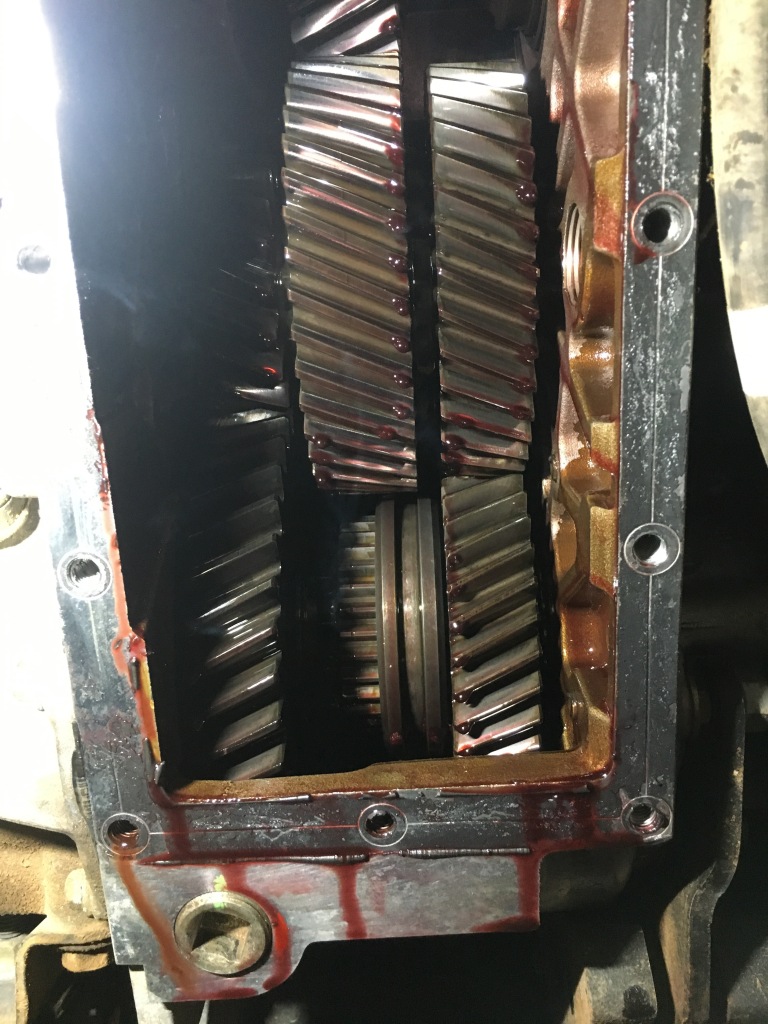
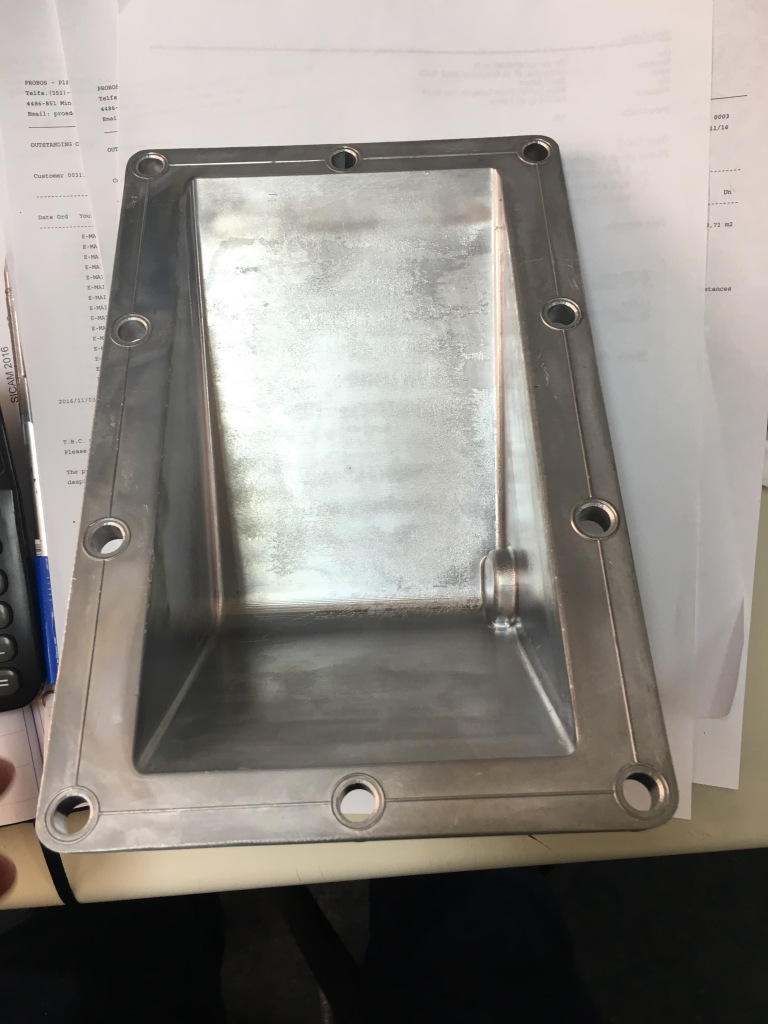
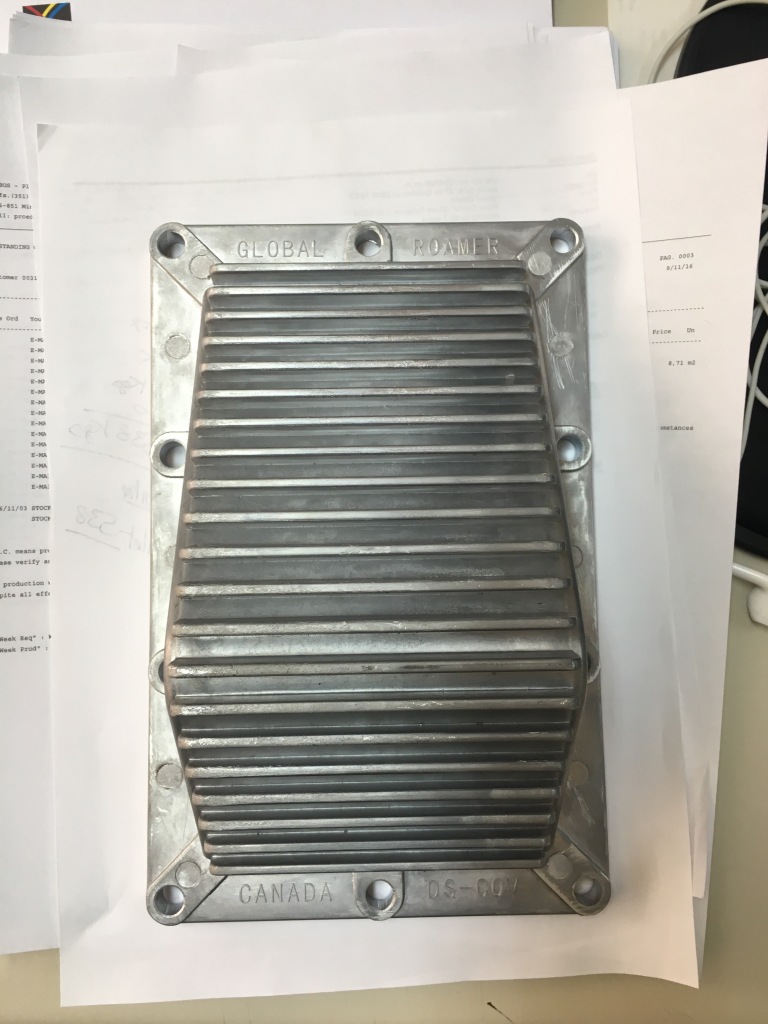
I already fitted the sump, pretty easy you need to take the original out, clean well the area around the sump as there will be sealing stuck to the Alu.
After all is clean i used new sealing and fitted the new sump and just filled 0,5 liter more of transfer oil to go upto approx 2,7 liter in total.
In the case of transfer box the more oil the better.
I will proceed with this upgrade that was recomended by my mecanic and not expensive @ 65£ and the logic make sense….
You can buy it here:
or
http://rockymountainspares.co.uk/product/roamerdrive-oil-cooler/
more info found here:
http://www.discovery2.co.uk/tbox_cooler.html
And here:
http://www.africaland.it/alubam_eng.htm
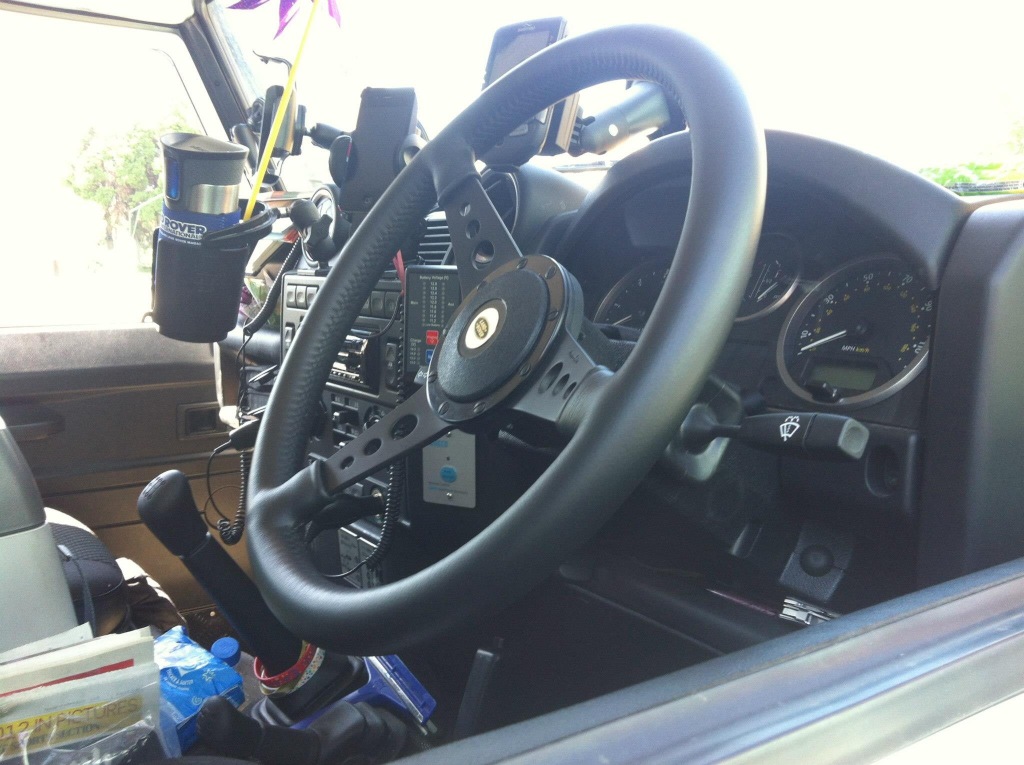
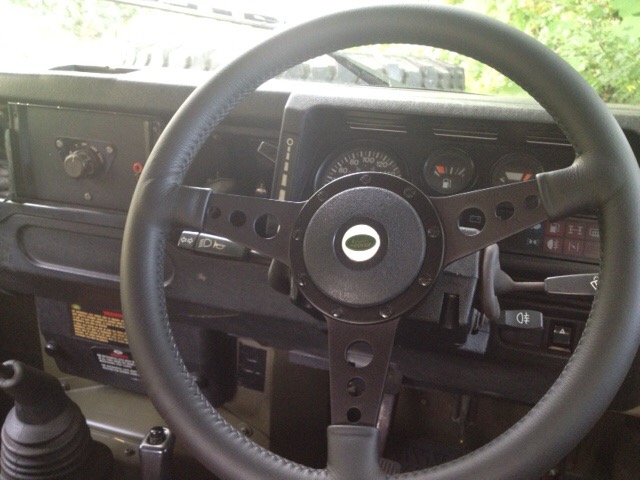
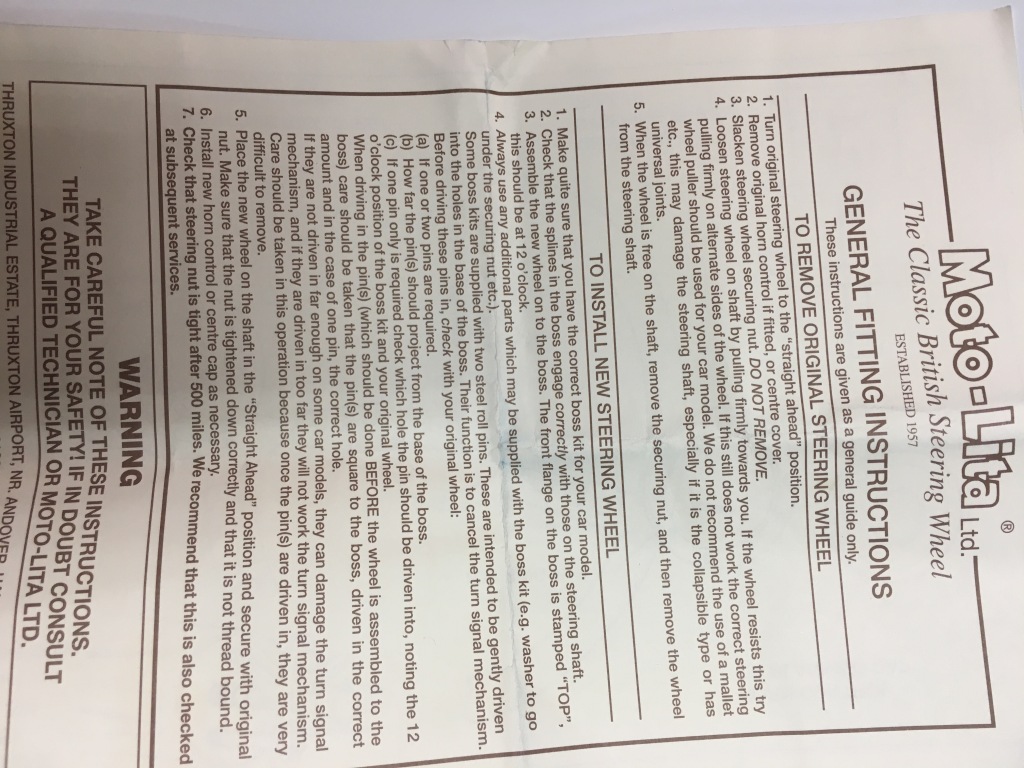
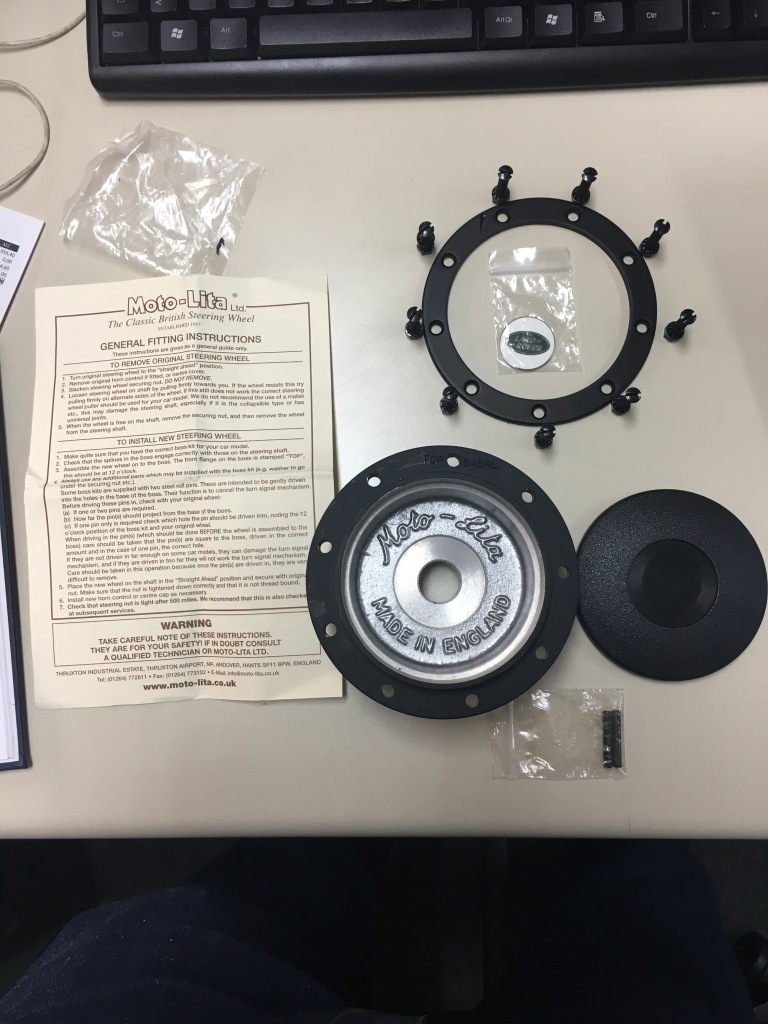
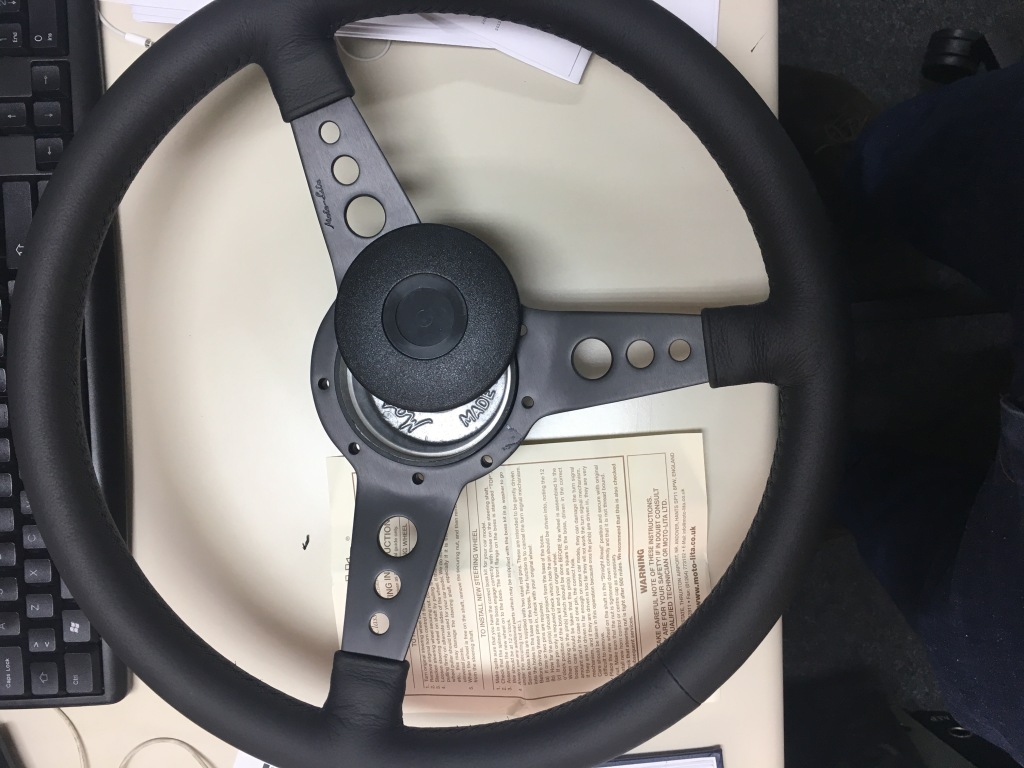


Just bought a Moto-Lita…..15inch / 380mm
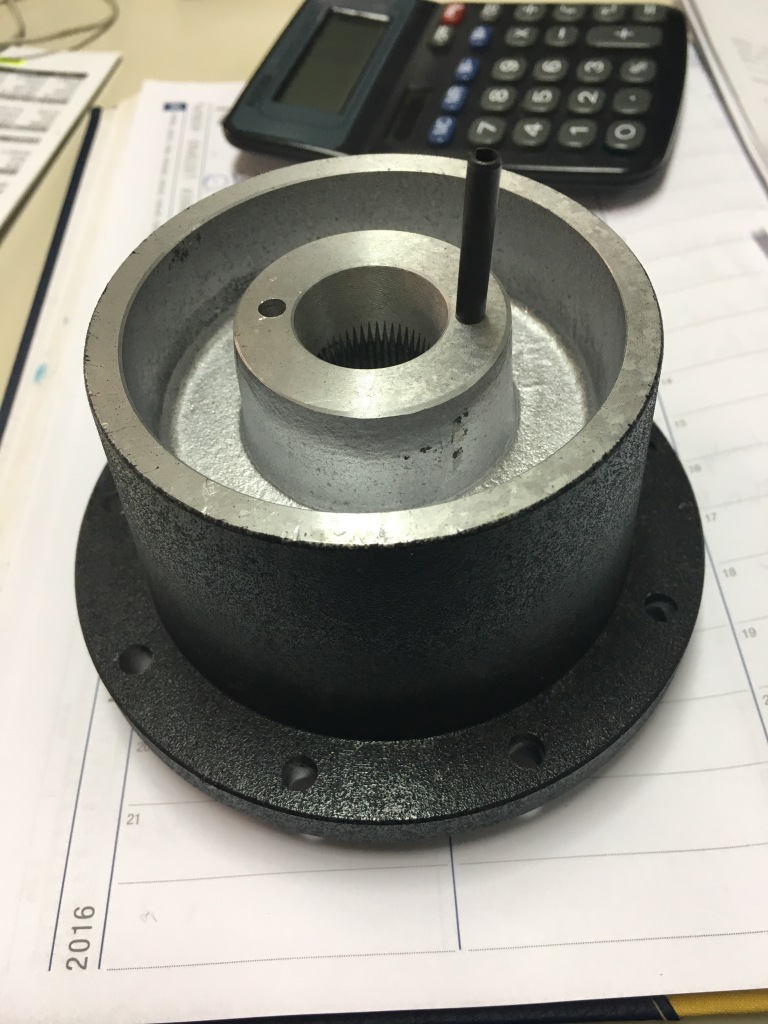
Boss and spline config.
http://www.web-rover.co.uk/nav.php?p=articles/steeringwheels
Mudstuff has more info as well
http://www.mudstuff.co.uk/products/moto-lita-steering-wheels/moto-lita-steering-wheel-kit.html
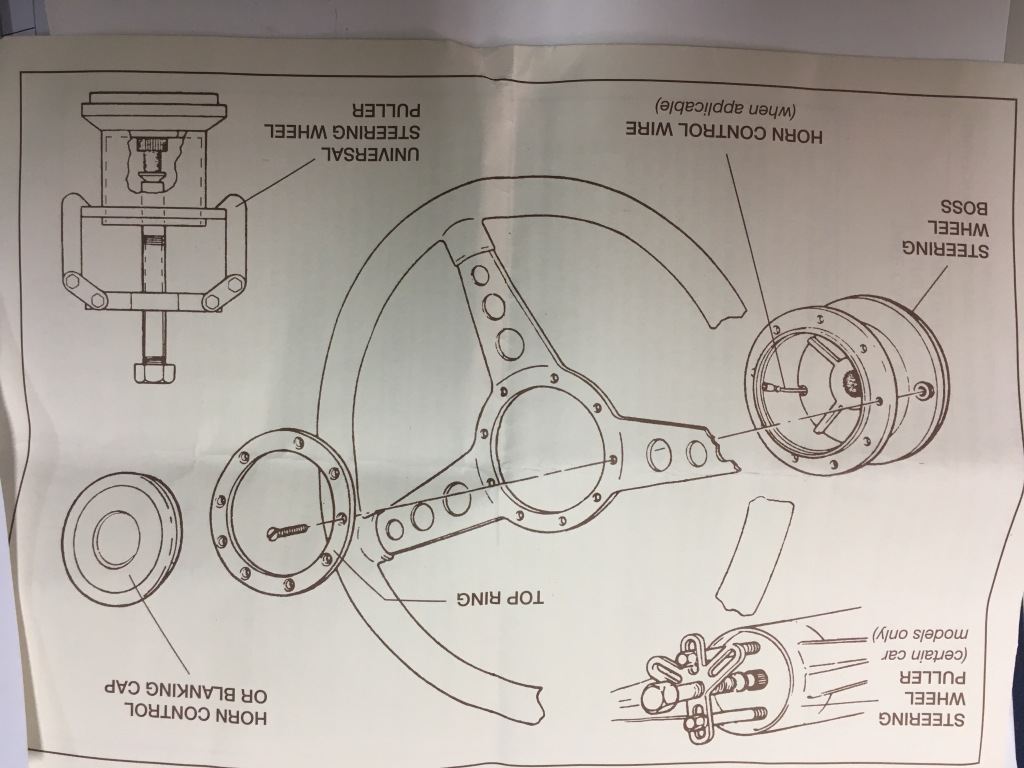
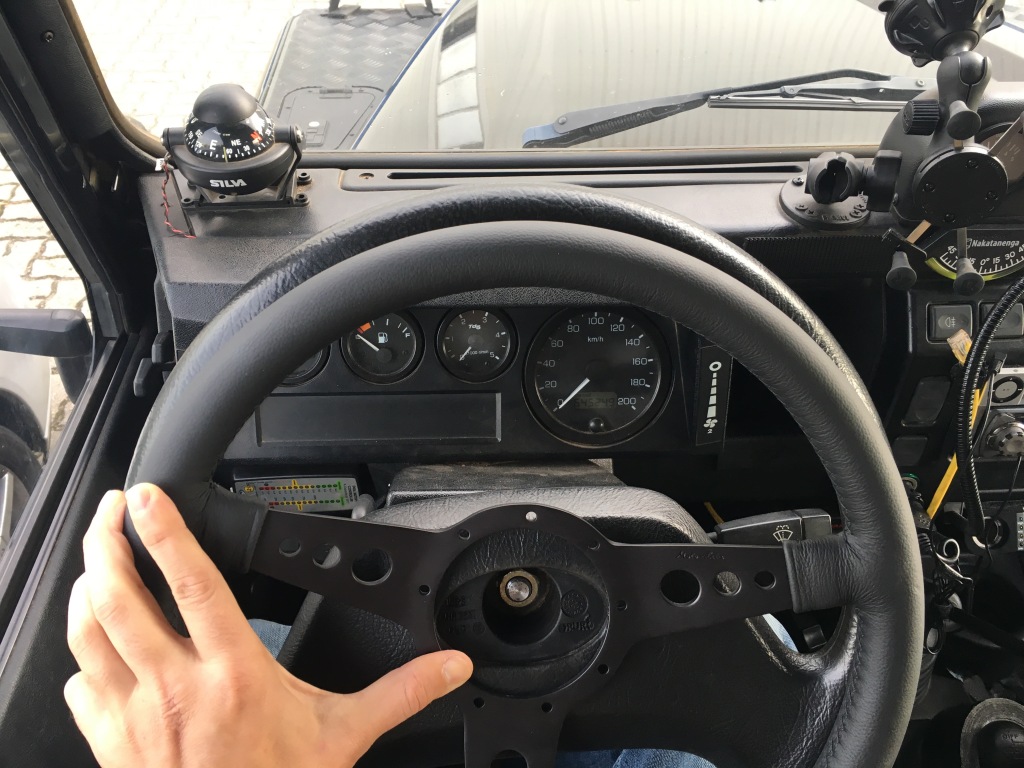
Done and I published the first Moto Lita fitting for a defender on YouTube
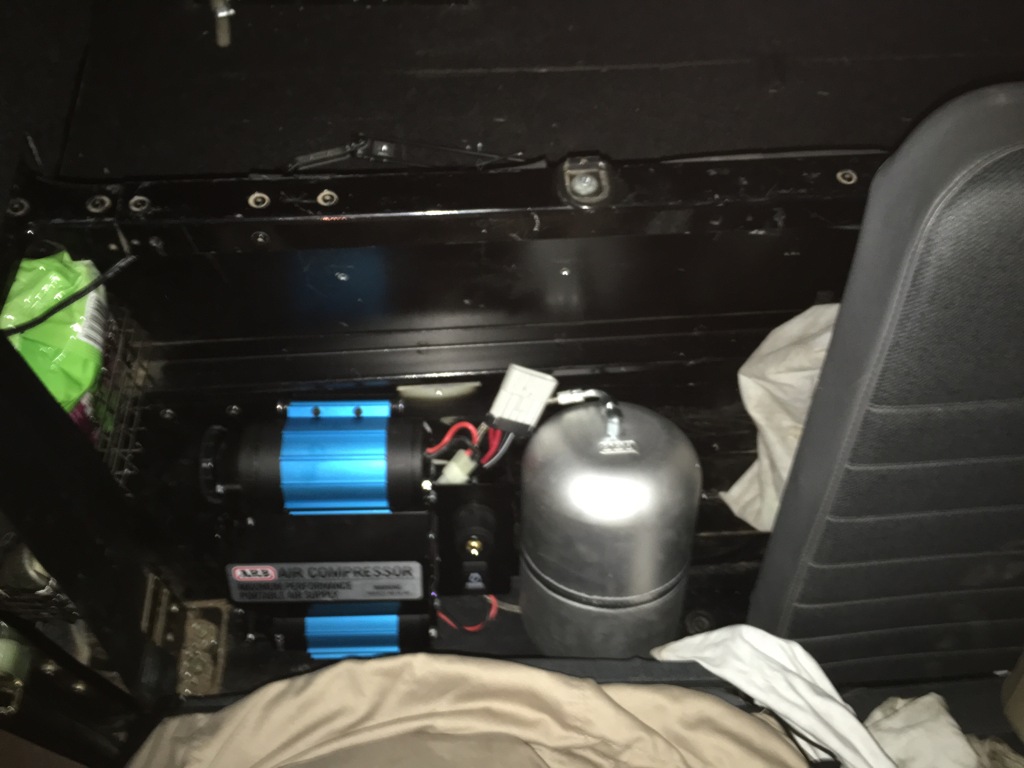
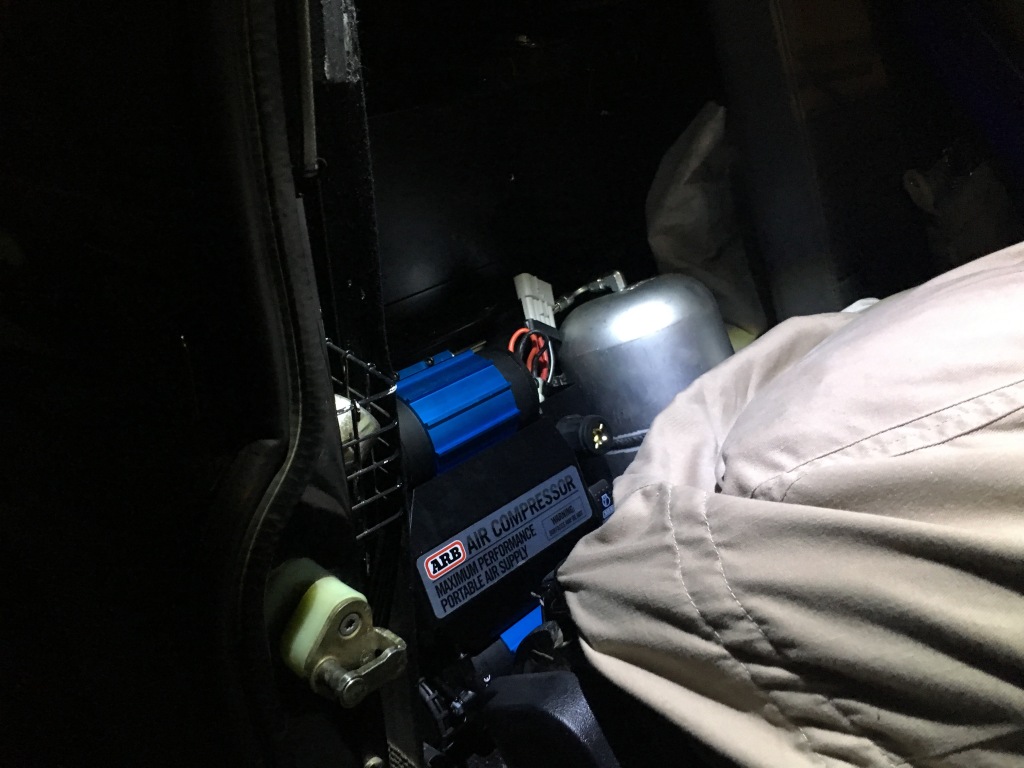
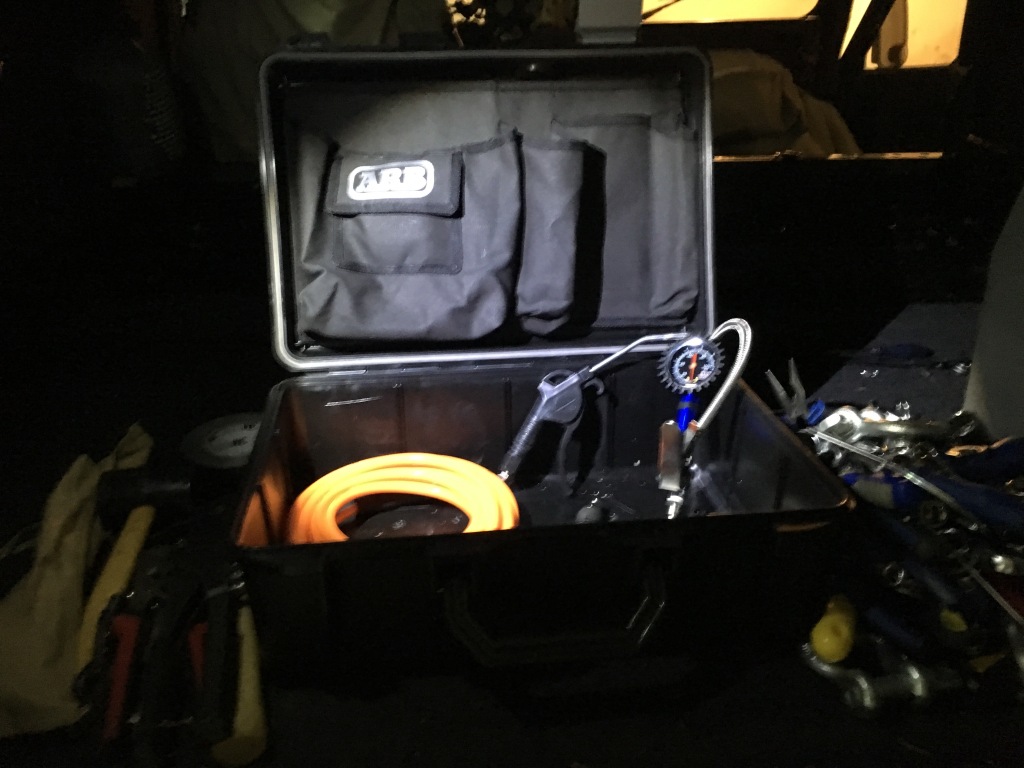
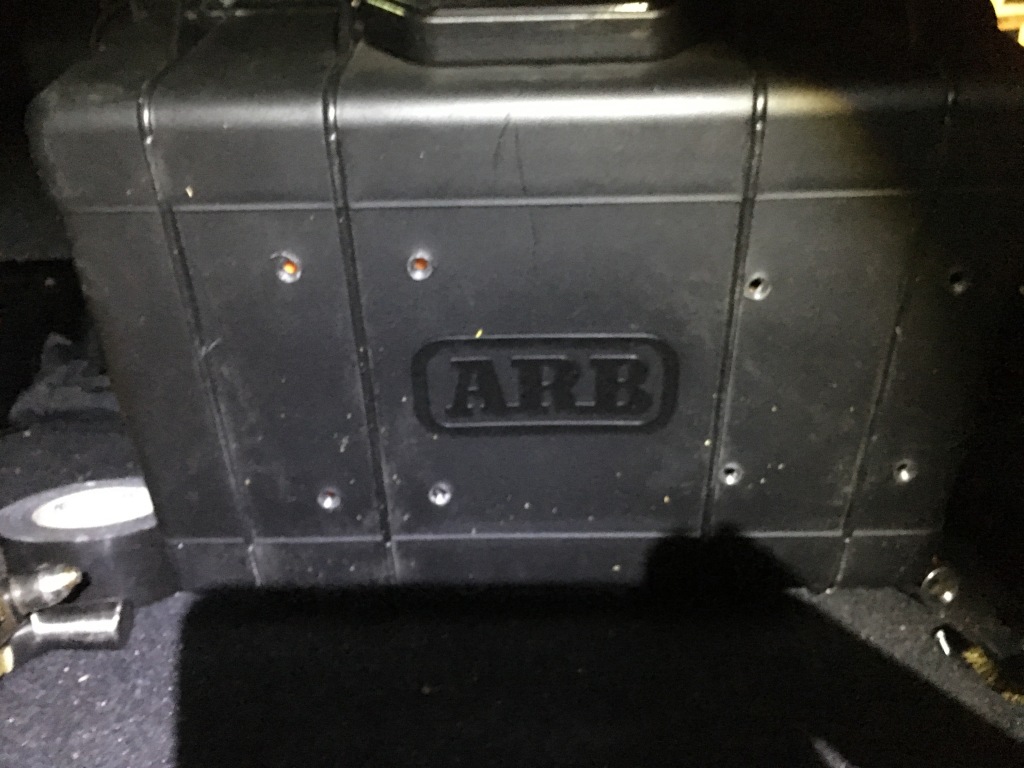
What a machine….this thing is a monster
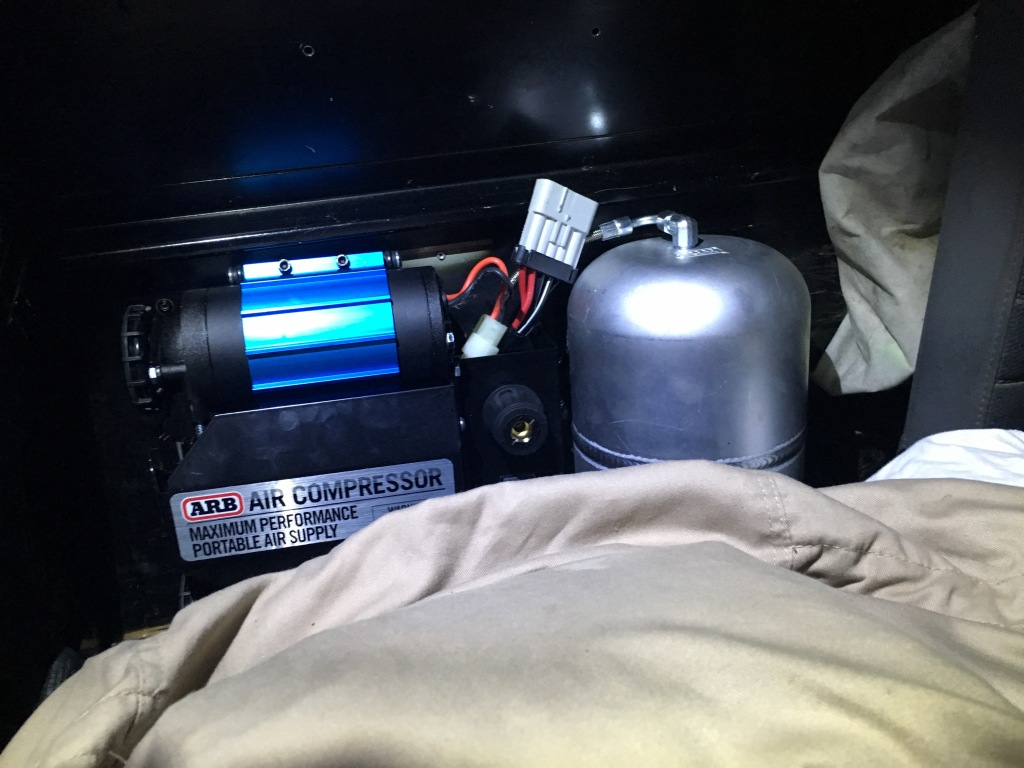
6cfm …..the air coming out is very pressured
I bought it in the box set with all the setup ready just plug and play.
I took it out of the box by undoing the eight bolts t on the box this releases the whole thing.
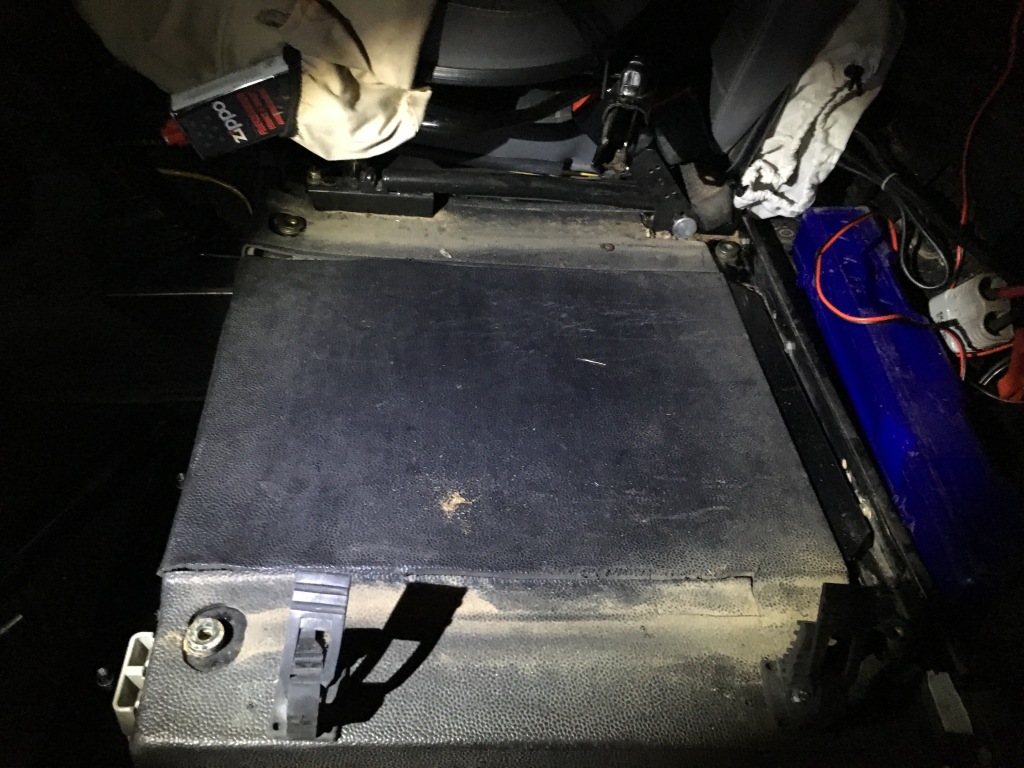
As you can see in photo it will fit in the back of the passenger seat, it has room and won’t take space behind the seat
I will fit the the Anderson plug and take out the crocodiles as I have already an Anderson plug outlet under my seat hooked on my secondary battery.

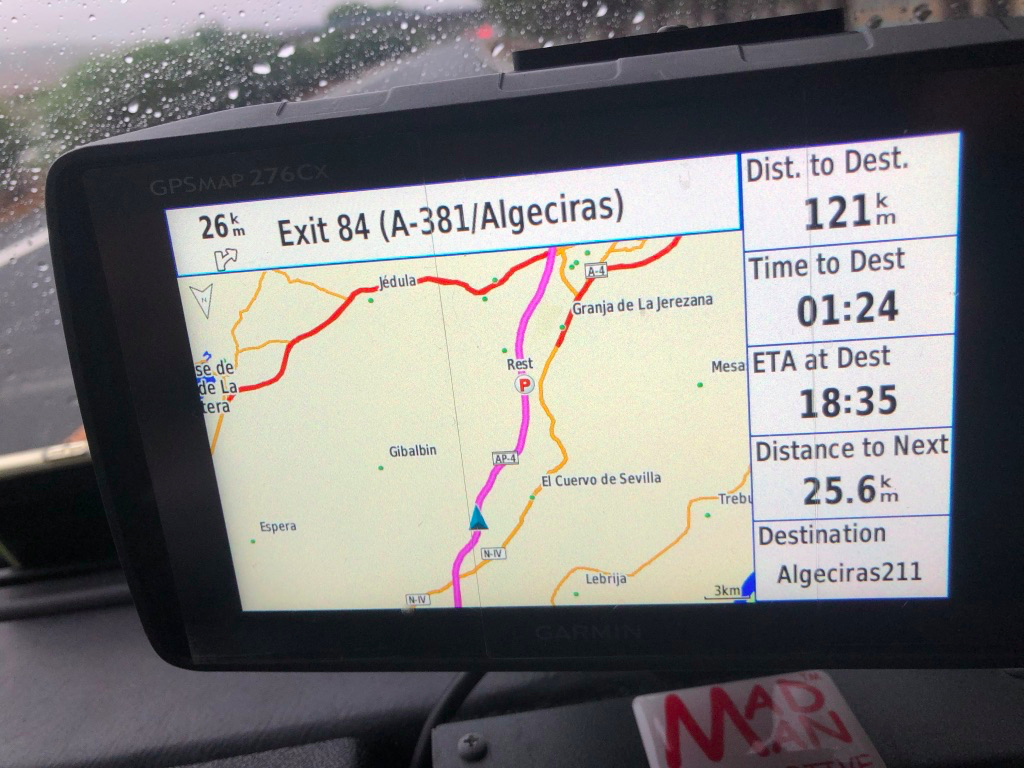
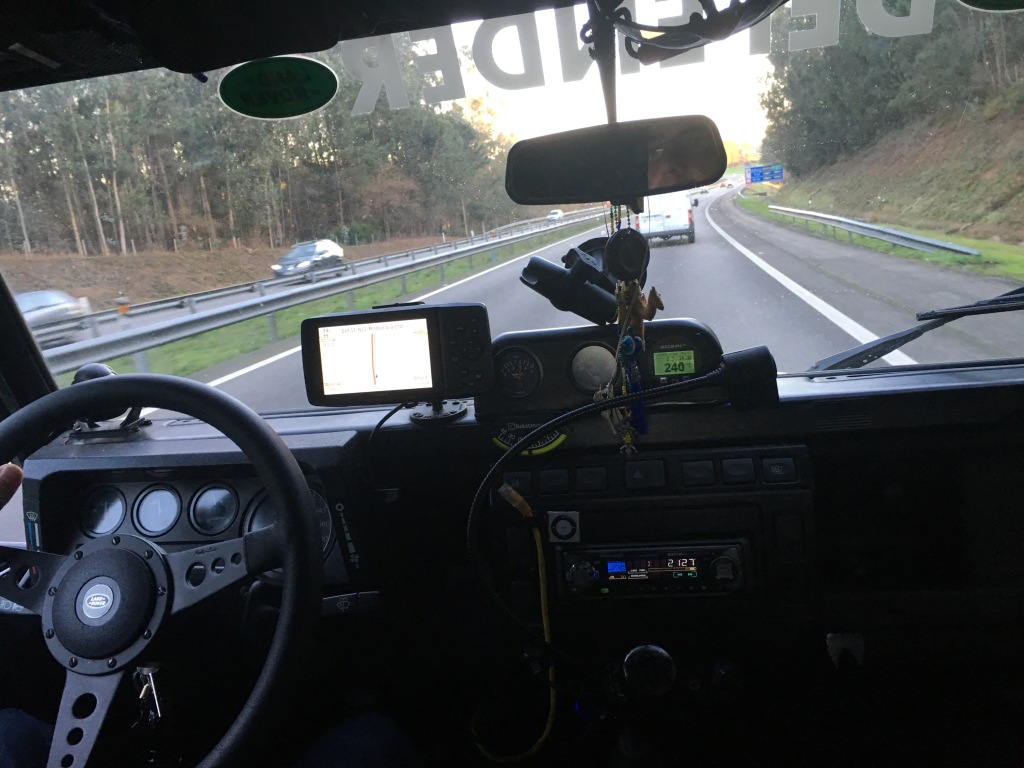
I will talk about the Garmin 276CX shortly as i am in process for preparing for the next overland and i am getting used to or not to BASEMAP software which i hate by the way very far from the straight forward MAPSOURCE which i still work with on the tracks.
this bloody thing that i cannot open each track from different files seperately and not all joined together in one file My Collection is constantly confusing me.
https://support.garmin.com/support/manuals/searchManuals.faces?refresh=true
Since I have ram mounts already I will ill go with the this mount as I already have the suction mount and bracket so all I need is the AMPS MOUNT
And this garmin mount which comes with the screws, screen protection film:
This is it

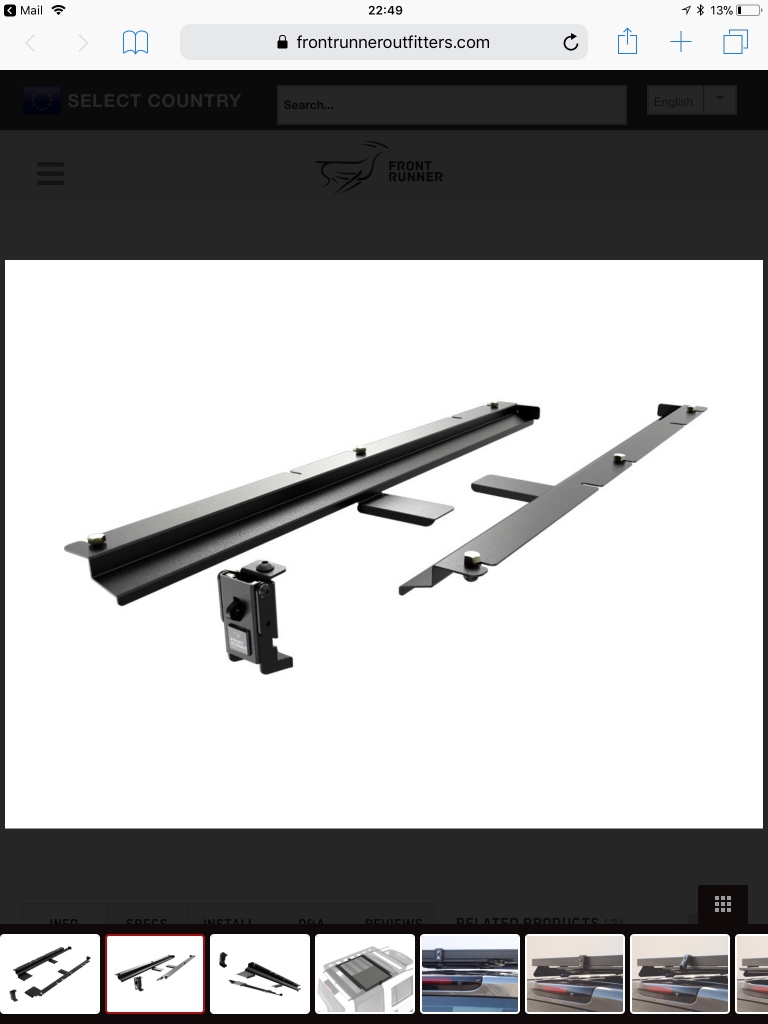
adding this to my side panel for easy side access…to roof rack that is now in the front of my Landy set up
Still need to study……..side steps are easy to spot on the side of Errol defender…. he did the 3 configuration
I like more Sam Watson defender 2 x configuration….
As i have myself already the wheel side step mount…seen on the back wheel but it is big, heavy and ineffective in front part of the landy ( only if you want to work on engine not climbing really to roof rack)
End result


Fitting on the hood soon…..I will split the 2 meter rail into 2 rail 1 meter each to fit on both sides of the hood.
Will still have to source counter sunk rails and hook rings…
You can buy them here:
More accessories can be found here:
As you can see on the hood the rail for which I want to secure the solar panels when I want to secure on the hood
http://www.paddockspares.com/pm278-extended-seat-rails-one-seat.html
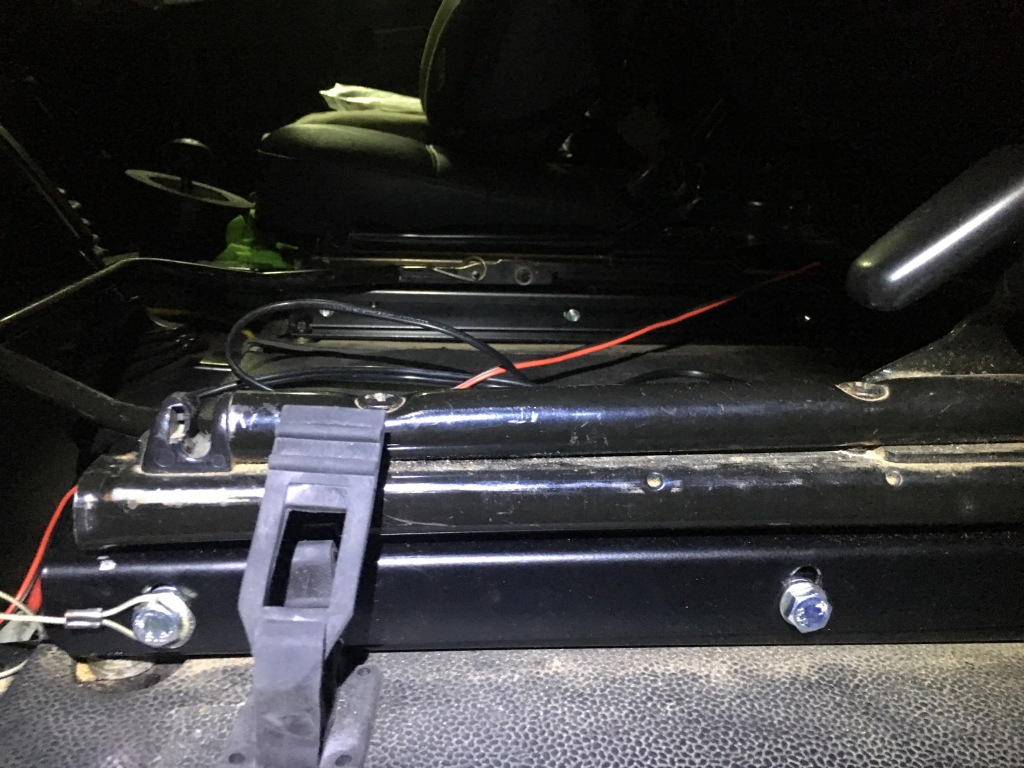
Just bought the rails and fitted them last night, will give my feedback shortly. But they defenetly add height and confort to the ride. Paddock ones are adaptable still need to fine tune height.
I can say that this is an upgrade which is not only necessary if you are tall and need a leg room, it is even better for an average height as you get a better view and more comfortable to drive (legs are higher & reach better the pedals)
Pretty straight forward you just have to Remove the seat base and locate the 4 mounting bolts( 4) that secure the seat frame to seat box
Remove those bolts and lift the seat frame, kept the orignal washers in place and used the original bolts on the raisers, the kit comes with 4 bolts that i used to bolt the seat frame on the raisers.
A general advice dont tighten all bolts in one go because you still need to first adjust the raiser to the seat frame and them the seat frame to the new seat raiser nut position i did need to push and adjust specially the back bolts.
Hence i strongly advise that you take first the 2 in the back than the to in front and when you place the raisers you put the 2 in the front first and then the 2 in the rear (Why this because if you dont do it this way once the frame of the seat is out the 2 bolts holes in the front wont be visible hence you will need to put the bolts in back first and it will be difficult to slide the seat on the original rail from the back to the front, for some reason it was easier to push the rails of seat front to back than back to front)
-View of the side between the middle seat and driver seat, not so easy to access for fine tuning seat height as you need to tighten the 3 bolts, you can see 2 here
-View on the side and a view on the back rail you can see that the seat has been set in the back
-The inner view of the seat raisers
-You can see here the difference in height ….maybe not but i do 🙂
-The seat is risen immediately 30mm and you can go up to 45mm which I did go for.
-You can adjust seat raiser to lower or raise the front and the same thing for the back but I didn’t notice a big difference.


I raised them all the way up and will go for a while like this…
I used the famous 5C changed the bulp for a led and serves as a source of light and security…


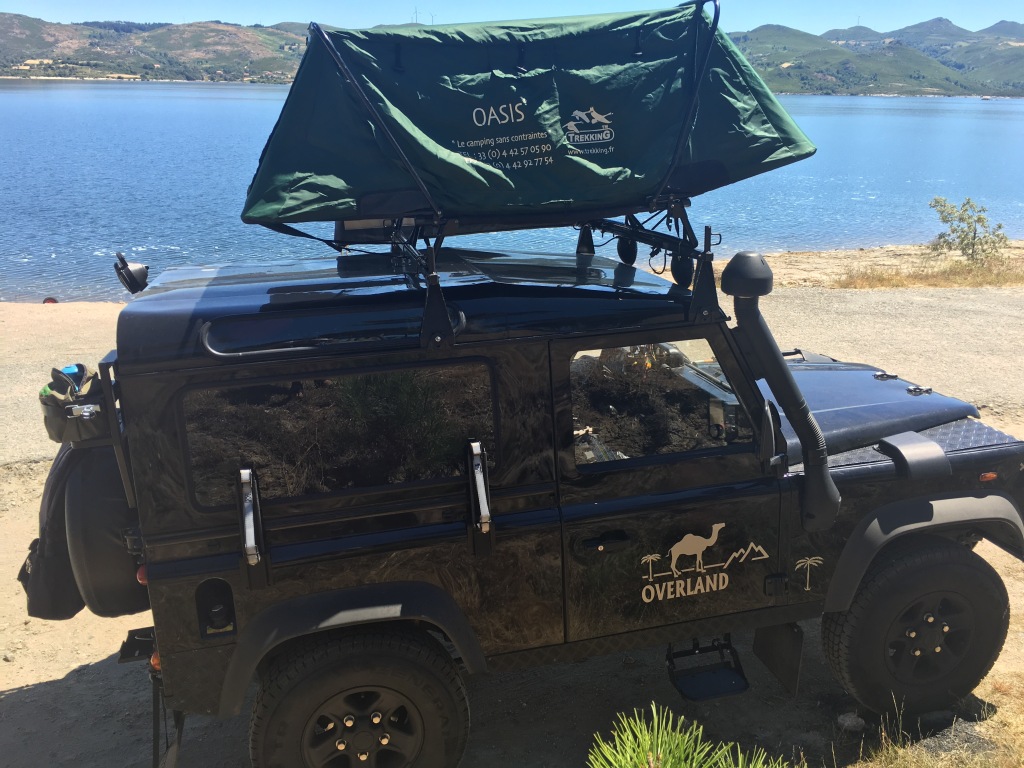
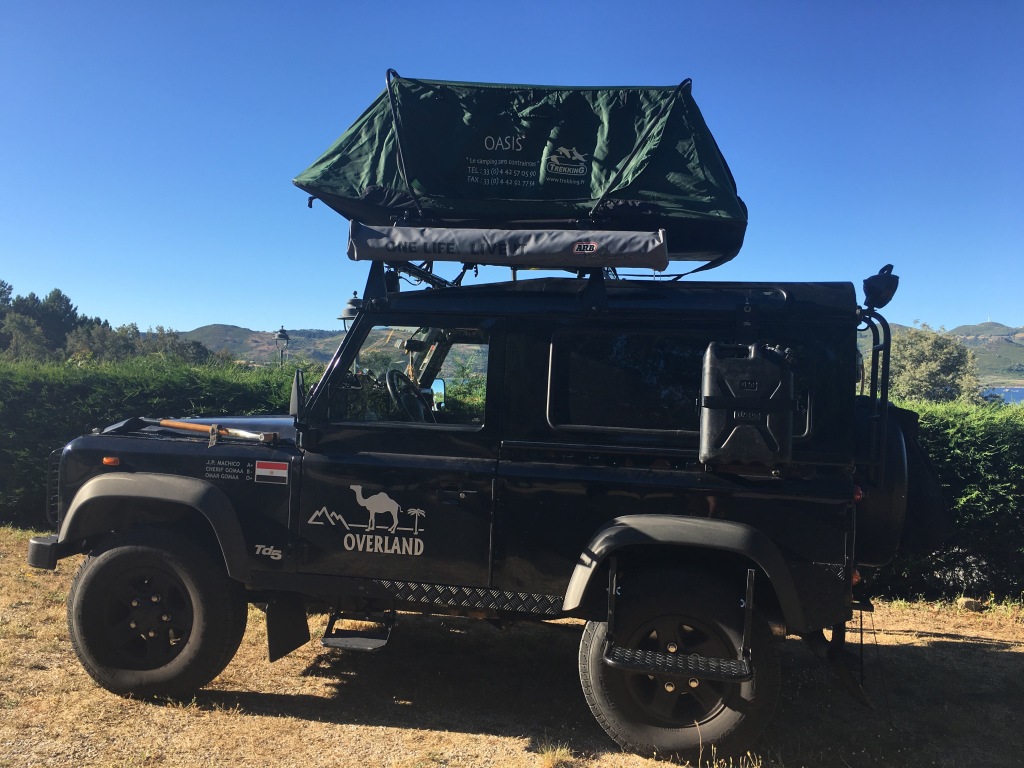
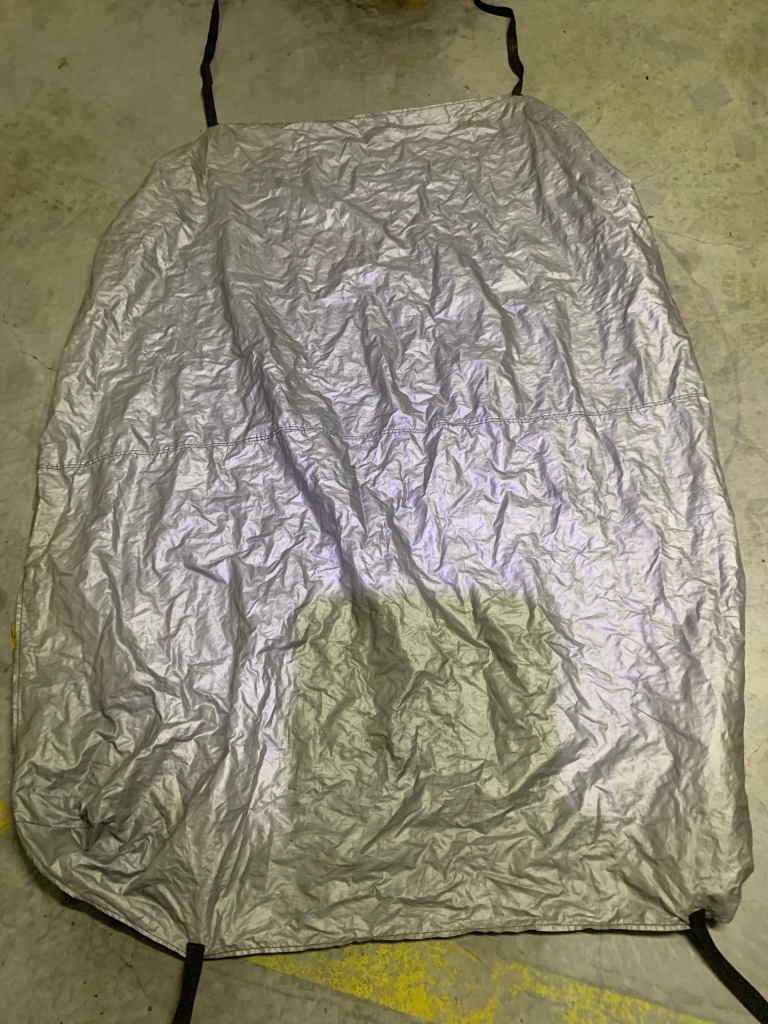
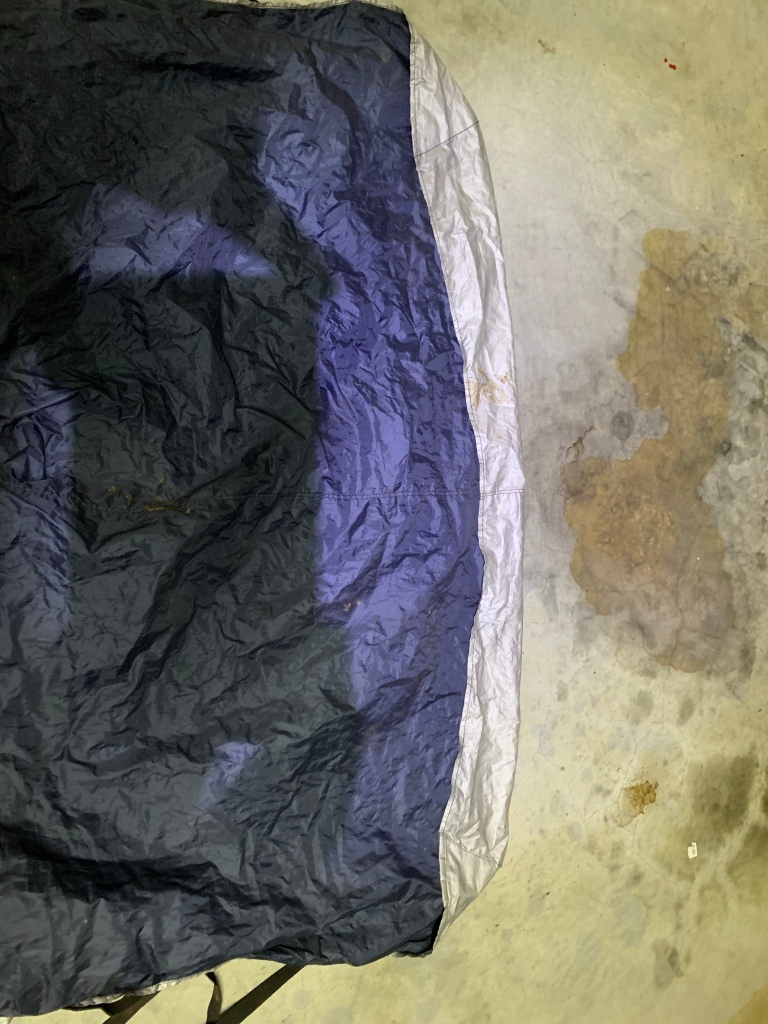
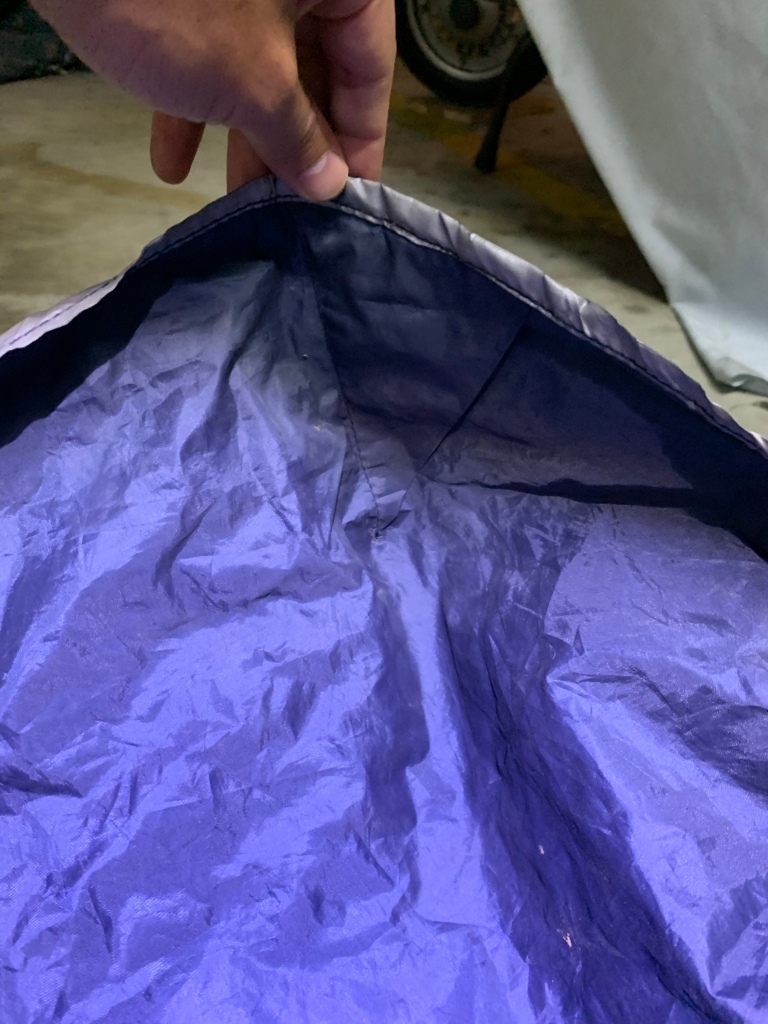
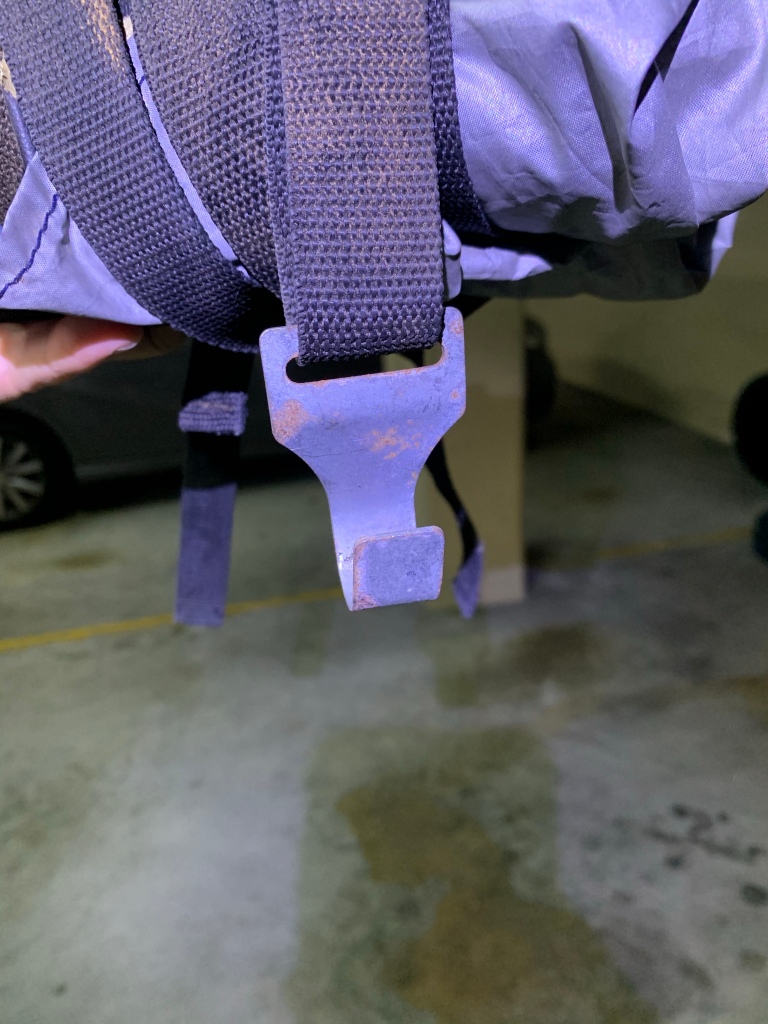
I purchased an Oasis II second hand one , details are following
The tent Model and actual condition, had to spray waterproof and polyutheran glue on some tears and seams damaged with use


The final result


That is the tent protection from tje rain and sunlight

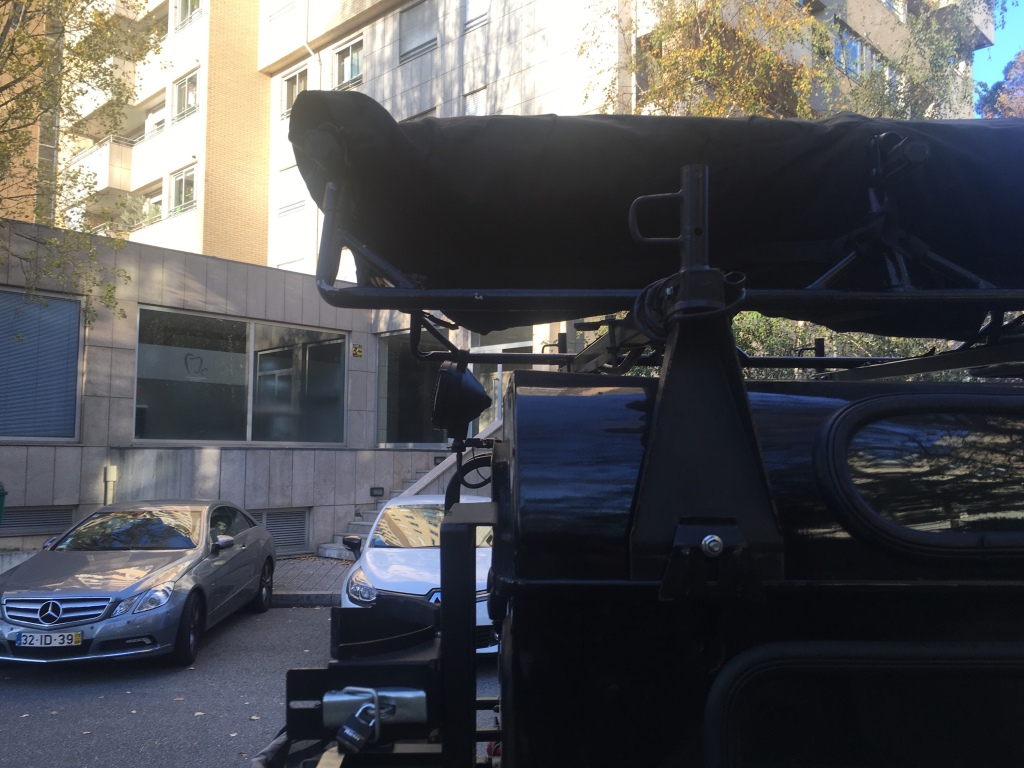
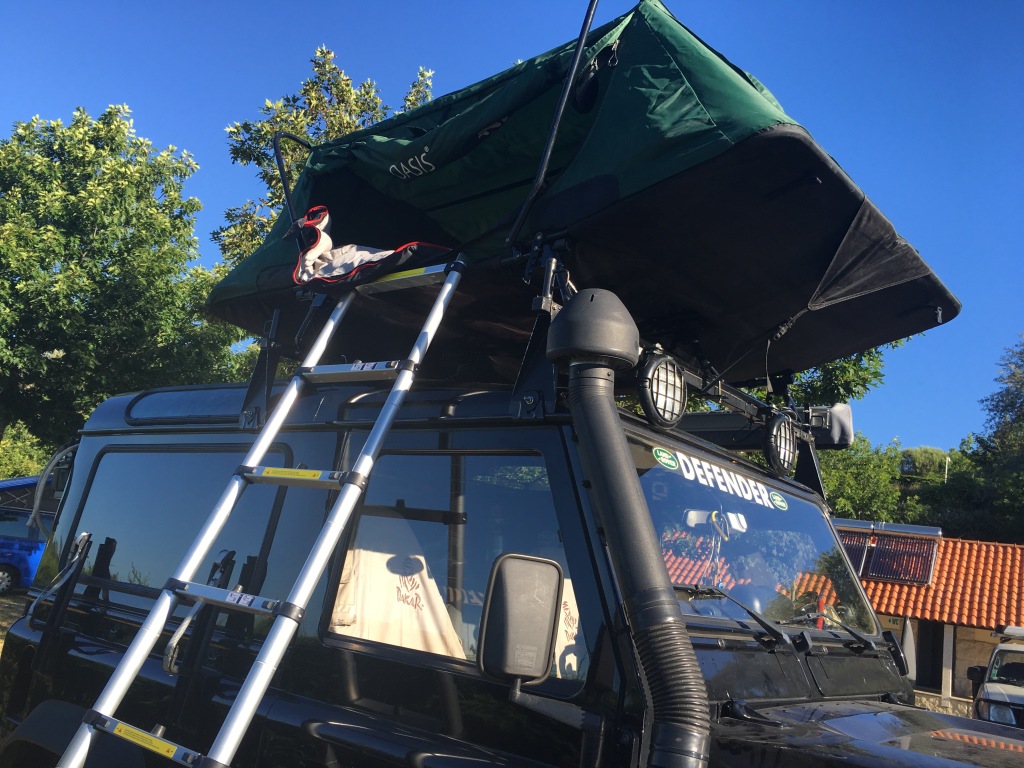
Fittin is pretty straight forward, just had to Position the ladder in way that I can fit the rear camp light
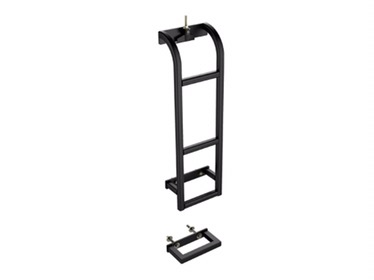
Just for your information this foam it applied on the top of the ladder on the back in order to close the gap the minimise any movement of the ladder to the back and kind of protect the paint of the hardtop
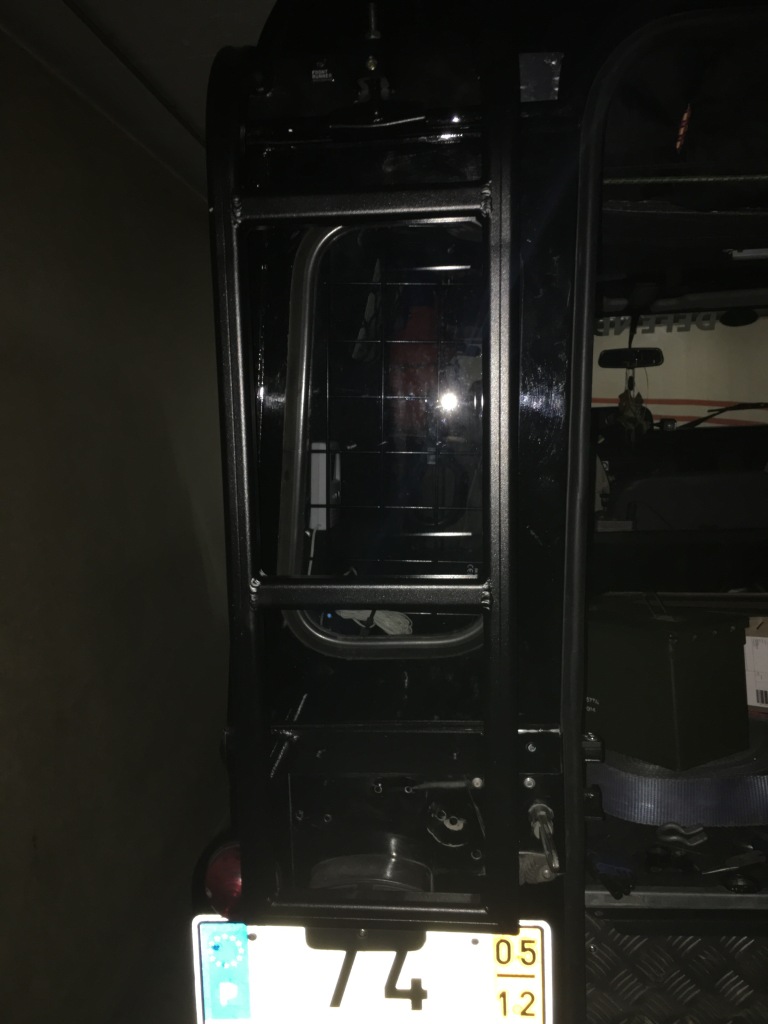
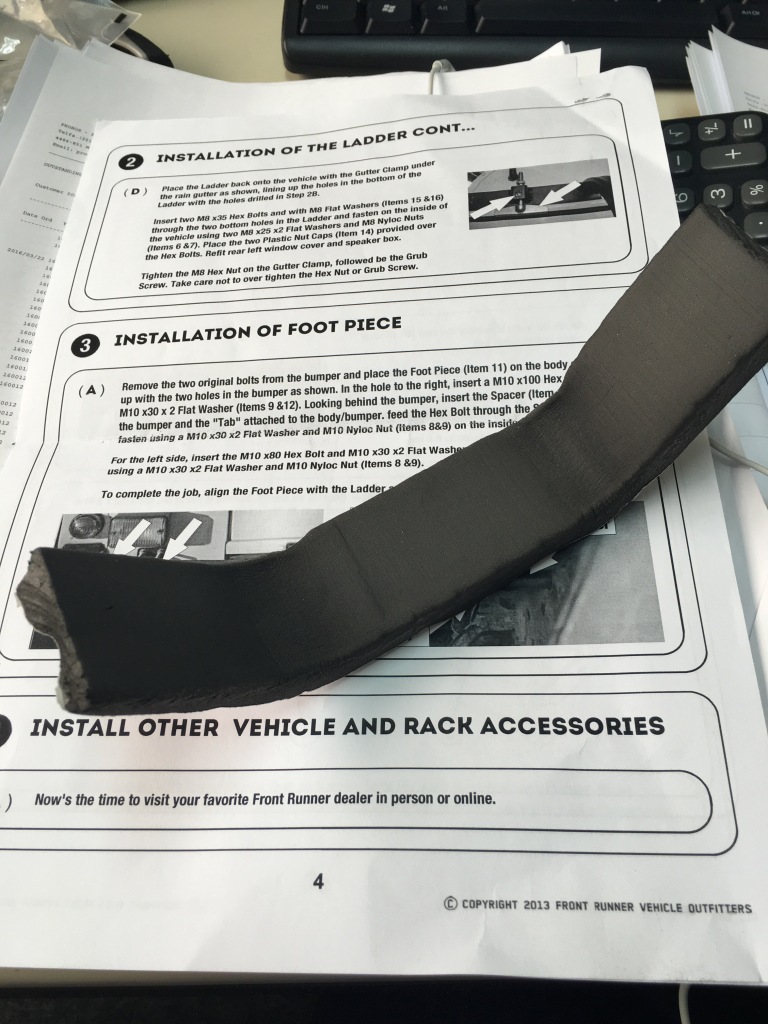
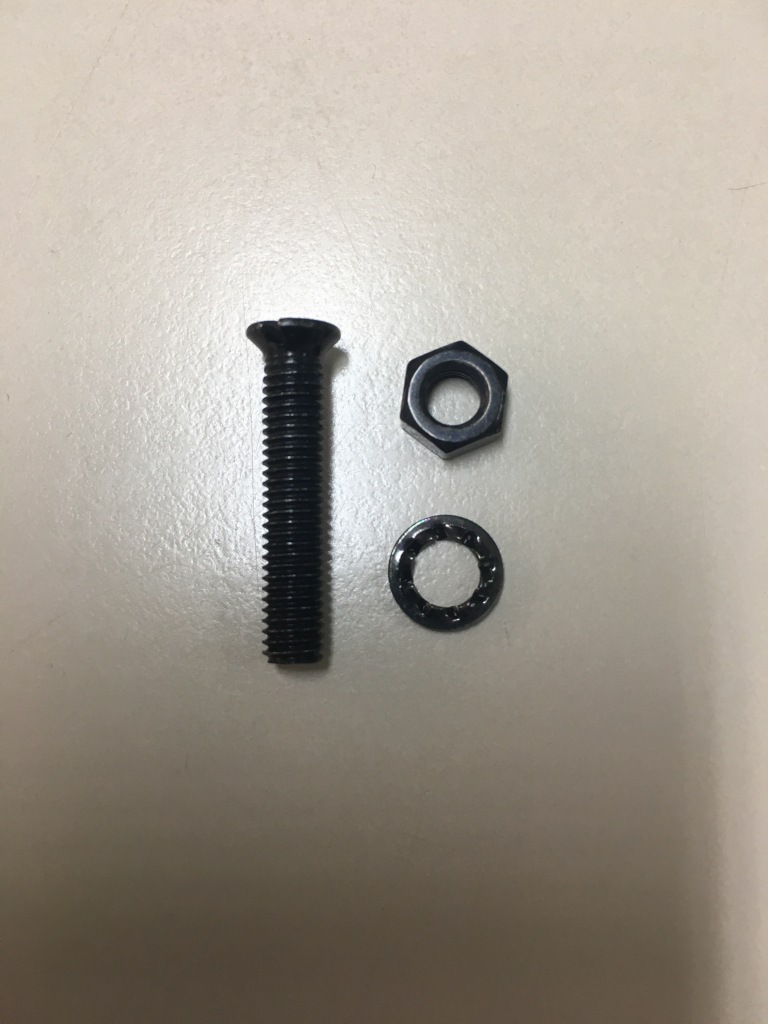
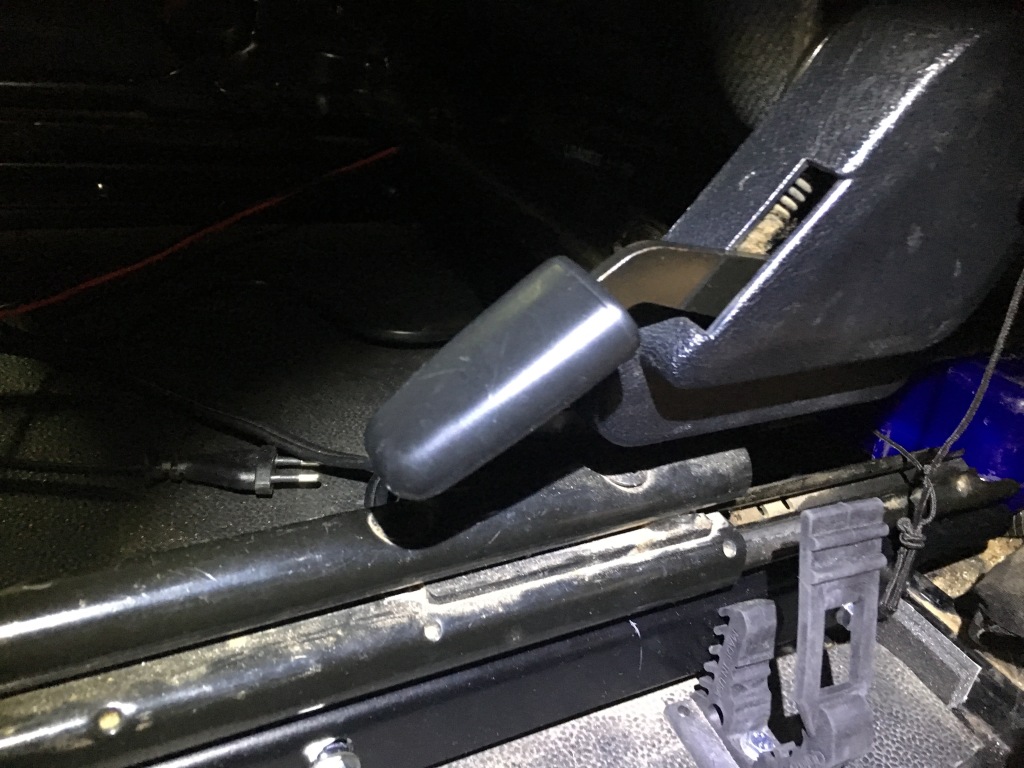
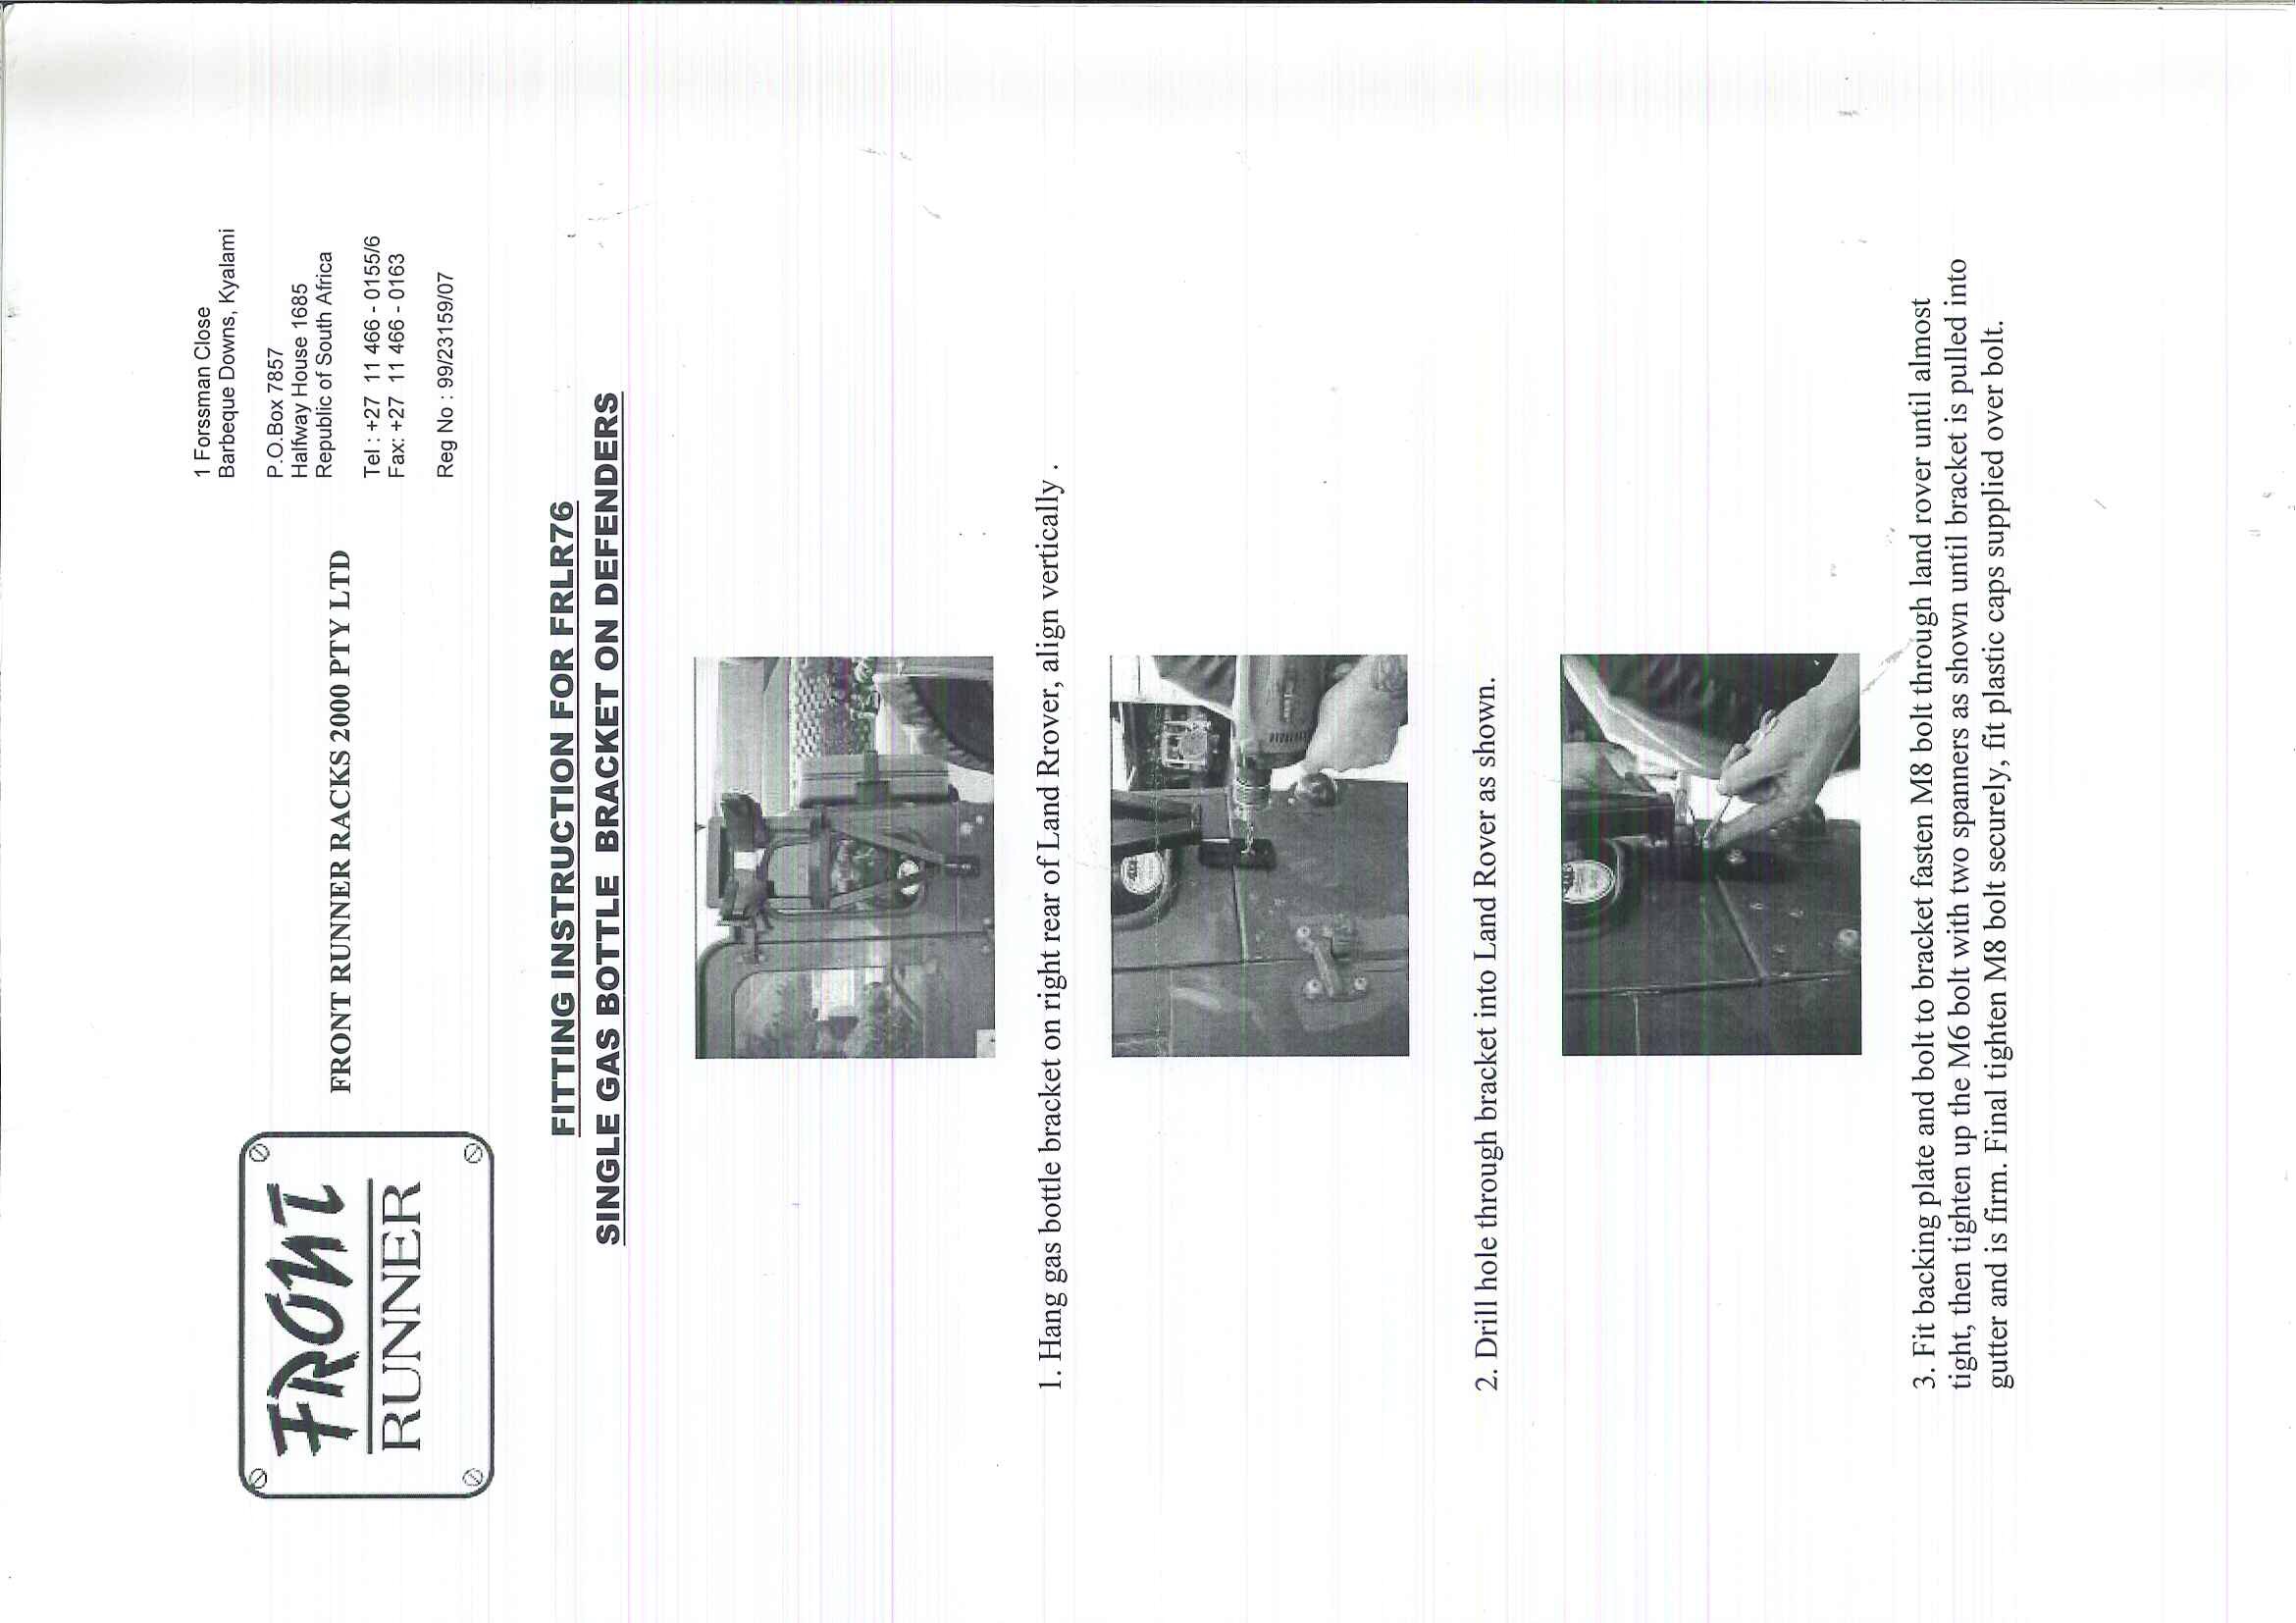
Pretty straight forward my only problem was that I had the swing away rear wheel carrier upper bracket that made me have to shorten the gaz bracket to miss the edge.
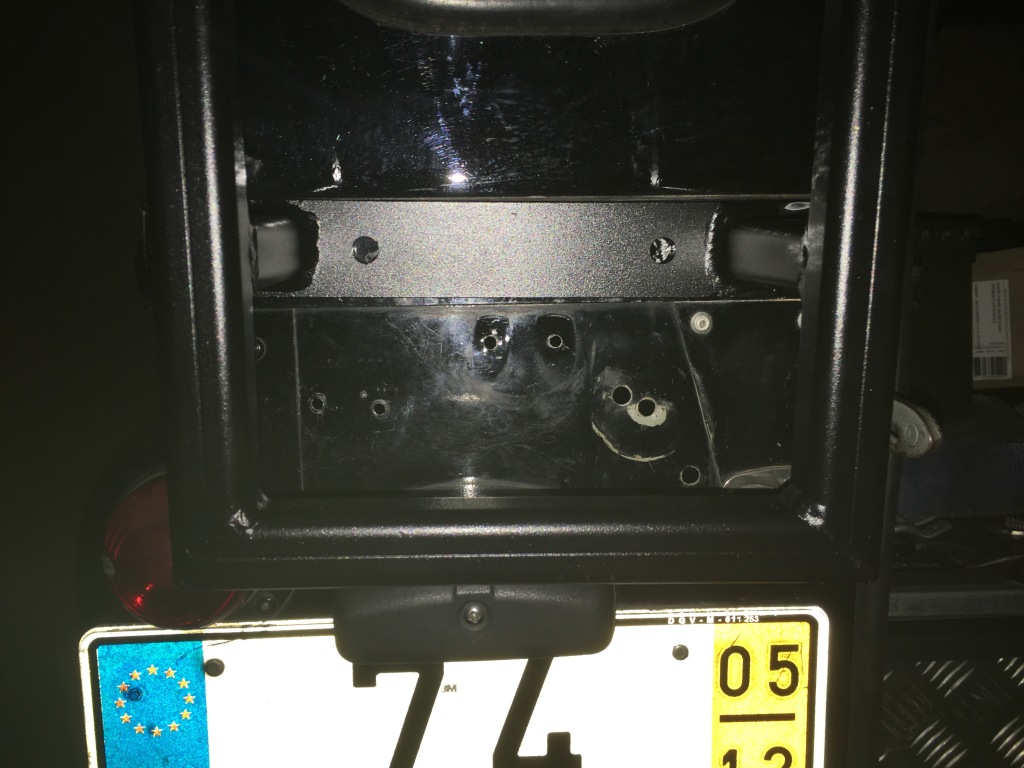
You need to drill the rivet out once out you will need to make it larger to M8 and just tighten the bolts up
I used galvanised spray on the hole
Again I placed a foam between the bracket and the hard top in order not to hurt the paint job


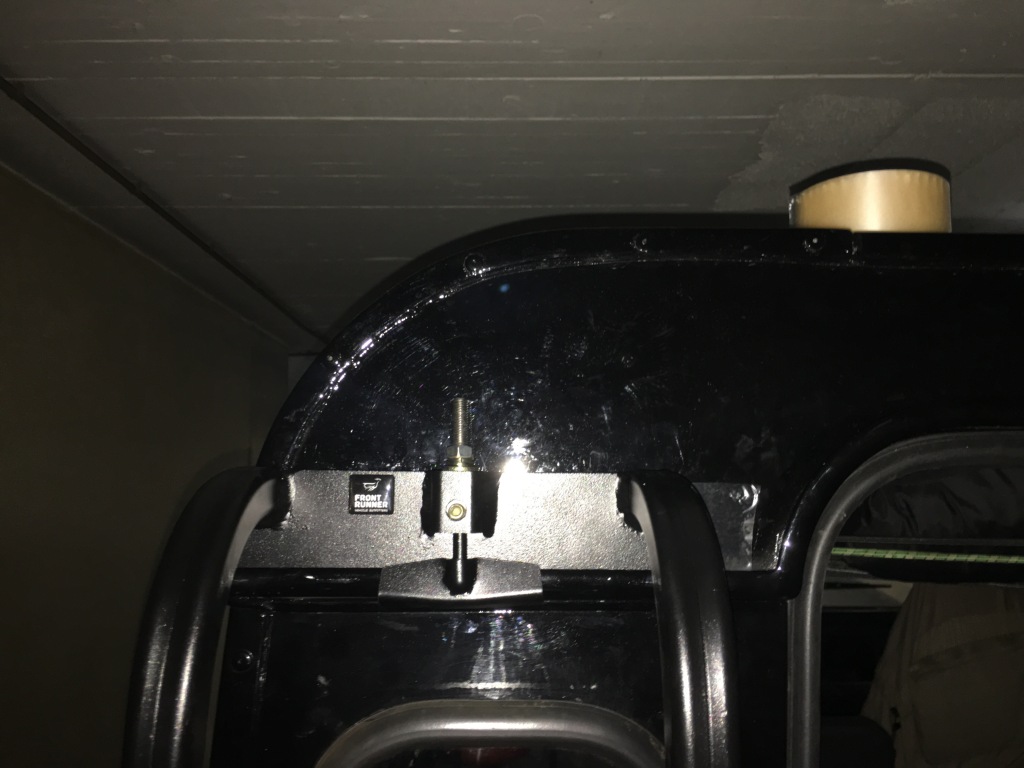
Again pretty straight forward , rivets drilled out , enlarged M9 insert rivet nut M6 in and tighten the bolts up.
Only observation is that the bolts are short they need to pop out from the other side ( inside the car) in order to fit a looking nyloc nut with the objective that the 2 bolts become impossible to unscrew from the outside…


I bought a panel of 10mm Maritime Plywood not too heavy but still solid, i primered it and painted it from one side black Matt and from the other i glued carpet like material.
the dimenssion in general which fitted with perfection are 143×60 and within those dimenssions there was some cutting to do in order for the panel to be a tight side fit.
The height can be less than 60cm if you require but i wanted a couple of cm height above the roof line and below the Alpine window in order not to be visible.
Plus i wanted more fixing points between the panel and the cappings below
but you can still buy it ready here……….Naaa there is no fun in that!!!!


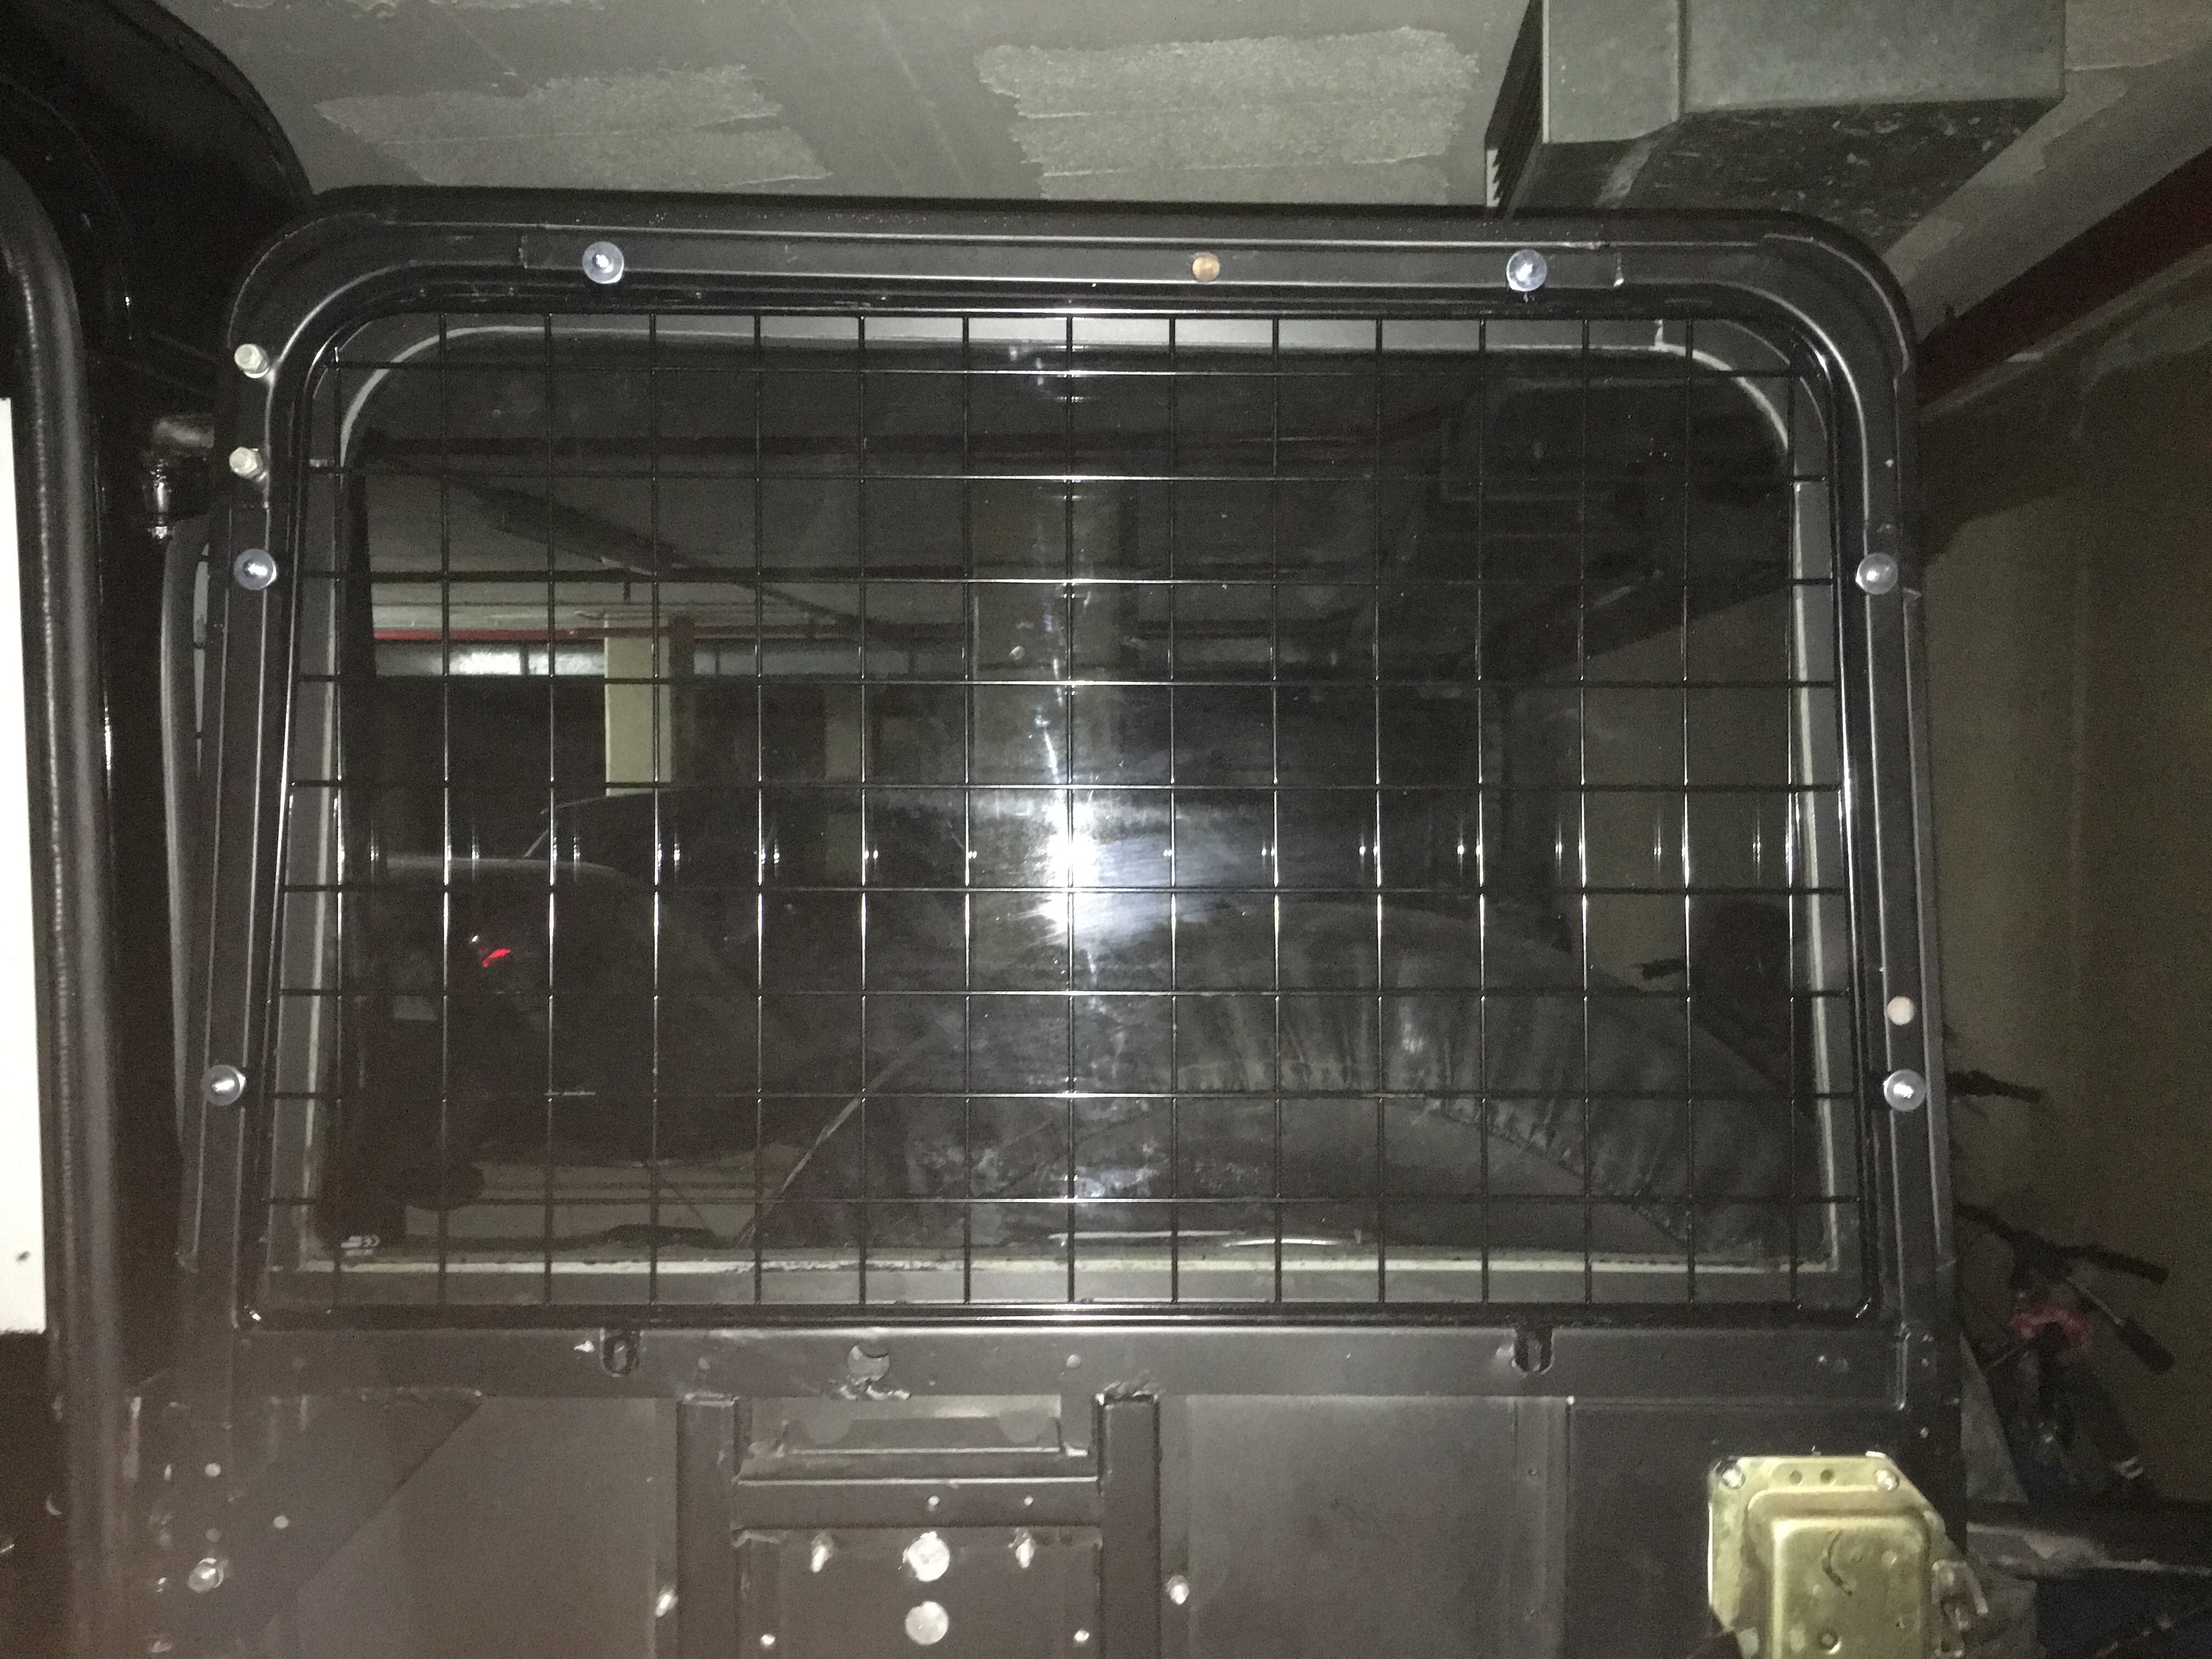
I fitted it without a problem pretty straight forward as following:
The set comes in 2 quarter windows and the door guard, the fitting is from the inside as i prefer the look and use to be descreet.
You can see quite clear throught the mesh while driving no obsrtuction really.
The set comes with the self taping screws and washers, meaning after position the mesh on the rear door you will need to drill a hole that is a little smaller than the selftaping screw with the purpose later when you introduce the screw in that hole it will be a tight fit.
Worked fine for me
As for the quarter 2 windows i am still figuring out how i will fix them internally without making a hole in the body ( i have no inner linning) my hardtop is totally stripped.
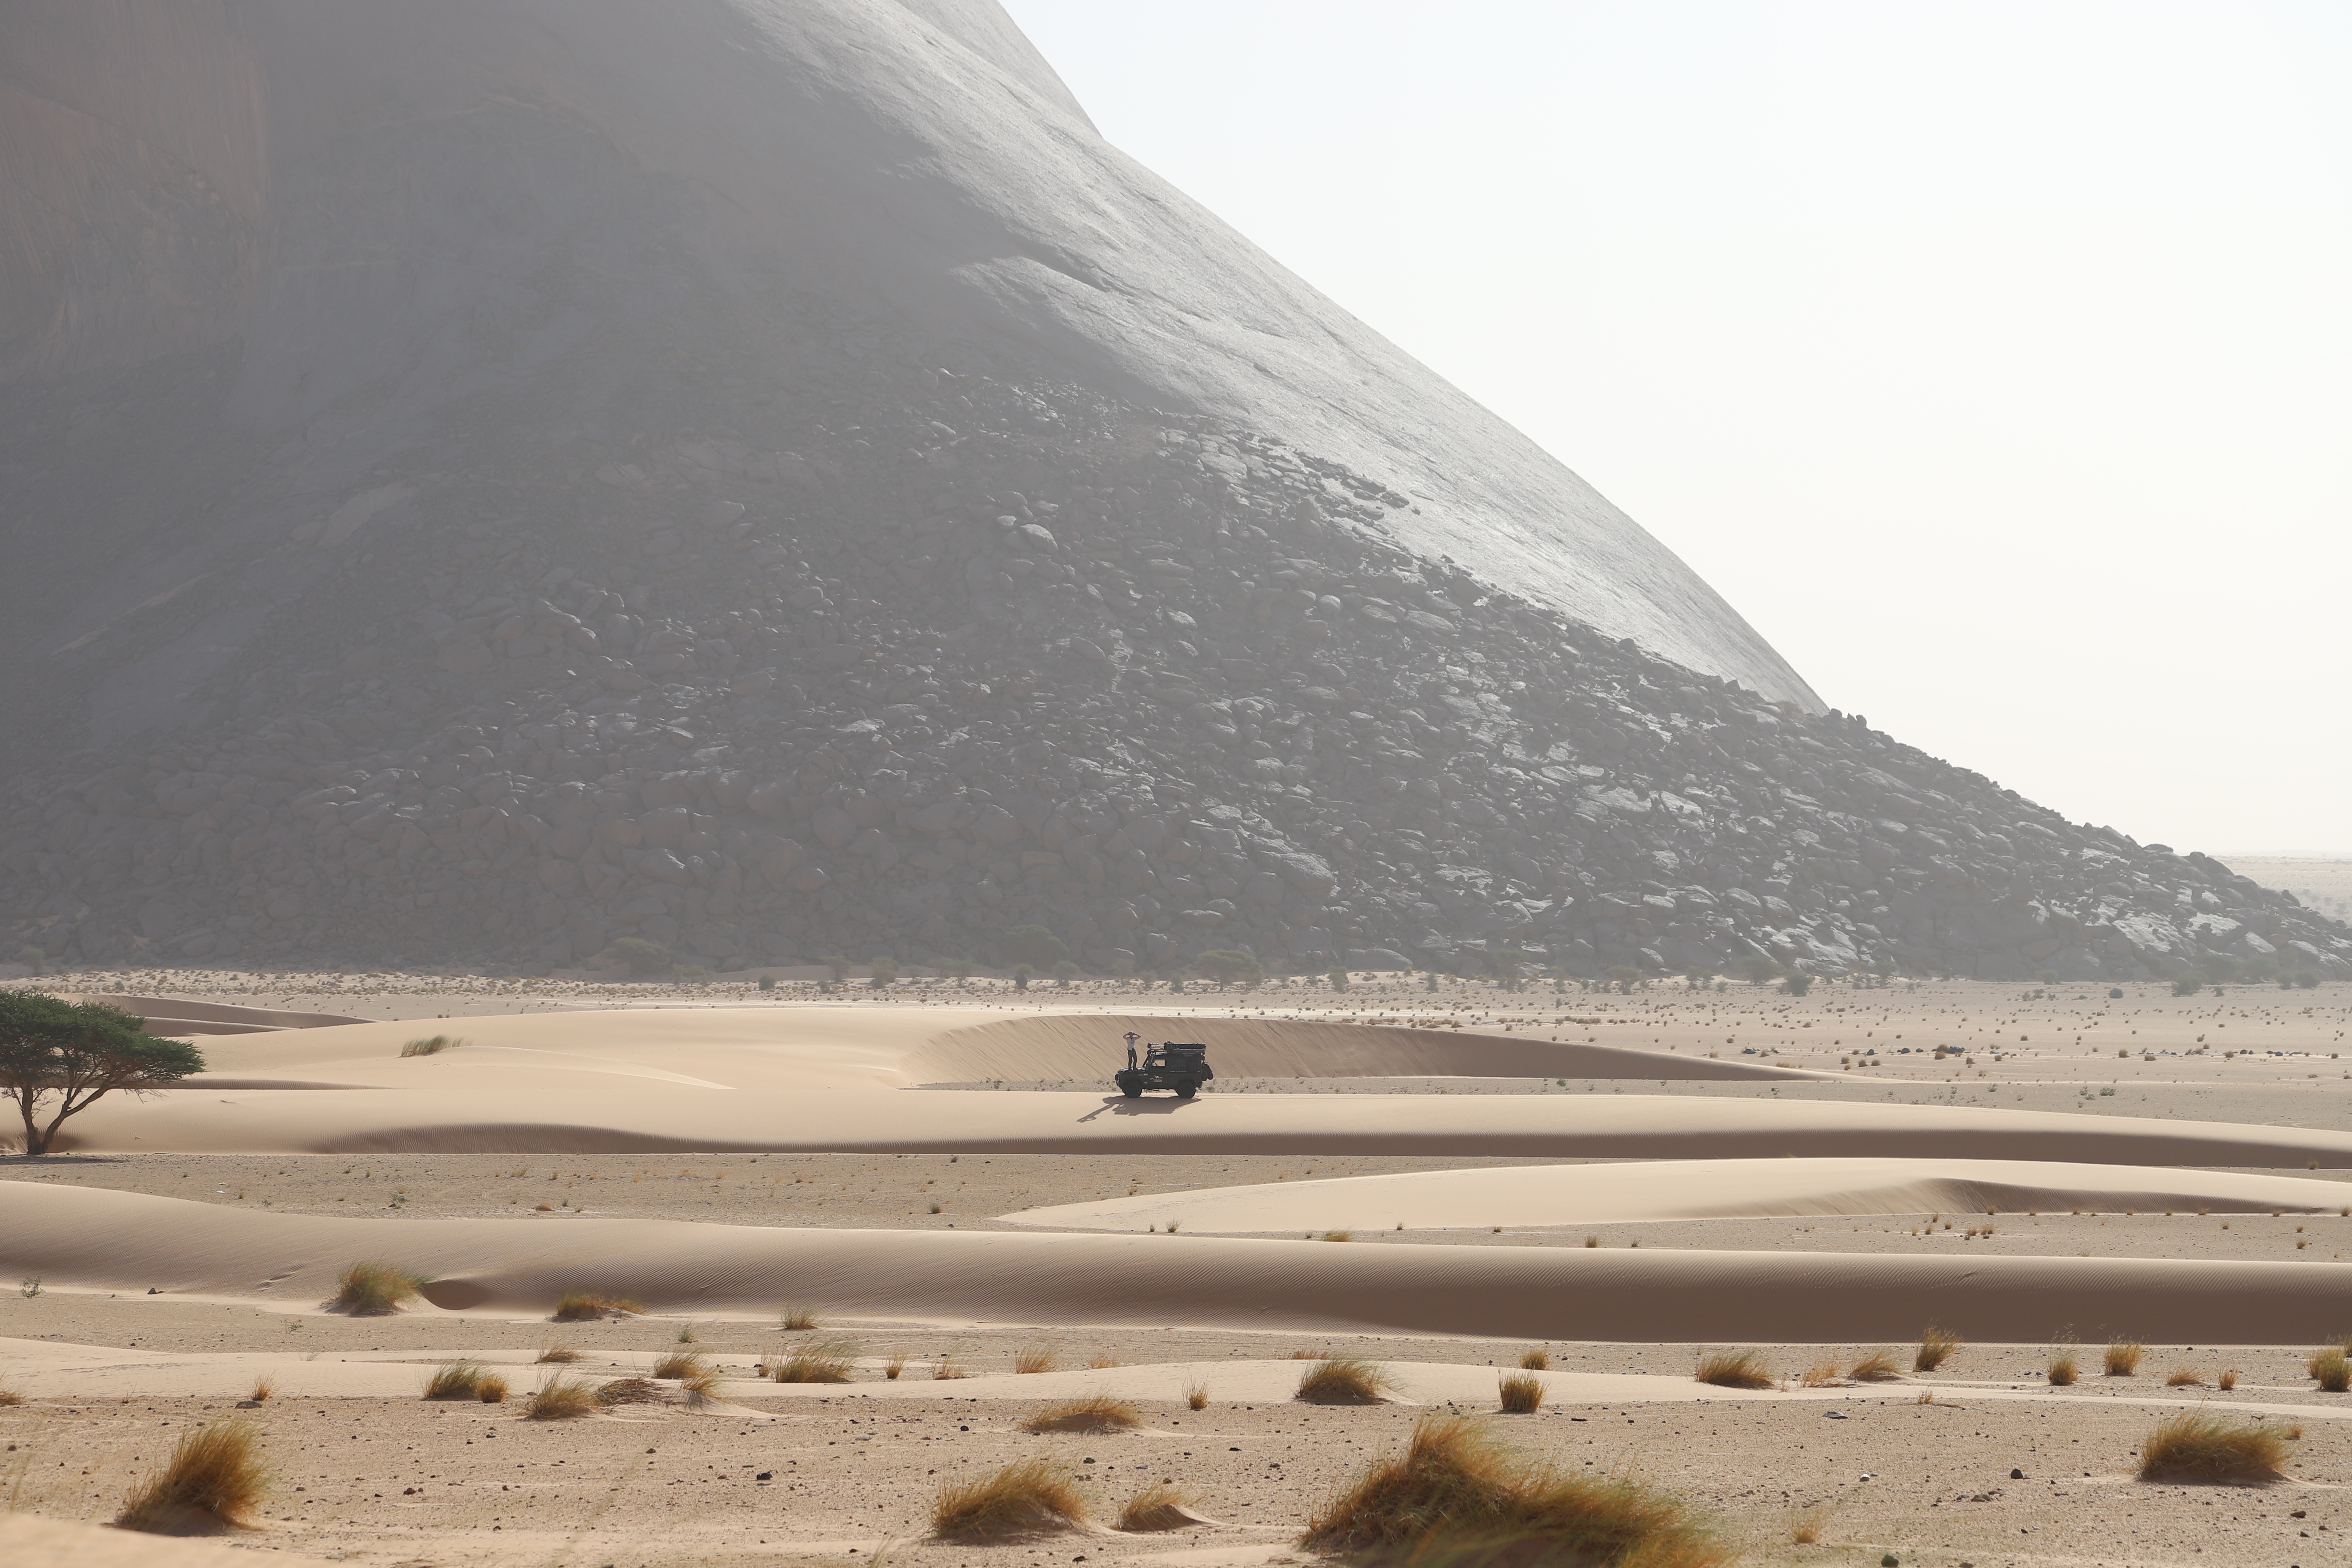
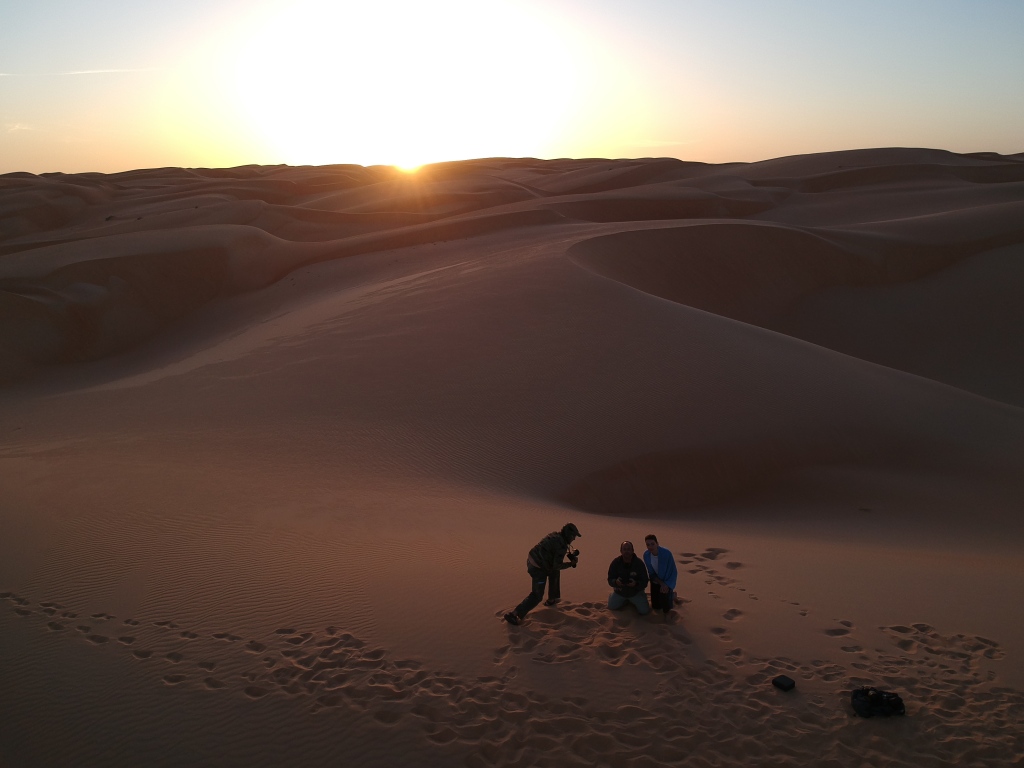
How Small We Are

Feedback